A herb spiral is one of those permaculture ideas that pops up frequently in permaculture circles. So you may already have encountered the term being bandied about. But what exactly is a herb spiral, and why is it such a good idea to include one in a garden?
In this article, I will let you know what herb spirals are all about, their benefits, and how you can create one in your own garden.
What is a Herb Spiral?
Herb spirals are a type of herb garden that synthesizes many core permaculture ideas, bringing them together to create an attractive and functional growing area that allows you to grow a wide range of herbs within easy reach, in a relatively small amount of space.
Herb spirals are raised beds which, rather than creating a level growing area, form a spiral rising up to a pinnacle at the centre.
This spiral, pyramid-like form enables gardeners to create a bed where herbs with different requirements can be grown together, and easily harvested, from a growing area that takes up a relatively small horizontal area in a garden.
The Benefits of a Herb Spiral
Herb spirals are highly regarded in permaculture circles because they:
- Are visually appealing with organic shape and form.
- Help us make the most of vertical as well as horizontal space.
- Maximise edge to promote biodiversity.
- Provide diverse growing conditions in limited space.
1. Organic Shape and Form
In permaculture, we often learn from and mimic the patterns and processes found around us in the natural world.
The spiral is a form often found in nature – in flowers and plant forms, shells, and in the movement of winds and water, for example.
This form is an important cultural and spiritual symbol within a number of cultures around the world, and it is often noted for its strength and the powerful energy contained within it – like a coiled spring.
Mathematically ordered, explained by the Fibonacci sequence, spirals contain an elegance and symmetry that underpins our sense of beauty. We respond aesthetically to the shape, whether or not we understand it from a mathematical standpoint.
Learning from and mimicking nature in our gardens allows us to at once pay homage to and gain benefits from the patterns and shapes that we see around us. And through using natural shapes in our gardens, like the spiral, we can feel a closer connection to the natural world and feel that we are adding to, rather than imposing on, that world.
2. Making the Most of Vertical as Well as Horizontal Space
Beyond aesthetics and a more feelings-based thought process, however, we can certainly derive a number of real-world, practical benefits by embracing a rising spiral form in our gardens and creating a herb spiral.
One key benefit is that by creating a bed for herbs that spirals into the air, we can take advantage of the vertical space available to us as well as the horizontal. This can help us ensure that we are making the most of all the space we have in our gardens, however large or small they may be.
3. Maximised Edge
The places where one habitat meets another – for example, the margins of a garden bed, or the fringes of a wildlife pond, are the most productive. The edge of a forest is one of the most diverse ecosystems found in nature. We can take advantage of that fact to get the most out of our gardens for ourselves and for the wildlife with whom we share it.
The shape and layout of your garden beds will often determine how much edge you have to play with. The more edge your garden beds have, the more of these productive edge areas, or ecotones, as they are more properly called, you will create.
For this reason, many permaculture gardens will have more, smaller beds or will commonly be curved, wavy, meandering designs to maximise the length of the ecotone. One popular shape is a spiral, which rises towards the centre. Since this pattern and form allows you to maximise edge in your garden.
A herb spiral maximises edge, thereby increasing biodiversity and potentially maximising the yield that you are able to obtain from a given area.
4. Different Growing Conditions in Limited Space
When we talk about growing herbs, we often talk about one herb garden. What we often forget is that a lot of the commonly grown herbs do not like the same sorts of conditions at all. Only herbs that like similar growing conditions can typically be grown in the same garden bed. Herb spirals change all that.
They can provide a climate for many different herbs with different requirements and preferences in a relatively small space. This maximises use of space while creating some unique little microclimates for various herbs.
Herbs that like drier and more free-draining conditions can be planted near the top, and those that like moister conditions towards the base and outer edge. Sun-lovers can be placed on the sunnier side (southern side in the northern hemisphere and northern side in the southern hemisphere). While those that prefer shade can go into the area with more shade behind the peak of the spiral.
Where to Place a Herb Spiral
Typically, a herb spiral is placed in a position in full sun, or light/dappled shade. Of course, the perfect placement will depend on where you live, and the herbs that you would like to grow. In general, a sunny, relatively sheltered placement will be ideal in temperate areas, while a little shade may sometimes be beneficial in warmer climes.
As well as thinking about sunlight, wind and other sectors, you should also think about permaculture zoning when deciding where to place a herb spiral.
A herb spiral with culinary herbs will be visited on a very regular basis, and so, therefore, is typically included within zone 1 of a design – close to the kitchen where it is within easy reach.
Integrating Herb Spirals into Garden Designs
It can also be helpful to streamline processes by placing a herb spiral close to primary vegetable gardens or other key food producing areas, so the ingredients for meals and the herbs to flavour them can all be harvested quickly and conveniently.
Another thing to consider is that the aromatic and flowering herbs in a herb spiral can also be beneficial placed near areas of annual food production because they will help bring in pollinators, and predatory insects to keep pest species down, and may also play a role in repelling, deterring or distracting certain pests.
One idea is to place a herb spiral at the heart of a no-dig mandala garden for food production, for example. There, the herb spiral can be an attractive visual focal point while also bringing benefits for the surrounding areas of planting.
A herb spiral might also be positioned adjacent to a seating area, where the aroma of the herbs and their flowers can be appreciated up close. Or next to an outdoors kitchen so you can grab herbs on the go for a barbecue or to pop onto a pizza cooked in an outdoors cob pizza oven…
You might also create a small pond at the lowest end of the herb spiral, to integrate some aquatic or marginal plants into the design.
Creating an Herb Spiral
Creating a herb spiral of your own at home is a relatively simple process, and one that need not necessarily involve a massive investment in money or time.
Marking Out Your Herb Spiral
The first step is to decide where you will place your herb spiral, prepare the area, and to mark out the pattern on the ground.
To create your herb spiral on bare soil or on an area of existing lawn, use a stake with a string attached to make a circle and mark this on the ground.
You can make a herb spiral as small as you wish, but a spiral around 1- 2m across is generally ideal since this allows you to create a growing area with sufficient height, and space to grow a range of herbs, while still ensuring that you can reach to the central top of the spiral from the sides of the structure.
Next, create a layer of untreated cardboard over the soil or grass in the area within the circle you have marked. This helps to prevent grass or weeds from growing up through the structure.
Once you have marked out the outer edge of the circle, shorten the string as you turn to create the spiral pattern and mark this on the cardboard. This means that you can see where to build the bed edging that will serve as the structure of your spiral.
The spiral should descend clockwise from the top, ending with the lowest part on the north (northern hemisphere) – the shadiest part of the structure.
When I have made herb spirals, I have generally had three-four tiers descending from the top. But you can decide for yourself how many turns the spiral should make from the top to the ground, depending on aesthetic decisions, bed edging decisions, and which herbs you wish to grow.
Building the Spiral Bed Edging
Once you have marked out where your herb spiral will be, you can start to build the bed edging that will form the spiral shape.
There are many different natural and reclaimed materials that you might use to create the structure for the ascending spiral form. For example, you might use:
- Wattle fence (using natural branches/ wood staves and pliable woody branches woven between them).
- Logs, or wide bamboo sections, inserted upright in the ground.
- Natural rocks as a dry stone wall or dressed stone.
- Rammed earth, cob or adobe.
- Earth bags.
- Reclaimed wood fence.
- Reclaimed bricks.
- Reclaimed concrete blocks/ breeze blocks.
- Reclaimed sheet metal/ metal pipes etc…
Remember, it is an eco-friendly choice to choose natural or reclaimed materials from your own home or garden, or from as close to home as possible. Look around you and you may well find that you have more resources than you might think at your disposal.
The first herb spiral I made was on my old allotment, before I had a garden of my own. There, the new allotment site had soil with numerous large natural stones- many of which I cleared as I prepared the growing areas. I used these to make a small herb spiral around 1m across and 50cm high.
I later made another small herb spiral with a sturdy wattle fence for the structure – using branches pruned from trees on my property – wider branch sections as uprights and pliable thinner branches woven between them. Of course, a wood structure will eventually rot down, so durability and how long you wish the structure to last is something to consider.
In future, I plan to make another larger spiral form bed with large dry-stacked stones from a wall we removed in our stone barn conversion.
If you cannot easily find building materials from your garden, or reclaimed materials, one other option is to omit the more lasting structure altogether, and create a circular hugelkultur mound with a spiral form created on the top.
This type of organic herb spiral will drop in height over time, but can still work well in some locations as a herb garden for the medium term. So this can be a good option if you cannot or do not wish to create a more long-lasting structure.
Of course, once you have decided which material or materials to use, you will also need to decide how high the centre of the herb spiral should be.
The best height will depend on where you live and the conditions to be found there. Generally speaking, herb spirals are typically between around 50cm and 1.2m in height.
In warmer climates, a taller structure providing more shade on the shady side will be best. While in cooler temperate climates like mine, a shallower structure is generally better for growing common culinary and medicinal herbs.
Creating Growing Area
Once you have created the spiral form bed edging, highest at the centre and lowest on the shady side, it is time to create the actual growing area within those bounds.
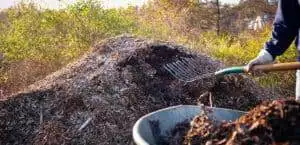
Layering organic materials will allow you to build up healthy soil within the structure, just as you can in other no dig raised beds.
Begin with a layer a woody material on top of the cardboard you have laid – such as wood chip and smaller twigs (perhaps larger decomposing wood if you opt for the hugelkultur method).
Next, layer on green (nitrogen-rich) and brown (carbon-rich) materials in layers of around 5cm depth, just as you would in a composting system.
As you near the top of the structure, use homemade compost, well-rotted manure, leaf mold, etc..with sharp sand added for plants near the top of the spiral that like free-draining conditions. Think about creating a growing medium suited to the specific herbs you would like to grow.
Fill the area between your edging until it is almost but not quite at the top of the built structure.
Though this will sink a little over time, the structure of the mound itself will remain and, with yearly application of a little compost created in your garden, this sort of herb spiral can grace your garden for many years to come.
You can now plant up your herb spiral with whichever herbs you choose to grow.
Planting Up a Herb Spiral
Many different herbs can be planted into your herb spiral. Of course, you should choose herbs with reference to the growing conditions where you live. You should also think about which herbs you will actually use.
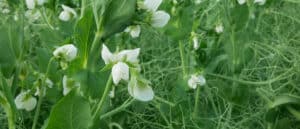
Most people will begin with common culinary and medicinal herbs such as: rosemary, lavender, thyme, oregano, marjoram, hyssop, catmint, sage, anise, tarragon, dill, coriander/ cilantro, echinacea, chamomile, basil, chives, chervil and parsley.
Remember that some of these are perennial, some are biennial, and some are annual and so will need to be sown each year.
If you plan on placing mint or other related herbs into your herb spiral, note that these can have a tendency to spread aggressively. So it is best to place these within a pot buried in the herb spiral to keep them contained.
Positioning Herbs
Deciding what goes where involves having a little understanding of the needs of various herbs. Here are a few hints to help you grow some common herbs:
- Rosemary, Thyme, Lavender, Marjoram and other Mediterranean Herbs: These like dry and fairly warm conditions. Set them at or near the top of the herb spiral on the south facing side (north in the southern hemisphere). Rosemary and lavender should be top centre of your herb spiral because of their deep roots.
- Sage, Oregano: These herbs are amongst those that also thrive in dry conditions but benefit from the shade of plants above them on the herb spiral, especially in warmer areas.
- Coriander, Dill, Basil: These plants like more moisture than the above and yet still benefit from being in full sun, (at least in cooler climates) so should be placed lower but on the sunnier side of the spiral.
- Parsley, Mint, Chives: These plants and others will enjoy slightly shadier and moister conditions on the cooler side of your herb spiral near the bottom.
With a little work, you can determine the growing needs of each of the different herbs you wish to grow, work out a full planting plan for your herb spiral, and place your plants.