
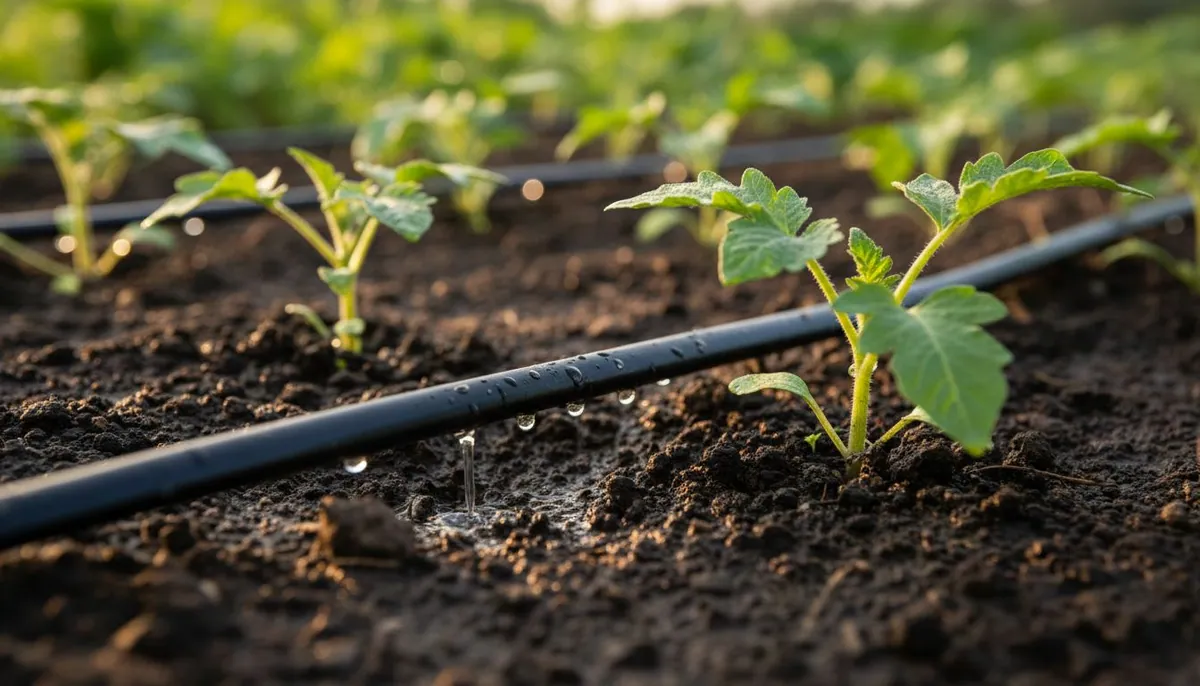
Drip irrigation is the single most effective upgrade most home gardeners can make to their watering routine. Instead of spraying water into the air where much of it evaporates or lands on paths and leaves, a drip system delivers water slowly and directly to the soil at the base of each plant. That precision is why drip irrigation saves water, reduces weeds, and produces healthier, more productive plants. Whether you tend a few raised beds, long vegetable rows, or a cluster of patio containers, a well-planned drip system becomes the quiet, efficient backbone of a water-wise garden. This guide walks through what drip irrigation is, the parts you need, and exactly how to plan, install, run, and maintain a system that will serve you for years.
What Is Drip Irrigation and Why It Works
A drip irrigation system is a network of tubing fitted with small outlets that release water at a low, steady rate measured in gallons per hour rather than gallons per minute. Water seeps into the root zone, spreads sideways and downward through the soil, and stays where roots can reach it. Because the water is applied at ground level and released slowly, almost none is lost to wind, evaporation, or runoff.
The benefits compound quickly:
- Water efficiency. Targeted delivery means far less waste than overhead sprinklers or hand watering, which is a major reason drip is a cornerstone of any water conservation strategy. It pairs naturally with broader approaches like xeriscaping and captured rainwater from a rain barrel harvesting setup.
- Healthier plants. Keeping foliage dry discourages the fungal diseases that thrive on wet leaves, and consistent soil moisture prevents the stress swings that lead to problems like blossom-end rot and cracked fruit.
- Fewer weeds. Only the soil around your plants gets watered, so the bare ground between rows stays dry and weed seeds are far less likely to germinate.
- Time savings. Once installed and connected to a timer, the system waters itself while you do other things.
Drip is versatile enough to work almost anywhere water pressure is available, and it forms one piece of a thoughtful garden water management plan. For a deeper look at how the different techniques fit together, the water topic hub collects related guides.
The Main Components of a Drip System
Drip systems look complicated in the store, but nearly every one is built from the same handful of parts assembled in the same order, starting at the faucet or hose bib.
Backflow preventer, filter, and pressure regulator
These three fittings screw onto the spigot first and protect both your water supply and your emitters. A backflow preventer stops garden water from being siphoned back into your household plumbing. A filter (typically 150 to 200 mesh) screens out the fine grit and sediment that would otherwise clog emitters. A pressure regulator steps typical household pressure down to the low pressure drip components are designed for, usually around 25 to 30 psi. Skipping the regulator is the most common cause of blown fittings and popped emitters.
Mainline and poly tubing
From the regulator, water travels through mainline poly tubing, the flexible half-inch black hose that forms the spine of the system. You route this tubing along the edge of beds or down pathways, then branch off it to reach individual plants. A hole punch and a range of push-in barbed connectors let you tap into the mainline wherever you need.
Emitters and drip line
The business end of the system is where water actually exits. You have two main options:
- Point-source emitters are individual drippers you punch into the poly tubing, each rated at a fixed flow such as 0.5, 1, or 2 gallons per hour. They are ideal for spaced-out plants like tomatoes, peppers, shrubs, and containers where you want to water specific spots. Link short lengths of quarter-inch micro-tubing from the mainline to place an emitter exactly at a plant's base.
- Drip line (also called dripline or inline emitter tubing) has emitters built into the wall at regular spacing, commonly every 6, 9, or 12 inches. Running dripline in parallel rows is the fastest way to water densely planted beds of greens, root crops, and closely spaced vegetables evenly.
Timer
A battery-powered timer that threads onto the faucet turns the system from a manual chore into a hands-off routine. Even a simple model lets you set start times and run durations so plants receive consistent moisture whether you are home or away.
How to Plan and Lay Out a System
A little planning prevents most frustration later. Start by sketching your garden and noting where the water source is, where each bed or container sits, and roughly how many plants need watering.
Raised beds
For raised beds, dripline is usually the best choice. Run two or three parallel lines of inline emitter tubing down the length of each bed, spaced about 12 inches apart, so the wetting patterns overlap and cover the entire root zone. Connect the ends to the mainline with elbow and tee fittings, and cap the far ends. This layout waters intensively planted beds far more evenly than a sprinkler ever could.
Rows and larger plants
For widely spaced plants in rows such as tomatoes or squash, run the mainline along the row and add one or two point-source emitters at each plant. Bigger plants and thirstier crops get a second emitter or a higher-flow one. This approach keeps the soil between plants dry and directs every drop to the crops that need it.
Containers
Containers dry out fast, so they benefit enormously from drip. Run quarter-inch micro-tubing from the mainline to each pot and finish it with an adjustable emitter or a short micro-spray stake. Because potting mix drains quickly, containers often need a separate, more frequent watering schedule than in-ground beds. For very small setups, low-tech options like olla irrigation can complement or substitute for drip.
Whatever the layout, keep each valve or zone within the flow capacity of your water source. If you try to feed too many emitters at once, pressure drops and the plants farthest from the faucet get shortchanged. Splitting a large garden into two or three zones on separate timer programs solves this cleanly.
How to Install Drip Irrigation Step by Step
Installation is genuinely a beginner-friendly project that requires no glue, no digging, and only a hole punch and scissors.
- Assemble the head. Screw the backflow preventer, filter, pressure regulator, and timer onto the faucet in that order, then attach a swivel adapter to accept the poly tubing.
- Lay the mainline. Unroll the half-inch poly tubing and route it along your beds and rows. Letting it warm in the sun for a few minutes makes it far easier to work with. Secure it with landscape staples every few feet so it stays put.
- Add branches and dripline. Use the hole punch to make openings in the mainline, then push in barbed connectors to attach quarter-inch tubing, individual emitters, or runs of dripline as your plan calls for.
- Place the emitters. Set point-source emitters at the base of each plant, positioning them a few inches from the stem so water spreads through the root zone rather than pooling against the crown.
- Flush and cap. Before sealing the ends, run water through the whole system for a minute to blow out any debris that entered during assembly, then close each line with an end cap or figure-eight closure.
- Test and adjust. Turn the system on and walk the entire layout, checking that every emitter drips and looking for leaks at connections. Add emitters to any dry spots and firm up loose fittings.
Covering the tubing and soil surface with a layer of mulch hides the lines, protects them from sun degradation, and slows evaporation even further, letting the drip water go further still.
Running the System on a Timer
The goal with drip scheduling is to water deeply but infrequently, which encourages roots to grow down where soil moisture is more stable. Because drip applies water slowly, run times are longer than you might expect, often 30 to 60 minutes or more per session, with the exact duration depending on your emitter flow rate, soil type, and weather.
A few practical guidelines:
- Water in the early morning. Cool, calm conditions minimize evaporation and give plants moisture before the heat of the day.
- Adjust with the seasons. Increase frequency during hot, dry spells and cut back in cool or rainy weather. Many timers let you set a seasonal percentage adjustment so you can dial the whole schedule up or down at once.
- Check the soil, not the calendar. Dig down a few inches after a cycle to confirm water is reaching the root zone. Sandy soil drains fast and needs shorter, more frequent runs; clay holds water and needs longer, less frequent ones.
Maintaining Your Drip System
Drip systems are low-maintenance, not no-maintenance. A little seasonal attention keeps them running efficiently for many years.
Flushing and cleaning
Open the end caps and flush the lines a couple of times a season to clear sediment that settles inside the tubing. Rinse the filter screen at the same time, or more often if your water carries a lot of grit.
Clearing clogged emitters
A plant that looks dry while its neighbors thrive often signals a clogged emitter. Mineral deposits and debris are the usual culprits. Try massaging or gently flushing the emitter first; if it stays blocked, punch a new one into the mainline nearby and cap or replace the old one. Keeping a good filter in place and flushing regularly prevents most clogs before they start.
Winterizing
In climates with hard freezes, water left in the tubing can expand and split fittings. Before the first frost, shut off the supply, remove the timer and store it indoors, and open the ends to drain the lines. Blowing them out with low-pressure air or simply leaving the ends open through winter both work. In frost-free regions you can leave the system in place year-round, just checking it periodically.
Drip vs Soaker Hose vs Hand Watering
Drip is not the only low-tech option, so it helps to know where it stands.
- Drip vs soaker hose. A soaker hose weeps water along its entire porous length, which is simple and inexpensive to set up. But soaker hoses deliver water unevenly, wetting the near end far more than the far end, degrade faster in sunlight, and offer no control over how much water each plant receives. Drip irrigation costs a bit more upfront and takes longer to assemble, yet it applies water far more uniformly, lets you place water exactly where you want it, and lasts much longer. For anything beyond a short, level bed, drip is the more reliable choice.
- Drip vs hand watering. Watering by hand gives you a daily look at your plants, which has real value, but it is time-consuming, easy to skip, and tends to be inconsistent, with the soil often wetted only at the surface. Drip on a timer delivers steady, deep moisture without depending on your schedule or memory.
For most home gardeners, the practical answer is a drip system for the bulk of the garden, hand watering reserved for seedlings and new transplants that need extra attention, and soaker hoses used only for the simplest situations.
Building a Water-Wise Garden Around Drip
Drip irrigation delivers the most value as part of a bigger water-wise picture. Combine it with moisture-holding practices such as mulching, soil building, and grouping plants by water need, and pair it with water capture and reuse strategies like rain gardens and greywater systems to stretch every gallon. Efficient watering also pays off with specific thirsty crops: reliable, even moisture is exactly what heavy feeders like tomatoes and peppers need to set fruit without stress. Set up well, your drip system quietly does the daily work of keeping the whole garden hydrated so you can focus on growing.
Sources
- United States Environmental Protection Agency (EPA), WaterSense program
- United States Department of Agriculture, Natural Resources Conservation Service (USDA NRCS)
- University of California Agriculture and Natural Resources (UC ANR) Cooperative Extension
- Colorado State University Extension
- Oregon State University Extension Service
About the Author
Lucas is a writer and researcher focused on sustainable agriculture and permaculture practices.