Microgreens are a specialty crop that has grown in popularity throughout the health food space and high-end dining establishments. At the same time, they are gaining a grassroots awareness at farmer’s markets, local shops, and in the public consciousness in general, and for good reason. A wide selection of vegetables, herbs, grasses, and grains can be grown as microgreens, offering incredible health benefits, tastes, and textures.
Microgreens are young sprouts, the immature version of a full-grown plant. Because they are harvested at an early stage of development, their vitamin, mineral, and enzyme content is potent, oftentimes containing more nutrients than their fully mature form. The young produce is also tender and easier to digest than full-size veggies and greens. Commonly enjoyed in salads, smoothies, sandwiches, tacos, and eggs, microgreens prove their infinite versatility.
Among these wonderful aspects, perhaps the best feature is the ease in which microgreens can be grown. They require little space, equipment or even growing experience. It is an excellent crop for a novice gardener to experiment with, anybody can grow them at home. All that is needed are some seed trays, a growing medium, water source, fan for ventilation and access to light.
Microgreens are fun and easy to grow right at home, providing produce independence and numerous health benefits with minimum effort and energy consumption in a short period of time, perfect for the sustainable gardener.
History & Origin of Microgreens
The precise history and idea of tiny vegetable greens grown densely in a seed flat is not exactly clear. But it is known that microgreens began sprouting up on the health food scene of Southern California and San Francisco around the mid-1990s (some claim as early as the mid-80s.) They have slowly made their way eastward, with the baby greens beginning to appear on restaurant menus and farmer’s markets across the country.
Interesting Facts
- Microgreens are not only supremely nutritious, they work wonderfully as a garnish to spruce up the presentation of a dish.
- Sprouts differ from microgreens in that they are not grown in a medium but by soaking and germinating in water. Sprouts are less mature than microgreens and consumed before true leaves form.
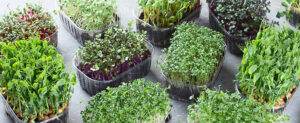
- There is an almost endless list of microgreen varieties; just about any common vegetable can be grown and consumed at an early, tender stage
- Popular herbs, like cilantro, dill and basil can be grown year round as a microgreen, adding their bright, intense flavor to winter dishes.
- Microgreens quickly lose their nutrients when cooked, consume raw to maximize their health benefits.
Medicinal Benefits
Microgreens are loaded with vitamins and minerals
Most varieties contain essential vitamins A, B complex, C, D, E and K. Commonly found essential minerals are Calcium, Copper, Iron, Magnesium, Manganese, Phosphorus, Potassium, Selenium and Zinc.
Nutrients in microgreens may reduce the risk of disease
The presence of polyphenols, a certain type of antioxidant, could help prevent heart disease, Alzheimer’s, diabetes and certain cancers. Broccoli microgreens contain a high concentration of sulforaphane, a powerful cancer-fighting antioxidant.
Microgreens are good for gut health
They are a great source of prebiotic fiber leading to the growth of beneficial microbes in the intestine.
Microgreens are more nutrient dense than mature vegetables
Fresh out of the seed, young vegetables haven’t expended their store of energy and nutrients.
Some varieties contain essential amino acids
Sunflower and radish microgreens contain indispensable amino acids that can’t be produced in the body and have to be acquired through diet.
Microgreens can provide a significant source of plant protein
Pea and sunflower shoots provide hearty levels of protein per serving.
Perennial, Annual, or Biennial
Microgreens are short-lived annuals, as they are harvested early and often. The growing lifespan of microgreens is anywhere from 7 to 30 days.
Various Methods of Planting Microgreens
Microgreens are always started from seed. There are a few different techniques to be aware of, based on variety, to give your young greens the best head start.
Soaking
Seeds with tough outer coatings tend to sprout and grow more easily when they’re soaked for a period of time. Water softens the shell and then is able to penetrate through to the interior, kickstarting the germination process. This helps the seeds sprout more quickly and uniformly. Common varieties that require soaking are peas, sunflowers, cilantro, nasturtium, beets and wheatgrass. All varieties have different required soaking times.
Stacking
Stacking trays on top of one another and/or adding weight helps some varieties to drive the roots into the medium, increasing their viability and overall yield. Most types of greens will benefit from stacking trays, namely: Beets, broccoli, cabbage, cilantro, dill, kale, lettuce, mustard, nasturtium, onions, peas, kohlrabi, radish and sunflowers.
Blackout
Certain types of seeds require a period of darkness before they can sprout. These seeds should be kept out of direct light and away from ambient light. A blacked out room or dark closet will ensure that the seeds germinate evenly. Be aware that there should be some ventilation provided to deter mold growth. If seeds don’t require weight on top, an overturned tray can be used as a lid to keep out the light. Seeds that require an initial blackout phase are: Arugula, basil, parsley, peas, sunflowers and wheatgrass.
How To Plant Microgreen Seeds
Once seeds are prepared according to their specific requirements (soaking, stacking, blacked out) they are ready for planting. Seeds are usually weighed in grams and planted in 10 inch by 20 inch (1020) nursery trays. A quick internet search will turn up how many grams of seed to plant per 1020 tray. There are plenty of varying opinions on the correct ratio of seed per tray, but the best way to see what works is through trial and error. By experimenting, the grower can determine what works best for their particular setup.
Due to the growing popularity of microgreen production, some companies now make microgreen specific trays. They are about half the height of a standard 1020 tray. These shallow trays make it easier to cut the greens at harvest time. They provide just the right amount of space for the roots to grow, reducing the amount of medium used while allowing the medium to dry out more quickly, discouraging mold growth.
Trays of all sizes can be utilized to grow microgreens and they certainly don’t have to be anything fancy. What is important though, is that two trays are used for each crop, one inside the other. The top tray should have plenty of drainage holes punched into it so excess water can run through the medium and collect into the bottom tray. The solid bottom tray will catch the water that isn’t absorbed and hold it to be soaked up as needed. Another important reason for using the two trays is that microgreens are typically bottom watered. The top tray is lifted up and water is poured directly into the bottom tray so it can be absorbed directly through the medium. This eliminates the need for any overhead watering, which gets the foliage wet and creates conditions conducive to mold growth.
Soil Requirements
Many different forms of media are used to grow microgreens, each with certain pros and cons.
Potting soil
Most potting soils work well for microgreens. Avoid soils containing lots of organic matter or conventional fertilizers. The organic matter won’t have the time to feed microgreens during their short lifespan and fertilizers could burn the delicate young plants. Soils range from cheap to expensive, can be messy and give good yields. They are a popular choice for many growers.
Coconut coir
A popular additive to soil mixes, the fibrous husk of coconuts can be used on its own as a growing medium. This natural product retains and drains moisture well because of its porosity and breathability. It is sold as a loose fiber in bags, or in brick or mat forms. It typically has a neutral pH with no fertilizer or additives. Coir is fairly cheap compared to soil mixes and is a byproduct of the coconut industry, making it completely renewable and compostable.
Burlap
The woven fabric from the jute plant can be used for planting seeds. It’s the cheapest and cleanest method, but it can be quite difficult to manage the temperature and moisture content of burlap. Not all varieties of microgreens will respond well to it and yields can be unpredictable and underwhelming.
Hemp mats
Mats made of oven hemp fiber make for a solid growing medium. They can be a little more expensive than coco coir, but are a cleaner option. Hemp mats do a great job of retaining water, but can be a bit flimsy when they’re soaked. Most varieties will perform well grown on hemp mats.
Other Tips
Experiment with different media, seed density and growing days. There are countless combinations of variables. Test different scenarios and document the conditions that provide the best results.
It’s especially important to grow to your own taste. Start seeds of greens that you love to eat. That way nothing goes to waste, you will be encouraged to continue growing and eating wholesome, homegrown microgreens.
Have a designated area to fill trays and sow seeds. This work space should be kept open and sanitary, making seed sowing quick, clean and efficient.
Consider using a rack for growing multiple trays. Lights and fans can be easily attached and space is maximized by growing vertically.
Don’t use a medium with large particles, like perlite. Whatever medium is used should be a fine grain, making it easy for roots to grow, take hold and absorb water.
The ideal temperature for microgreens is right around 70 degrees, humidity should be kept at 50% or less. A dehumidifier may be necessary to maintain proper moisture levels.
Stacked trays can become stagnant with moisture and lack of airflow. If this is the case, mist daily with a hydrogen peroxide solution to prevent mold from forming.
Withhold watering 12 hours before harvest. Greens that are full of moisture will lead to condensation in storage and a shorter shelf life.
If refrigerated greens are collecting too much moisture, add a paper towel to the container to absorb some of the excess condensation.
Light and Water Requirements
Microgreens will need at least 6-8 hours of light per day. It’s possible to grow them on a sunny windowsill or outdoors, but a controlled environment lends to more predictable results and better yields.
Fluorescent or LED grow lights easily provide the requisite light for microgreens without consuming too much energy. For convenience they can be daisy chained, fixed to a rack and set on an automatic timer. Some growers use a light cycle of 12 hours on and 12 off, while others implement an 18/6 schedule. This can be experimented with to determine what’s best for a particular set up.
The light color spectrum is not as important with microgreens as other plants, due to their short lifespan. They aren’t grown for flowers or fruit, so most color temperatures will work fine. However, a color temperature above 4500k would be ideal, especially for varieties that are grown for 20 days or longer.
Fertilization
Because of their short growing window, microgreens don’t necessarily require fertilization, especially because they are harvested and immediately consumed afterwards. They may not have enough time to flush out the fertilizer they were fed.
Seeds inherently contain an abundance of nutrients in order to supply energy throughout the seedling phase. This is why microgreens are packed with essential vitamins and minerals.
Some growers opt to feed their microgreens with a light organic fertilizer to increase yields. This can be helpful, especially when using a soilless medium, like coco coir or hemp mats, that don’t contain any nutrients.
Length of Growing Season
One of the highlights of microgreens is that they provide an incredibly quick turnaround from the time of planting until harvest. A couple of the fastest growing varieties are arugula and radish, both can be ready in as little as six days! The slower growing greens are typically herbs like basil, dill, parsley and cilantro, ready in 20-25 days; or flowers such as nasturtium, marigold and chrysanthemum, finishing in about 20 days.
Pest Management
Microgreens don’t typically attract any harmful pests because of their abbreviated life span. If kept too moist they may lure in a stray fruit fly or two, but they won’t damage the crop.
The more dire consequence of moist and humid conditions is the appearance of mold. Mold is a microgreens grower’s worst enemy. Densely planted seeds in a moist medium can easily lead to an invasion of mold. Ventilation and air circulation is paramount. Every tray of greens should have a fan directed toward it, constantly moving the air.
If mold does break out, a quick overhead watering can actually destroy the colony. After that make sure the tray receives plenty of air flow and light. Sometimes the moldy area can be removed, but if it spreads out of control it’s much safer to discard the tray.
Another way to prevent mold is by keeping a clean work and growing space and maintaining a regular cleaning schedule for the trays. Hydrogen peroxide is a cheap, non toxic and organic substance that has powerful antifungal properties, perfect for disinfecting trays, greens, seeds and the workplace. The perfect solution for preventing mold is 1 tablespoon of 3% food grade hydrogen peroxide in 500 ml of water. Apply the solution with a spray bottle to clean trays and destroy developing mold.
Harvesting Tips & Techniques
Most varieties are ready for harvest when they reach 1-3 inches in height. Another sign to look for is the appearance of the first true leaves. Once true leaves begin to emerge, the greens are ready to be cut. Waiting too long can lead to overgrown, tough and woody greens.
When harvesting, always start with a clean workspace. Wearing gloves is a good idea, especially if the greens are going to be marketed or given to family/friends/neighbors. Kitchen scissors, a sharp knife, or specially designed harvesting knife is recommended for the job. Grab a small clump and cut it level with the top of the tray. Go slowly and take care not to pull up any roots or medium.
Harvest fresh as needed or into sealable containers.
Used growing media and root systems can be repurposed in a number of ways. The leftovers can simply be composted and will break down easily, adding great organic material to the compost pile.
The thick matted nature of media and tangled roots make an effective mulch that can be used advantageously in the garden. The decomposing roots and protected soil will attract worms and microbes to the surface of the garden.
Spent media can also be fed to virtually any livestock. Throw it out to the animals and let them sniff, scratch, forage and snack throughout the leftover roots and greens.
Some varieties of microgreens will even regrow if given the chance. Harvested trays of cabbage, nasturtium, onions, peas, radish and wheatgrass can potentially provide full grown crops if planted outdoors in the garden.
Processing & Cooking
Microgreens are usually consumed fresh and raw, this is when they are at their nutritional peak. Some hardier varieties like pea and sunflower shoots hold up to some light cooking in eggs or stir-fries. But just because they aren’t perfectly suited for cooking doesn’t mean there is a lack of creative ways to enjoy microgreens’ nourishing flavors.
- Microgreens are excellent as a stand alone veggie side dish, accompanying pasta or a protein.
- Top your eggs, sandwich, taco or avocado toast with a heaping handful of your favorite microgreen.
- An assortment of microgreens can be tossed together in a salad, contrasting the unique flavors and textures.
- Concoct the ultimate health shot by juicing pea shoots, broccoli, kale or wheatgrass.
- Kale, spinach, kohlrabi, broccoli, beets, pea and sunflower shoots blend perfectly into fruit smoothies, an excellent way to pack more nutrition and fiber into your breakfast.
- Spicy microgreens like radish, arugula and basil can be effortlessly converted into a delicious pesto by blending with olive oil and garlic.
Preserving & Storing
When stored properly in the refrigerator, microgreens will remain fresh for over a week. Dehydrating is also an option when there is a surplus of microgreens. To prevent them from spoiling, they can be dried and ground into a powder that can be later added to soups, casseroles, drinks or baked goods.