Finally, it’s that time of year again!
For passionate gardeners, it’s a moment full of potential and hope.
Starting your seeds while it’s still cold outside will give you a great head start on the growing season, especially with warm-weather crops like peppers and tomatoes.
When it comes down to it, seed starting is a fun and exciting process. I get a certain sense of joy watching vibrant green life burst from its seed casing, unfolding into delicate leaves that reach for the light, hungry for life and growth.
No doubt, there’s a feeling of pride and accomplishment that comes with starting a seed and bringing it all the way to harvest. You will reap not only these benefits, so wait, because there’s more!
The selection of unique seed varieties is almost unlimited. You’ll be able to tap into rich flavors, colors and textures instead of the bland, boring same-old fruit and vegetable varietiesfound at the store.
You know how much love and effort goes into your prize plants. You can raise them as you choose and time them according to your planting dates.
And of course, it will be cheaper than having to load up on starts from the nursery.
It’s not a difficult process, but a few tidbits of knowledge and some useful insights and advice can go a long way when it comes to getting your seedlings off to the strongest start possible.
Medium – The Perfect Seed Starting Mix
An appropriate place to start is with the medium your seedlings will be growing in. Seed starting mixes are available at any grow store, garden center or home improvement outfit. Generally they’re good quality and worth the investment.
Some great quality ingredients to look for are:
- sphagnum peat moss
- vermiculite
- perlite
- coco coir
- mycorrhizae
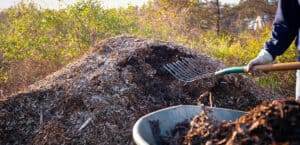
- compost
- humus
- earthworm castings
You can even make your own custom mix, as all of these ingredients are readily available. A breakdown of the perfect ratio is:
- ⅓ moisture retention (peat moss, coco coir)
- ⅓ drainage (vermiculite, perlite, sand)
- ⅓ organic matter (compost, humus, earthworm castings)
Other organic ingredients to consider dashing into your mix are azomite and diatomaceous earth to add a bit of micronutrients and pest-fighting capacity.
All of these substances are pretty neutral as far as nutrients go, which is a good thing for young seedlings. Anything too hot could shock, stunt or kill the tender new plants. There will be time as the seedling matures to fertilize lightly and transplant into more nutrient-rich soil.
Don’t use soil from your garden to start seeds indoors. It’s important that seed starting mix is sterile so that no disease or pests are transferred to the seedlings.
Mixes with an acidic pH of around 5.5 – 6.5 will give the best results.
Containers for Seed Starting
Now that we’ve identified an optimum medium to get your seeds started in, let’s discuss the container that will be holding that light, fluffy seed mix.
Don’t underestimate the significance of the shape, size and depth of your container. These dimensions will influence healthy growing traits of your young plant.
Sowing into standard seed starting flats is practical and the best space-saving choice. Follow the directions on the seed package as to how far they should be spaced.
Once seedlings sprout and develop their first set of true leaves they can be up-potted to a bigger container. Don’t let seedlings grow too big in this initial container or it will be difficult to scoop them out without disturbing the roots.
Plug trays are another convenient option. There are individual pockets for each seed to be planted. These trays make transplanting a snap, avoiding the threat of root disruption. Pay attention to the rate of root growth, usually filling the plug quickly, at which point they will need to be transplanted.
Small pots can also be used to start seeds, albeit with a bit more difficulty; the smaller the better. I’ve started tomato seeds in 3” pots with success, but wouldn’t generally recommend it. It’s too difficult to moderate the moisture and temperature of the starting medium for the tiny seedling and its developing root system.
Still, other alternatives are available.
Biodegradable peat pots and coco pots are pretty handy. Make sure you time it right so they’re able to be planted in the garden by the time the roots fill the containers. Egg cartons and cardboard paper tubes are easily fashioned into seed-starting cells that decompose easily after being planted into the earth.
Take the time to start seeds in flats, plugs or small containers and transplant up to a bigger pots once they’re established.
All containers should have proper drainage holes that allow excess water to drain out. Make sure there’s a tray underneath to catch the runoff.
Starting Indoors vs. Direct Sowing
Especially in colder climates, it’s important to know the types of garden plants that should be started indoors. Some will tolerate it and yet others that should only be directly sown outdoors.
Based on your climate, preference and personal experience, do what gets you the best results. This list is just a guideline.
Start Indoors
Tender vegetables and crops with slow root development do best started in the warmth and comfort of an indoor environment.
- Basil
- Broccoli
- Brussels Sprouts
- Cabbage
- Cauliflower
- Celery
- Eggplant
- Lettuce
- Peppers
- Tomatoes
Start Indoors for a Headstart
Some tender crops will benefit from an indoor headstart but prefer to be directly sown outside. They grow quickly oftentimes catching up to those that were planted ahead of time inside.
- Cucumbers
- Cantaloupe/Muskmelon
- Pumpkins
- Squash
- Watermelon
These crops tend to grow fast and furious once they sprout. If starting indoors, be sure you have the space to keep them until after the last frost.
Directly Sow Seeds Outdoors
This category consists of mostly crops that don’t like their taproot disturbed once established. Either that or they grow so quickly that there’s no need to start indoors.
- Arugula
- Beets
- Carrots
- Cilantro
- Corn
- Dill
- Green Beans
- Okra
- Parsley
- Parsnip
- Peas
- Potatoes
- Radishes
- Spinach
- Turnips
There are a handful of crops that are commonly started both indoors and directly seeded. Cold hardy plants, brassicas like kale and kohlrabi, swiss chard, lettuce and onions are all flexible when it comes to whereabouts of sprouting.
Stratification
Depending on nature, size and genetics, you may need to pre-treat your seeds before planting.
Two particular processes that may seem counterintuitive and a bit tricky at first are stratification and scarification. But fret not, we’ll explain in full detail how to mimic nature and utilize these common practices to ensure the best results when starting your spring seeds.
Stratification is a process used to replicate the cold winter season that seeds typically endure under natural circumstances. This pre-treatment of cold exposure triggers the germination process by waking the seed up out of its dormant state.
Plants that evolved in cold climates have the need to first experience a spell of cold weather. It’s a survival technique that’s built into their genetic code, preventing self-sown seeds from sprouting late in the summer or fall. At that point, they’d prematurely be killed by a frost without having time to mature and produce seeds of their own.
Seeds that are directly sown in the fall or early spring don’t need to be stratified, as they will undergo the process due to the natural cycle of the seasons.
Read on to learn about the two different methods of stratification.
Dry Stratification
Simply put your seed packets into the refrigerator, sometimes freezer, for a few weeks up to a couple months. Seeds that are accustomed to dry soil and winters will benefit from this method. Desert plants and native prairie wildflowers and grasses are species that typically require dry stratification.
Look into the background of your plant’s native climate to figure out how long and at what temperature to cold stratify the seeds.
Moist Stratification
The process of moist stratification requires a bit more effort and planning. As the name indicates, your seeds must be in contact with a moist medium and kept in cold storage for a given amount of time. It’s good practice to research the specific variety of plant you’ll be growing.
Some general plant groups that benefit from moist stratification are:
- Deciduous and evergreen perennials (apple, blueberry, peach, oaks, walnut, maple),
- Self-seeding, cold-hardy herbaceous perennials (coneflowers, columbines, lupines, catmint, anise hyssop, oregano)
- Cool season biennials (carrots, parsnips, celery, parsley, dill, caraway)
There are a few medium options to choose from when starting the moist stratification process. Peat moss, sand, sterile soil and starting mixes will all work well. Wet your medium to the point where it is malleable but not soggy. Just the right amount of moisture decreases the risk of mold throughout the process.
Paper towels or cotton balls can also be used as your medium. Use a spray bottle to dampen or soak and wring out the paper or cotton.
Seeds can also be simply kept in water, as long as the refrigerator doesn’t get too cold. It should stay above 40 degrees. Use a jar or sealed plastic bag to contain the water and seeds. Under these conditions, seeds may germinate, at which time they should immediately be planted into ideal growing conditions.
Follow these steps for moist stratification in the refrigerator:
- Select a container like a ziploc bag, tupperware container, or glass jar. Add the seeds, cover with your medium, seal the container and put it in the fridge.
- Make sure the medium stays moist throughout the process. Use a spray bottle to lightly mist when needed.
- Check every day for any signs of mold. Mold can be prevented by opening containers daily to introduce fresh air to the medium and seeds.
- When seeds have been stratified for the required time, remove them from the refrigerator and plant them into the fresh flats or pots.
Scarification
An extremely effective way of improving the germination rate of seeds with hard exteriors is through the process of scarification. The idea is to soften the seed coating or to rupture it by physical means.
Another defense mechanism protecting against poorly timed sprouting, the dense coat prevents seeds from germinating in less-than-ideal conditions.
In the seed’s natural setting a long wet spring with multiple freezes and thaws is required for the sprout to emerge from its hard outer casing. This process gradually scarifies the seed and breaks down the tough exterior, allowing water and air to pass through, ultimately leading to germination.
Some seeds that may benefit from scarification are:
- Trees (maples, black walnuts, hickories and crabapples)
- Perennials (columbine, butterfly weed, lupine, moonflowers)
- Some annual flowers (nasturtiums, milkweed, morning glory)
- Native flowers
- Beans
- Squash
- Strawberries
- Spinach
Let’s explore the various ways seeds can be scarified to prepare for planting.
Sandpaper
Use a small piece of sandpaper and gently rub seeds to wear away the stubborn outer coating. Stop rubbing once the casing has been broken down and a lighter color begins to become visible. It’s not necessary to scrape the entire seed with sandpaper, just focus on one small area. Seeds should be planted immediately after scarification.
Soaking in Water
Fill a bowl or jar with warm water. Drop the seeds into the water and let them soak for at least 12 hours. Give the seeds a stir every once in a while and keep an eye out for any swelling. If any seeds split or sprout, remove them and plant right away.
Nail File or Clippers
Much like the sandpaper method, use a nail file to wear down the hard outer coating. Stop filing when the lighter part of the seed shows through. Alternatively, nail clippers can be used to nick off a small portion of the seed casing. Use tweezers to help with smaller seeds.
Refrigerator
Place seeds on a damp paper towel and fold them within it. Apply some pressure so that the seeds are in contact with both sides. Put the paper towel into a sealed plastic bag. Place the bags in the fridge for about three months. Remove them and plant immediately, discarding any rotten seeds.
Hot Water
Bring a pot of water to just below boiling. Take the water off the heat and drop in the seeds. Let the seeds soak until the water cools. Remove them and plant into prepared containers.
Based on certain qualities of the seed you’re planting, this extra step may help to achieve the best germination rates. By understanding when and how to simulate the natural cycle of the seasons and manually alter the physical form of the seed, gardeners can ensure greater success for the upcoming season.
How and When to Plant
The logistics of seed sowing are quite straightforward. But consider these few steps to nail the process.
- Take your container and fill it to the top with seed starting mix, then tamp it down until firm. Top off containers with a bit more mix and smooth the surface.
- For the best shot at a good germination rate, always select the biggest, healthiest looking seeds in the pack. Make a small hole or impression to the appropriate depth of the seed you’re planting. Smaller seeds can usually be pressed into the surface and covered with a dusting of starter mix. If unsure of the planting depth, a general rule of thumb is the larger the seed, the deeper it should be planted. Most seeds you’ll be planting indoors are on the smaller side. Tomatoes and peppers are perfect at ¼ inch deep while brassicas and lettuce can be planted at ⅛ inch. Big seeds like squash or melons are planted at about an inch.
- After seeds are planted, cover them up, gently tamp them down and mist heavily or use a watering can that breaks the water well to soak the seed starting mix.
- For goodness sake, after planting, label all your seedlings! Countless times I’ve lost track of particular varieties. After so much planting it’s near impossible to commit to memory what’s what. Take notes of specific varieties and the date planted.
Of course, as gardeners, we’re jacked up and giddy to get growing by the time late winter rolls around.
But concerning seed starting, timing is of the essence. And starting seeds too soon is a common problem for anxious growers. You don’t want seedlings outgrowing their containers or running out of space before it’s warm enough to plant outside.
Generally, seeds are started indoors 6-8 weeks before the projected last frost date in your area. This date can easily be found online, based on your region and hardiness zone. Consult the seed pack for the number of weeks seeds need to get established before transplanting outdoors.
Make sure you’re keeping track of the days and types of seeds you want to plant because sowing late is a problem too.
You want your long-season crops to have enough of a growing season to reach maturity and make all the work worth your while. Seed packets typically have the days until harvest from the time of transplant, so that’s another date to take note of and look forward to.
Water Consistency
Watering seeds and seedlings can be a tricky task. Though once you get the hang of it and understand the needs of the plant, it’s simple.
Seeds require plenty of moisture to sprout, establish roots and thrive. With a good seed starting mix, it should be difficult to overwater. That said, your medium shouldn’t be completely soaked at all times.
Water just until it starts coming out of the drainage holes. As seedlings get bigger they’ll use up water at a quicker rate. Water well and keep an eye on the consistency of the medium. Let it dry out slightly before another thorough watering.
Sitting in pools of excess water will negatively affect root growth and invite fungal diseases and damping off. Proper air ventilation is imperative for moderating the humidity and deterring disease.
Importance of Air Circulation
Even before seeds sprout, the indoor growing space should have good airflow.
One of the most important factors of good plant health is fresh, free-flowing air. This prevents mold spores from dropping onto soil surfaces, especially essential in moist settings, like seed starting trays.
Use a fan that oscillates to move the air in all directions. If the fan is pointed directly at the starter trays and seedlings the medium will dry out quickly and unevenly.
Young plants need to be tested and grow resilient to the elements they will be facing in nature. The resistance provided by the blowing wind triggers hormones in the plant that tell it to develop a strong root system to anchor it in place.
Running your hands over the seedlings every once in a while will help them develop strong stalks and roots as well. And as crazy as it sounds, the old wive’s tale of talking to your plants could help them grow. I believe they appreciate the care and company, as well as benefit from the exhaled CO2.
Young plants need attention and care, but also need to face adversity, lest they become weak and fragile. For this reason, young plants shouldn’t be staked unless they become excessively leggy, which can be prevented with proper lighting.
Germination Temps and Heating Mats
Every seedling has an ideal soil temperature. At the critical stages of germination and seedling, a heating mat can make a world of difference. More than anything, a seed requires moisture and warmth to sprout and thrive. A warm, moist and light seed starting mix will encourage rapid root development.
The preferred soil temperature of germinating seeds typically falls between 70-85 degrees. Warm-weather crops, like tomatoes, peppers and eggplant should be kept at the higher end of that range, while cool-weather crops like brassicas, lettuce and most other greens prefer closer to 70 degrees.
Light Exposure
Access to sufficient light is crucial for young seedlings. At this stage of their life they should be developing a sturdy shape and structure. If the light is too weak or distant, seedlings can stretch out and get leggy. Once this happens, it’s a difficult condition to correct.
This is why growing seedlings on a windowsill is not a good idea.
The quality of light is much greater in a greenhouse, cold frame or under grow lights. With access to bright light all day long, seedlings develop stout stalks with shorter distance between branching nodes. A solid start leads to stronger, bushier and more productive plants.
Full-spectrum fluorescent or LED grow lights can be found at garden centers or home improvement stores relatively cheap. They will be the best solution for supplying adequate light for your indoor seedlings.
Keep a distance of 4-6 inches between the light and the top of the seedlings. It’s enough distance that they won’t get burnt and it will provide enough light to prevent stretching. As seedlings get taller, adjust the height of the light accordingly.
Seedlings are hungry for light and eager to grow at this stage. Give them up to 16 hours of light per day. This way they’ll grow faster and bulk up in preparation for the stressful process of hardening off and transplanting. To keep the schedule consistent, automate it by putting the lights on a timer.
Fertilizing Seedlings
Freshly sprouted seedlings are fed by the nutrients contained within the seed for s short period of time.
The first set of leaves produced is the cotyledon, which are part of the seed embryo. These help sustain the young plant until the first true leaves appear and begin photosynthesizing, which is how the plant produces its energy with light, water and carbon dioxide. The emergence of true leaves is a good indication that you can begin to lightly feed your seedlings.
At the seedling stage, plants require a fertilizer with nitrogen and phosphorus. These elements help plants grow dense vegetation and establish strong root systems.
Liquid or water soluble fertilizers make the feeding process easy. Opt for a mild fertilizer like fish emulsion, liquid seaweed, worm castings or a seed starting specific feed like Bio-tone Starter.
Dilute the fertilizer to half strength of the directed use, or follow the given instructions for seedlings. Starting with a weak dose and working your way up is a good way to prevent overfeeding and burning young plants. Feed seedlings weekly, weakly.
Microbial Seed Inoculants
Microbial inoculants are organic bacteria that will help seeds absorb nutrients and repel diseases. Once the seed sprouts, the bacteria form a symbiotic relationship with the roots, which develops a healthy soil microbiome. Inoculants typically come in a powder form and are applied to the seed before planting. Be sure to follow the specific instructions.
Hardening Off
Young plants need to be hardened off before they are transplanted into their permanent garden homes for the season.
As the term suggests, hardening off is a gradual process of toughening up your pampered indoor plants to be able to withstand the harsh outdoor elements of spring. They’re not yet robust enough to handle the full strength of the sun, cold evenings and powerful gusts of wind.
7-10 days before transplanting outdoors, put the young plants in a location that gets dappled sunlight and is protected from wind. Leave them out for an hour the first day, then increase the time outdoors by an hour every day until they’re outside for the entire day.
Make sure seedlings are always well watered throughout the hardening off process; they are easily dried out by breezy, dry air. Plan on transplanting on a cloudy day, early in the morning or evening to minimize the strength of full sunshine.
Cool weather crops are less fussy and will acclimate to the outdoors more quickly than tender plants. Lettuce, brassicas and onions can be transplanted when the soil reaches about 50 degrees. They will tolerate light frosts.
Soil temperature should be consistently warm before planting tender crops. Peppers will NOT be happy about being transplanted out into chilly spring weather, their roots plunged into frigid soil. Monitor the soil temperature and observe forecasted overnight lows. Because even after the threat of frost has passed, it may not be warm enough for some plants.
A Final Word
Starting your own seeds is a very rewarding experience for gardeners.
With enough patience and practice, starting seeds will become second nature. You’ll be able to plant seeds confidently and capably maintain seedlings, knowing just what they need based on how they look and their stage of growth.
Always start with good quality seeds from companies that operate locally or in similar climates and conditions to your own.
Along with a desire and excitement to grow your own crops from seed, use these tips to develop your own tried and true methods of seed starting.
There’s no doubt, it will be worth it.