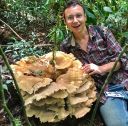

Mushrooms In the Food Forest
Incorporating mushrooms into a permaculture design is something many people dream about. It’s this idea of adding an additional and intertwined functional-layer that leaves people fascinated. It’s like a missing niche that has yet to be exploited within the nooks, crannies, and edges of an already productive system. Afterall, decomposition is constantly happening in all parts of a living system, why not utilize functional decomposers like mushrooms?
While it’s easy to fantasize about a fungal fairy-land garden flushing with mushrooms, it’s true that this is a bit easier said than done. Meanwhile, I’d like to debunk the rhetoric that mushrooms can only be grown in controlled sterile conditions. Yes, hap-hazard inoculations with spore slurries, old mushroom blocks, or mushroom stem-butts often fail, but there are ways to successfully incorporate mushrooms into a garden or farm.
They not only provide an additional yield to your system, but they provide many health benefits for your plants and soil. Beyond just mushrooms, incorporating a fungal perspective can really provide good insights into your management style and practices. So forget the lab coats, and let’s get fungal in the garden!
Mushrooms, Fungi, Soil, And Plant Health
While we will mostly be discussing practical methods for incorporating edible mushrooms into your design, I think it’s important to discuss the role of fungi in your soils and plant health. To begin, I am distinguishing between fungi and mushrooms, because not all fungi produce mushrooms. Many are microscopic, hidden from plain sight, but playing tremendous ecological roles.
Mycorrhizal fungi, for example, are associated with 95% of plant species. They support plants by improving their access to nutrients and water, but also help strengthen their defenses against pests and disease. Only about 5% of plants associate with mushroom producing fungi (mostly known as ectomycorrhizal fungi), while the vast majority of plants, including all our cultivated species, associate with non-mushroom forming fungi (namely arbuscular mycorrhizal fungi).
While you can buy mycorrhizal inoculum for your gardens, a vast majority of the time this is not necessary. Healthy and living soil is already jam-packed with mycorrhizal fungi. Inoculum might be useful in cases where you are working with highly deteriorated lands or with otherwise sterile growing mediums.
In these cases, studies have shown that the roots and surrounding soil of healthy plants can function as suitable inoculum. Grasses are particularly good hosts for these types of fungi, although you may want to consider using inoculum from plants in the same family as your cultivated plant. Consider not to introduce pests or disease when doing this (for example, it may be a bad idea with members of solanaceae who have adaptable and opportunistic pests).
Aside from mycorrhizal fungi, other soil fungi are also known to be beneficial. They help release nutrients from undecomposed organic matter, making it available to plants and other members of the soil food web. They also help mediate interactions that reduce the prevalence of pests in cultivated plants.
An example of one of these fungi is trichoderma. While it is most renowned as a plague for mushroom growers, it actually acts as a beneficial fungi for plants. That’s because trichoderma is a fungal antagonist, whose niche competes with and predates other fungi. Most importantly for plants, it is known to attack countless fungal pathogens that negatively affect plants. This is why plants will actually absorb trichoderma through their roots and utilize them as an endophyte. Endophytes are organisms that live within the stems, leaves, and tissues of plants!
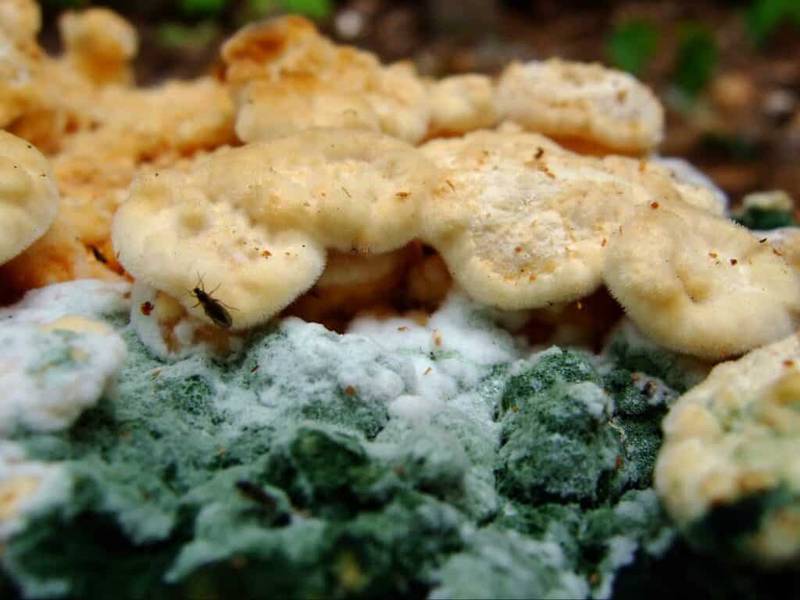
Trichoderma inoculum can actually be purchased and applied as a foliar spray or placed directly in irrigation systems. Trichoderma even gets applied directly onto fruit postharvest to improve shelf life and reduce rot. Thankfully, there are many ways to incorporate trichoderma directly into your soil food web. One of the best ways to do this is via the application of mulch. Mulch such as straw and wood chips are a carbon-rich material that acts as a perfect food for fungi. Decomposer fungi will naturally thrive in this substrate, whether inoculated or not, and then attract the antagonist fungi like trichoderma.
Adding Mushroom Grow Kits Into Your Garden
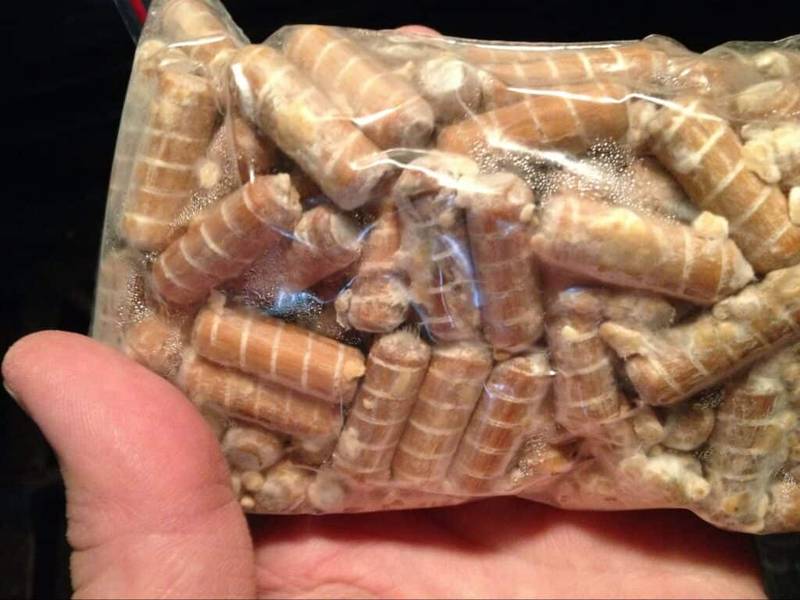
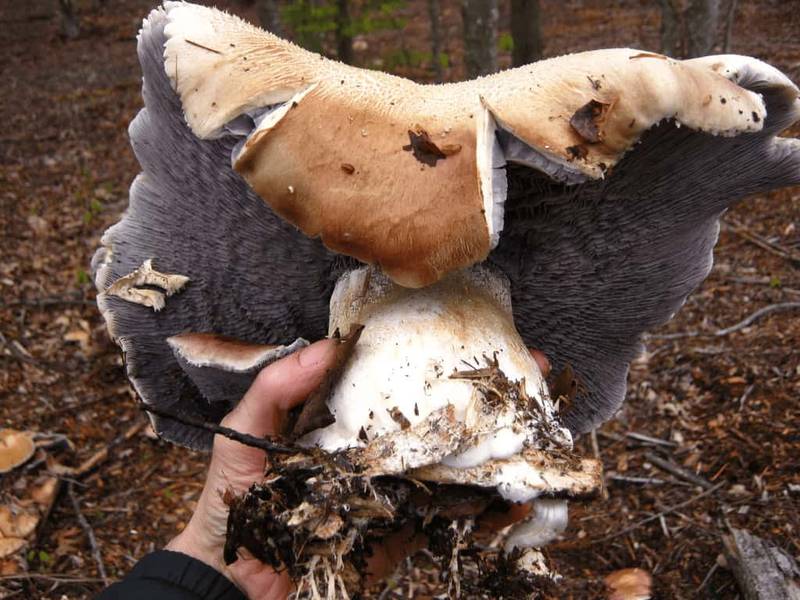
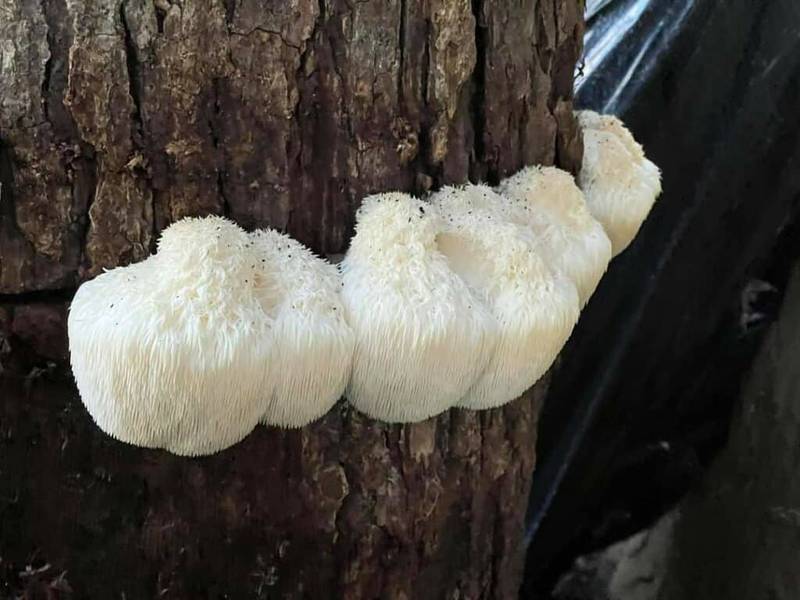
What is even better than your average mulch for attracting trichoderma is incorporating spent mushroom grow kits. These are also known as spent mushroom blocks and they are a waste product produced by mushroom farms. Mushroom grow kits are what conventional mushroom farmers use to cultivate gourmet edible and medicinal mushrooms like Oysters, Lion’s Mane, Shiitake, and Reishi. Once these are no longer productive they are removed from production and usually composted.
If you are willing to go pick them up, many mushroom farms have no problem handing them over. These blocks, still ripe with mycelium, are the perfect breeding ground for trichoderma.
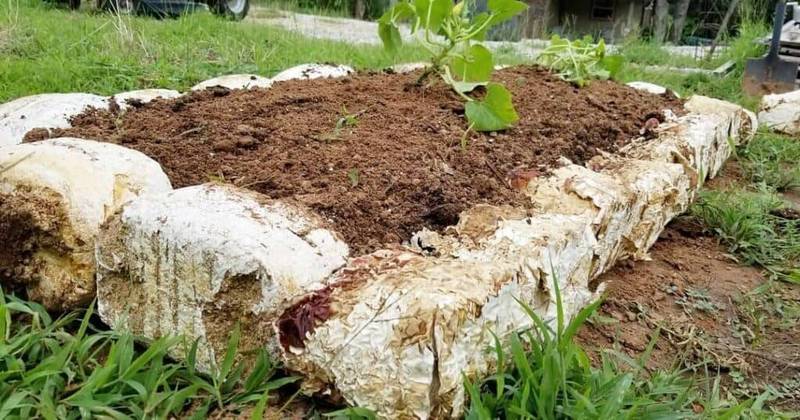
Not only this, spent mushroom blocks can also still fruit mushrooms! If placed in the understory of your garden, within a shady and well irrigated place, they will often give at least one or two flushes.
Incorporating Mushroom Grow Kits In The Garden
- Spent grow kits are usually free so you have nothing to lose incorporating them in the garden. Alternatively, you can also use fresh unused grow kits and expect larger harvests. The downside with using fresh grow kits in this way is that the harvest may not be quite as large as if fruited in conventional methods.
- Choose a site that is shady, moist, and won’t dry out from wind or sun. Under heavy foliage or in a forest-like setting is best.
- It is best to keep the grow kits whole and not break them up to protect their vigor.
- There are many ways to incorporate the grow kits. One simple method is to simply place them in the garden and cover them with mulch..
- Alternatively, you can bury them completely or just half way to help with moisture retention.
- You can also just place them under deep shade protected from direct sunlight. The wetter your climate the less protection they need.
- If you try to break up the grow kit and inoculate wood chips or other mulches with it, you will probably fail. The good news is, you’ll still feed the soil rich fungal organic matter!
- You can always break up and compost these mushroom blocks to make a rich fungal compost that has many health benefits to plants.
Companion Mushrooms In Gardens
Aside from using spent mushroom grow kits in your gardens, there are other ways to integrate mushroom cultivation into your gardens. We will be discussing three methods below. These are all tried and true methods that have been shown to work for outdoor cultivation. No labs, pasteurization, or sterile technique required! Before we get started lets cover 3 simple terms that you may want to brush up on first.
Mushroom Spawn
Mushroom Spawn is mycelium, typically cultivated on grain or sawdust, and is used for introducing mycelium into a new growth medium. It is produced in laboratory-like settings since it should be free of contaminants to ensure success. Plug spawn is a form of spawn used for cultivating on logs and consists of wooden dowels colonized by mushroom mycelium.

Substrate
Substrate is a growth medium for mushrooms. This can be straw, wood chips, or agricultural waste. Substrates not only feed mushroom mycelium, but they also must provide favorable habitat since the mycelium literally lives within this food source.
Inoculation
Inoculation is the process of introducing a mushroom culture into a new growth medium. For example, mushroom spawn is used to inoculate a substrate.
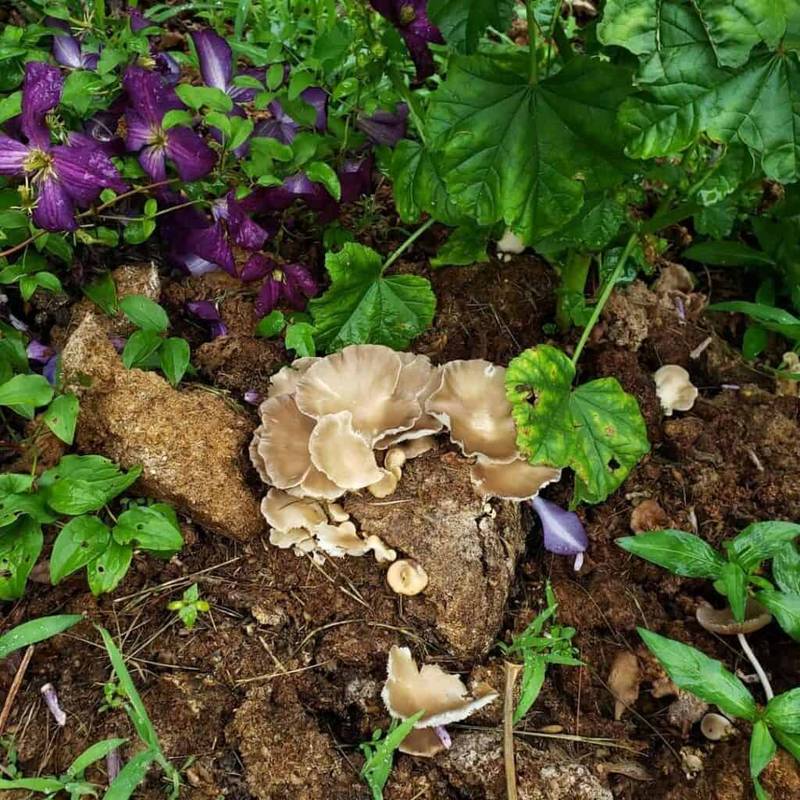
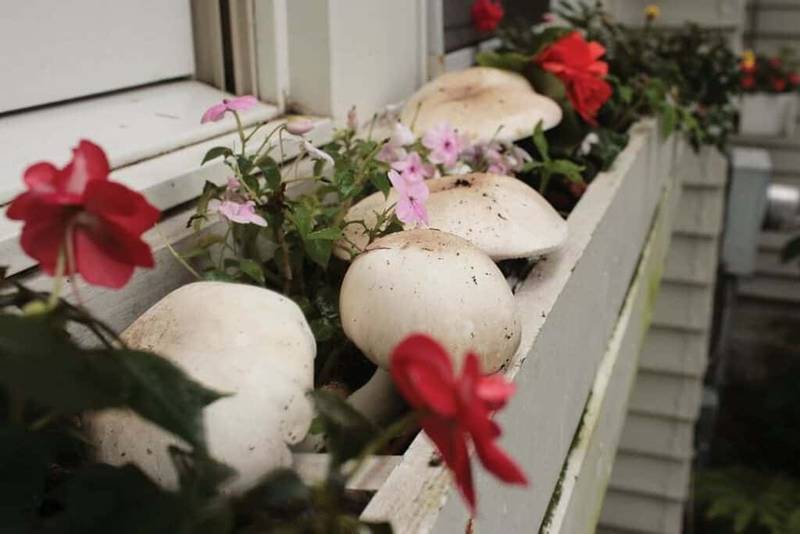
Growing King Stropharia, aka “The Garden Giant”
King Stropharia, also known as the Garden Giant, is an exceptional mushroom and an obvious choice for gardens. It is one of the only mushrooms that can be easily established in outdoor beds with long-term success.
King Stropharia is extremely hardy and thrives in the competitive microbial realm of non-sterile environments. In fact, mycologists have trouble cultivating this species in fully sterile conditions! Studies have also shown that King Stropharia is capable of killing nematodes who act as plant pests by using specialized cells with spiky finger-like projections called acanthocytes.
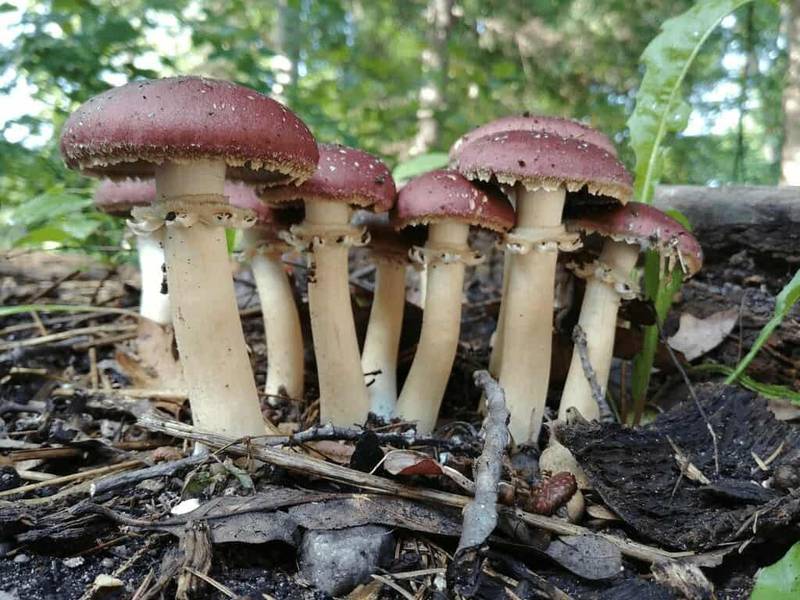
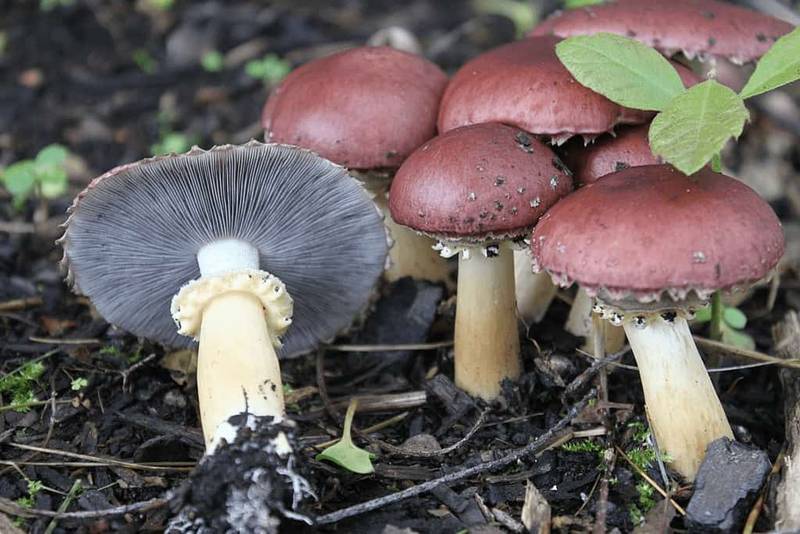
Making a stropharia bed is relatively easy, and can be directly incorporated into your already established permaculture practices. Essentially, it is just a matter of getting your hands on King Stropharia spawn and applying it alongside a heavy layer of straw or wood mulch. Some studies suggest straw to be a more prolific food source, but many people advocate using sawdust or hardwood. King Stropharia isn’t too picky when it comes to its substrate so either or both are probably a good option. It will take 6 months to a year before fruiting. Some sources say you shouldn’t eat King Stropharia more than 3 days in a row or else you can suffer gastrointestinal distress.
General Guide For Growing King Stropharia
- Get fresh and high-quality spawn from a trusted producer. Use it immediately and don’t sit on the spawn for too long.
- You can apply it when sheet mulching or just applying a new layer of mulch. Sprinkle the spawn in layers in between the mulch. Ideally use a good 3-4” of mulch or more and always cover the spawn making sure it is not in direct sunlight.
- Shady and moist areas of your garden where the mulch doesn’t dry out are best. Preferably somewhere with irrigation or perhaps runoff from a roof or drainage. This being said, they can grow fine in full sun given enough mulch and proper conditions.
- Plant it somewhere near your home in Zone 1 or 2. They tend to fruit abruptly during the rainy season, so you want to be able to catch the flush when it appears.
- You can often see the mycelium developing by moving the top-layer of mulch. Try not to disturb it too much!
- It may take 6 months to a year before you get your first flush! Be patient!
- Harvest the younger specimens. These are more flavorful and tend to have a better texture. Older mushrooms may be buggy and less flavorful.
- As the mulch begins to decompose you can add more to prolong the established patch.
- It’s not uncommon for King Stropharia to begin popping up in other parts of your garden! So don’t be surprised if it spreads.
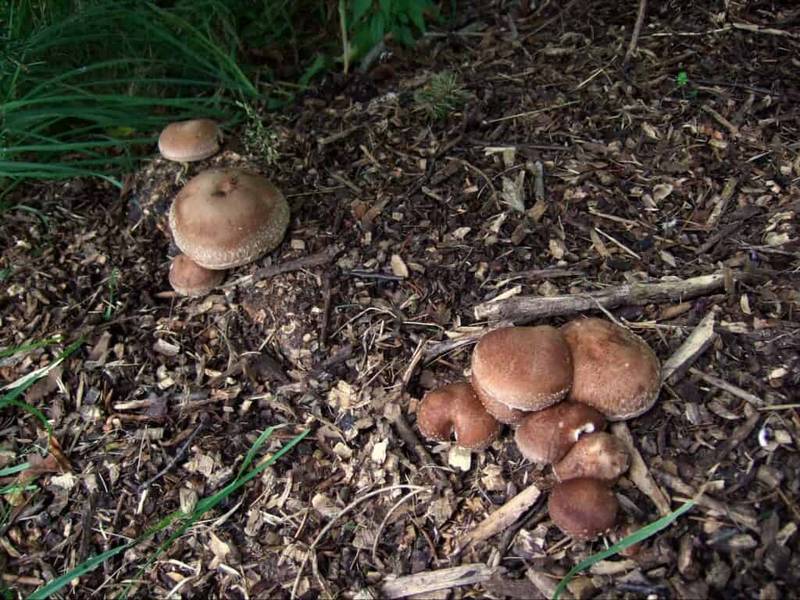
Growing Mushrooms on Logs
One of the best ways to incorporate mushrooms into your farm or garden is to cultivate them on logs. This is a relatively care-free method that fits into the permaculture design philosophy. It truly mimics nature, as most cultivated mushrooms grow on woody debris in the wild. Most importantly, cultivating mushrooms on logs is a full-proof way to obtain a yield with the least amount of effort possible. Sure, it isn’t quite as prolific and quick as the mushroom grow-kits prepared with pasteurized substrates, but it’s often the slow and steady strategies that win the race..
Things to consider for cultivating mushrooms on logs
- Logs should be hardwood. Oak, Eucalyptus, Alder, Maple, and most fruit trees work. Coniferous trees should be avoided. In the tropics, you can use ficus, acacia, guava, and other tropical fruit trees. Avoid anything with known antimicrobial properties.
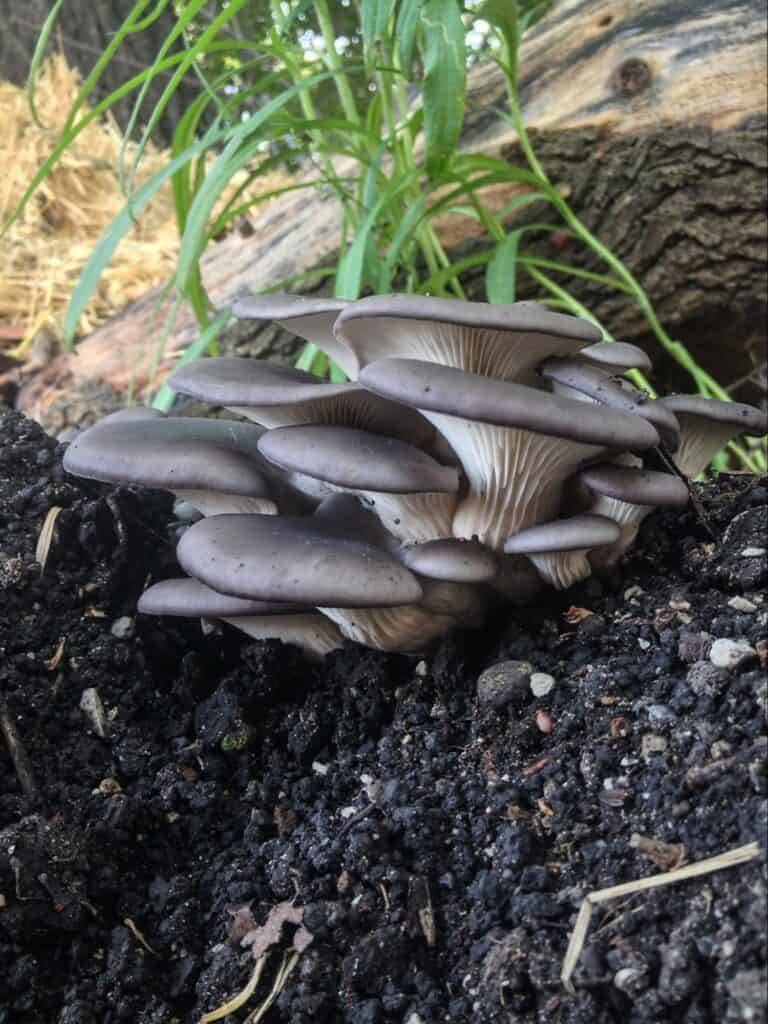
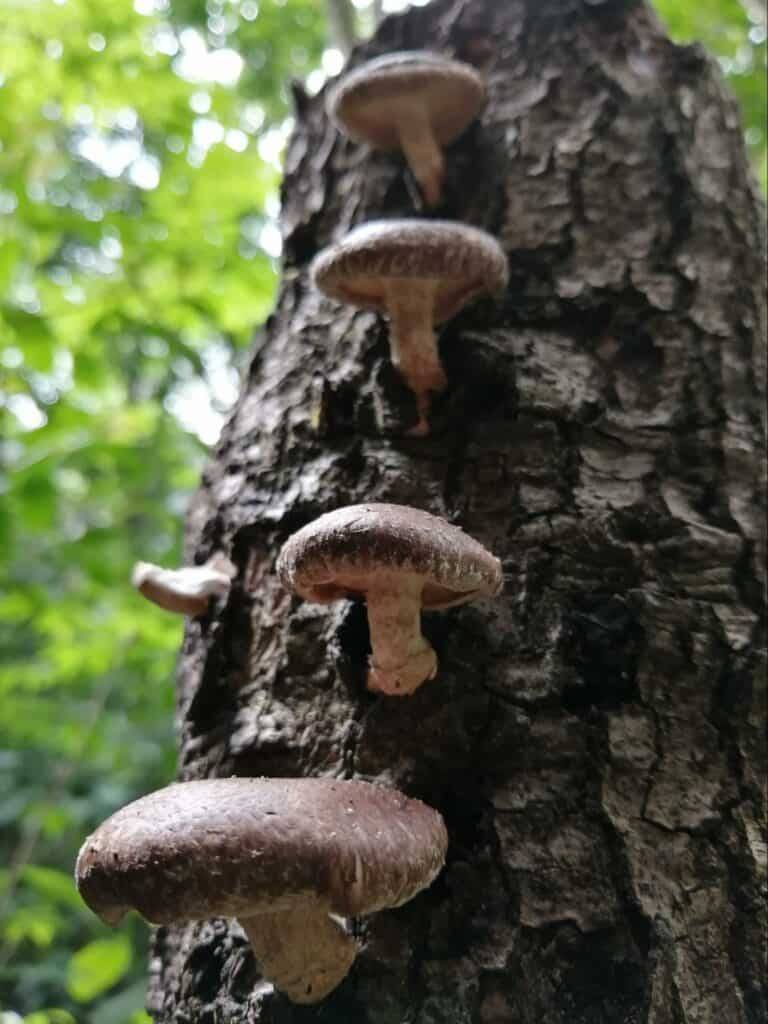
- Wood-loving mushrooms for this method include Oysters, Lion’s Mane, Shiitake, Reishi, Turkey Tail, and Chestnut Mushrooms. Oysters and Shiitake are the best and most reliable for beginners. Gray, White, and Golden Oysters are particularly aggressive and robust.
- Avoid using grain-spawn. Grains attract insects, animals, and other critters. Sawdust or dowels is the way to go. Some growers use sawdust based grow kits with success.
Traditional Log Cultivation
Equipment Needed
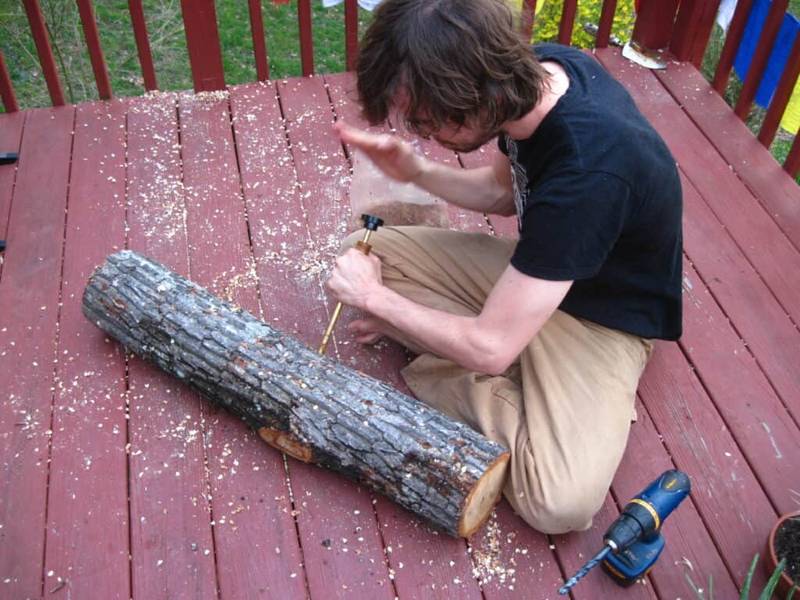
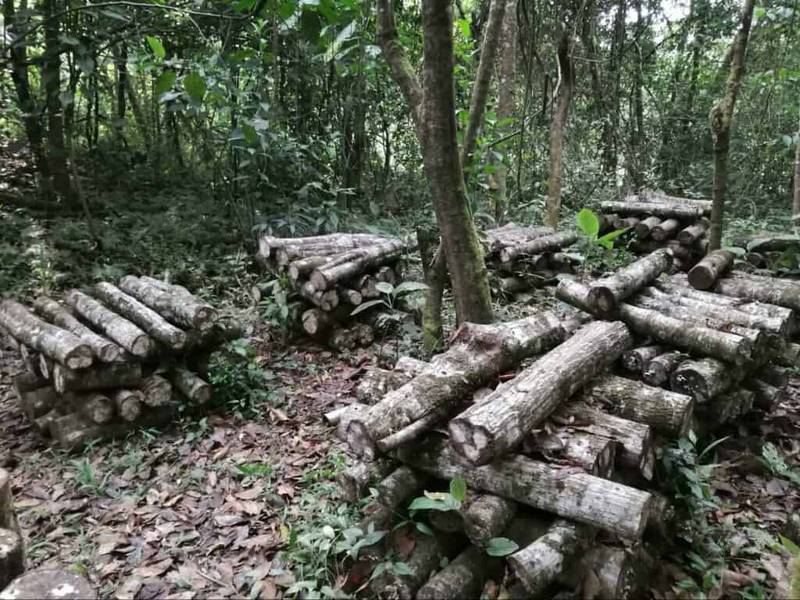
- Logs – Logs should be about 6-10” in diameter and about 3-5 ft long. You may or may not be moving them, depending on your strategy, so consider this. You can also inoculate stumps and trunks with this method, although the totem method outlined below works better for large pieces of wood.
- Mushroom spawn or dowels
- Applicator (if using spawn) – This is a nifty tool used for transferring spawn into holes you will be drilling in the logs.
- Small mallet or hammer (if using dowels) – This is for inserting dowels into drilled holes.
- Drill with 9mm drill bit – Dowels and spawn applicators are typically designed to work with 9mm holes.
- Candle wax and pot + heat source for melting – Although its a petroleum product, candle wax tends to work better than natural waxes which tend to decompose.
- A brush for applying melted wax – A larger brush makes this process quicker.
Summary of Process
- Drill 2-inch holes spaced about 4-5 inches apart across the entire surface of the logs. If using an applicator, depth doesn’t really matter too much. For plug spawn it should just be a tiny bit (1/10th of an inch) deeper than the dowel.
- Fill these holes with spawn.
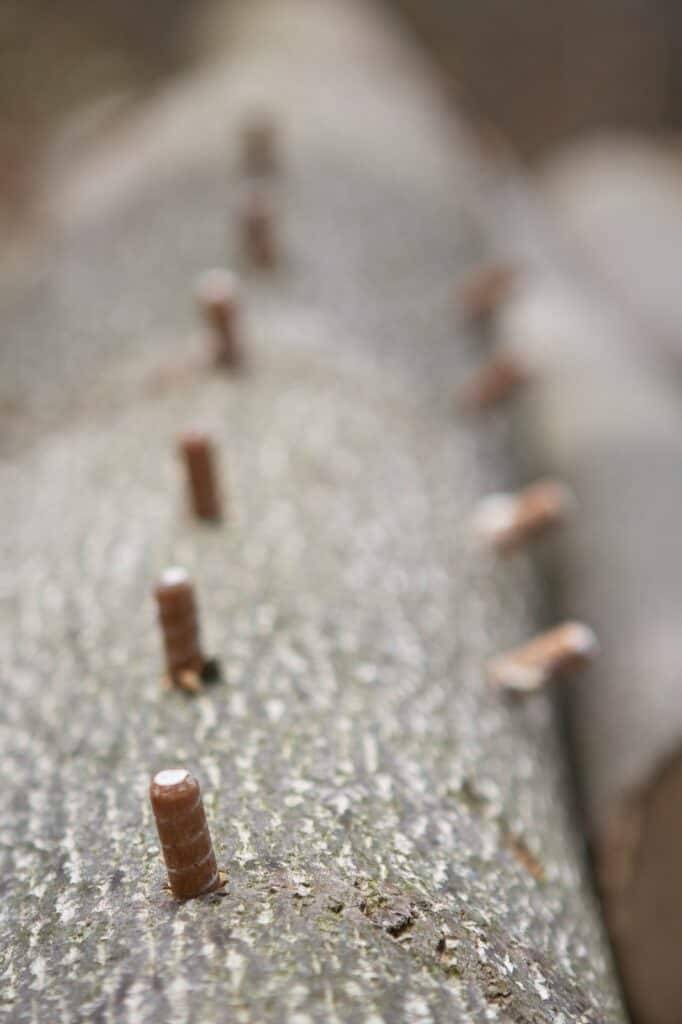
- Melt wax and paint it directly onto the holes that have been filled with spawn. The wax protects the spawn from contamination and critters.
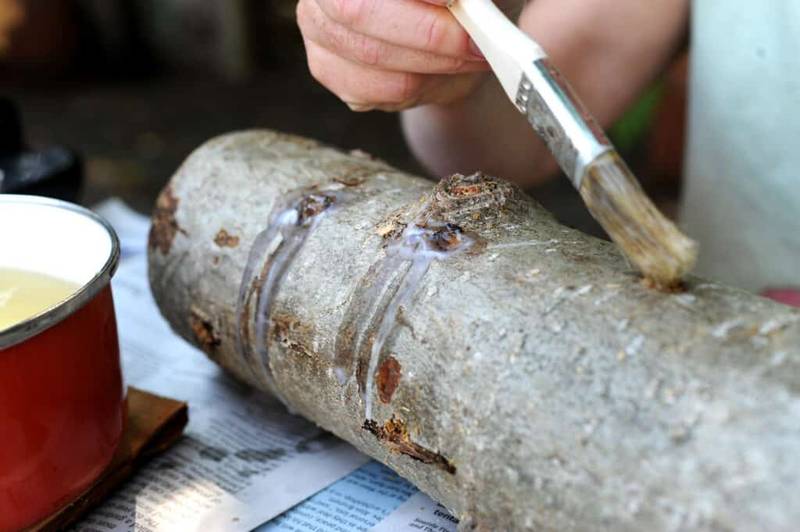
- Place logs in a shady and cool place to rest for 4-6 months. It is typically recommended to keep them directly off the ground, especially with slower-growing species like Shiitake and Lion’s Mane. Otherwise, I’ve also seen logs used for lining garden beds/paths and fruiting vigorously with no problem.
- These will fruit naturally once the rainy season approaches. Shitake requires cold temperatures. If you want to stimulate fruiting, you can soak the logs for 12hrs in cold water.
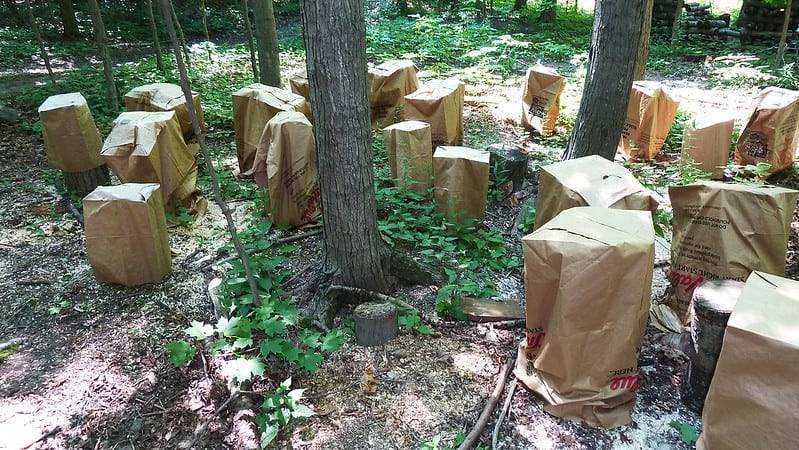
Growing Mushrooms on Totem Logs
Mushroom Totems are a relatively more novel way to cultivate mushrooms on logs, but many people have great success with his technique. It is slightly less labor intensive and allows you to use larger logs and trunks that are typically not so good for conventional log cultivation. I will be honest to mention that this is a technique I have never conducted myself, but it seems worthwhile and deserves a mention in this guide.
Equipment
- Logs – Large round logs at least a foot in diameter that fit together one on top of another. Wider logs or trunks are preferable as you will want these totems to stand on their own with no problem.
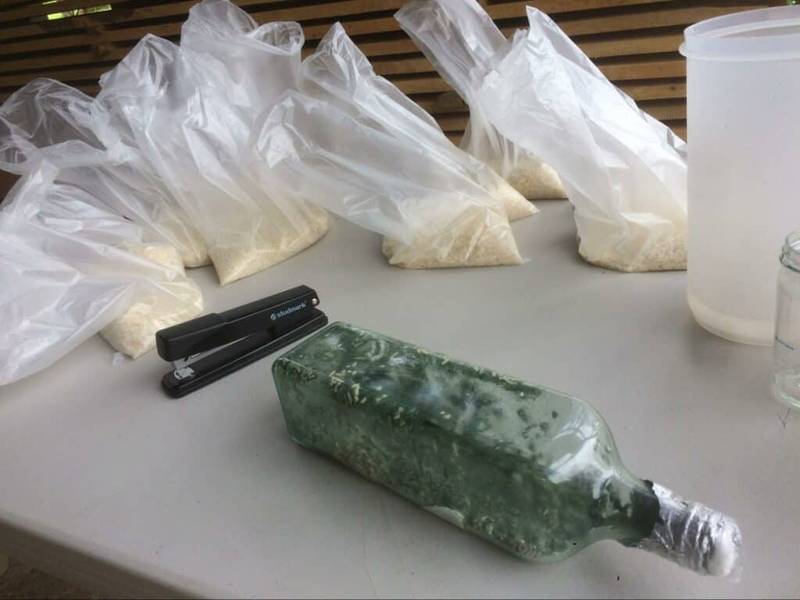
- Spawn – Sawdust spawn is ideal for this method. Some growers will use sawdust grow kits for this method as they are cheaper and more accessible.
- Large Bags or Plastic Wrap – This is for securing and protecting the totems after inoculation.
- Chain Saw (optional) – If you don’t already have these logs cut you will need a chain saw to cut them into separate layers.
Technique Summary
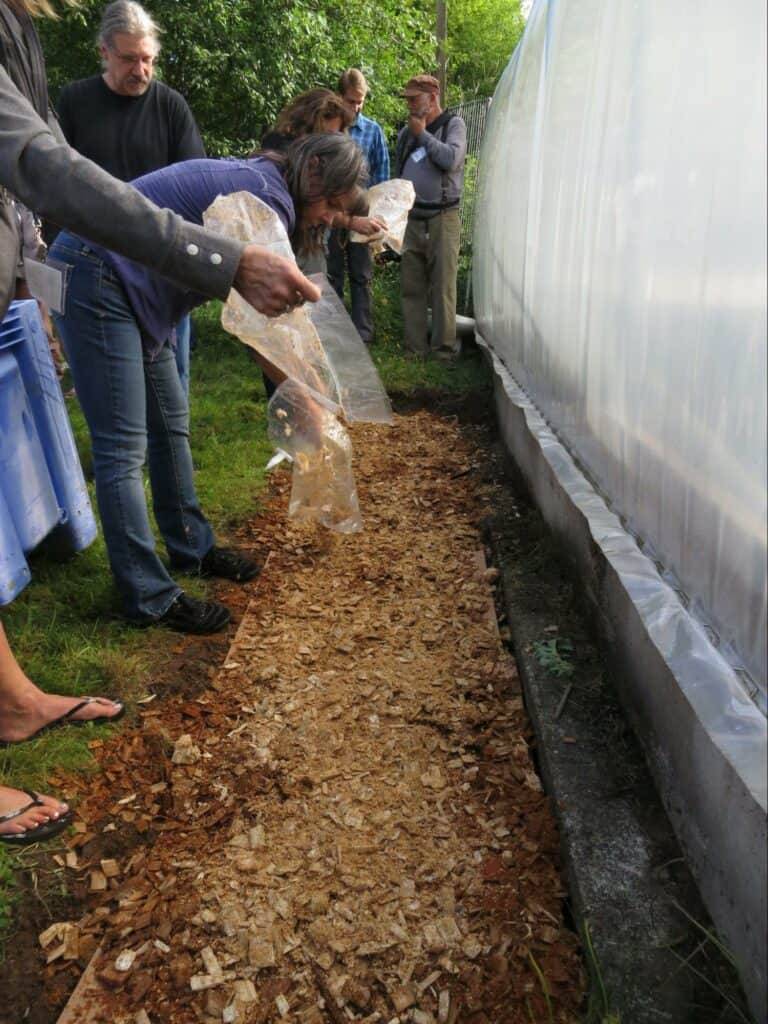
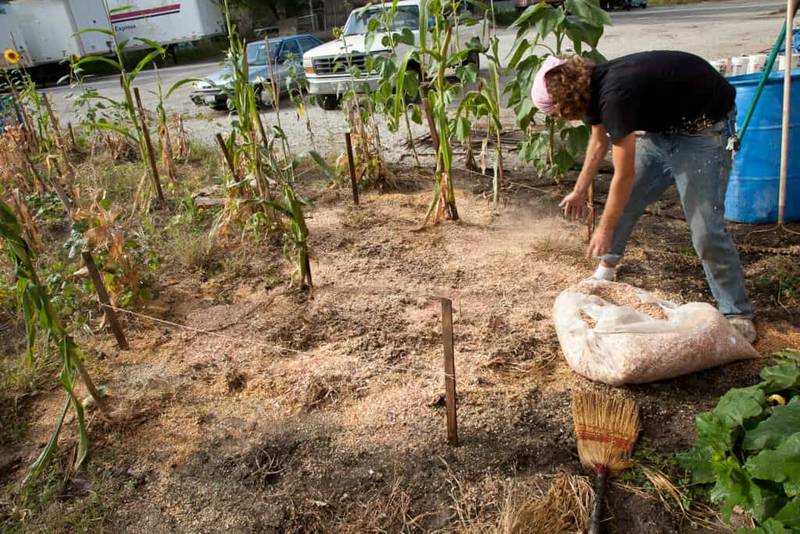
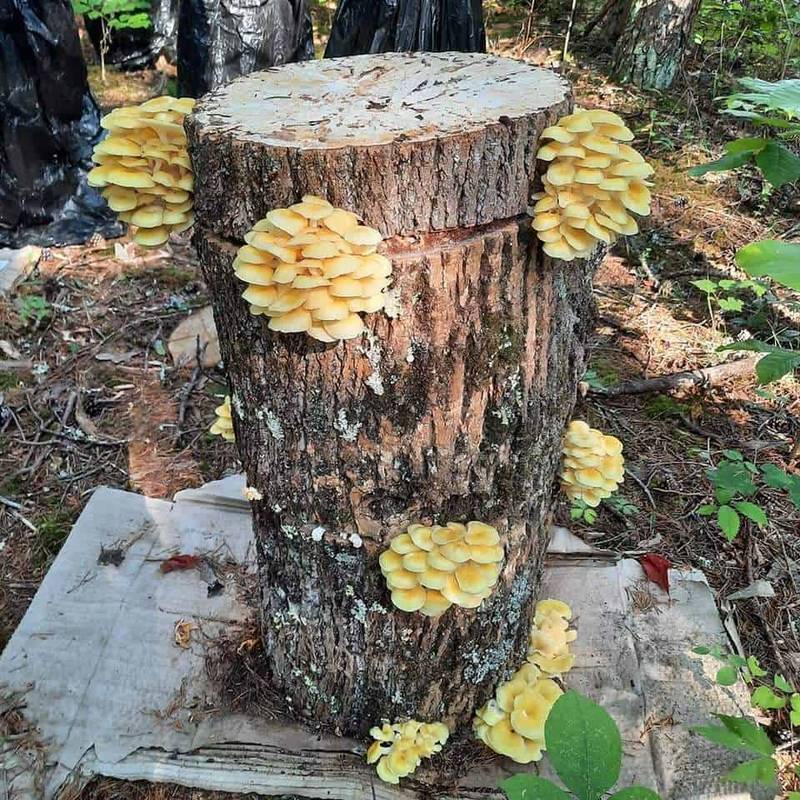
To make a mushroom totem you are essentially just layering the large rounds of wood with 1-2” of mushroom spawn. Some growers place cardboard at the very bottom followed by a layer of spawn below the first round of wood. You will want at least 3 or 4 separate rounds so you can have 2 or 3 layers of spawn.
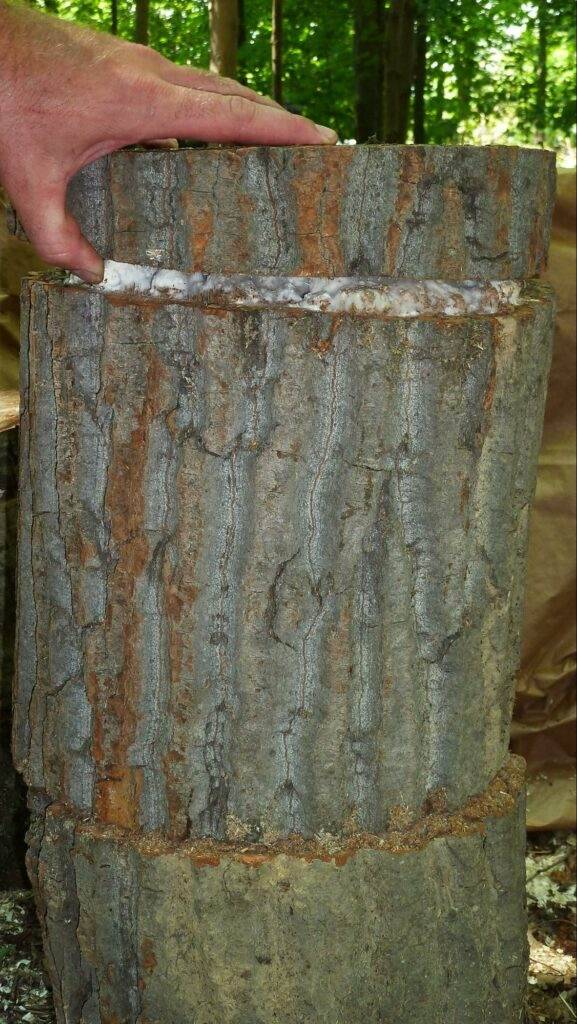
After inoculating, you can either wrap plastic wrap around the layers of spawn or cover the entire totem in a plastic bag. This will protect the spawn from unwanted critters and maintain the moisture needed for growth. If you look in the background of the image pictured at the beginning of this text you will see the grower covered their totems with large black plastic bags. These bags are left on the logs for 3-4 months until conditions are ripe for fruiting. Once colonized, these logs will regularly produce crops of mushrooms for several years.
The methods for growing on totems seems to be a bit less standardized than other mushroom cultivation techniques. I recommend doing some additional research on this method to find a technique that works well with your context.
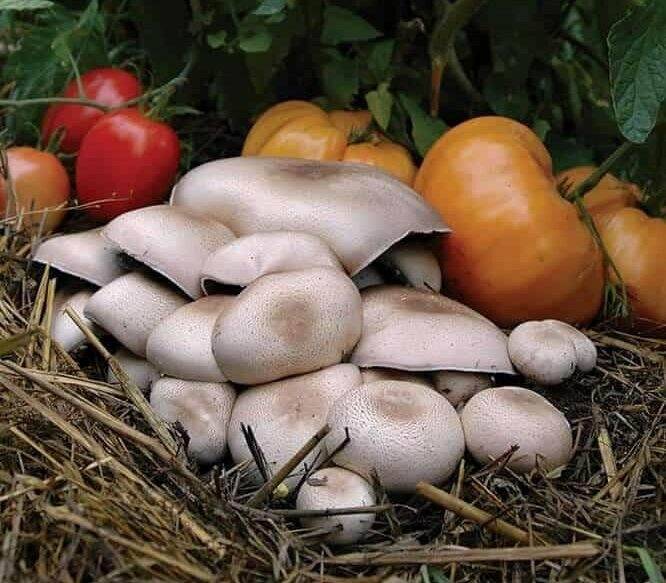
Growing Almond Mushrooms on Compost
This is the last method we will be discussing in this article. We’ve talked about growing mushrooms on logs, mulch, and now we will finally talk about growing some compost-loving mushrooms. In particular, we are talking about the Almond Mushroom.

This is a vigorous relative of the common button mushroom and a truly under-appreciated one at that. These mushrooms are absolutely delicious and rightfully named because they do have an almond-like flavor. I often say they taste more like almond extract than almonds themselves, because they are bursting with flavor.
Today these mushrooms are not cultivated in the US or Europe but there is ongoing cultivation in tropical Asia and Brasil. Here they are valued as gourmet and medicinal mushrooms. While today the cultivation of this mushroom in the United States is relatively unheard of, historic reports show that it was cultivated and commercialized in the eastern United States from the late 20th century to early 21st century. Commercial production of this mushroom gave way to the button mushroom, which was considered more prolific and quicker to grow.
- All you need to grow this delicious mushroom is some well-finished compost, mulch, and the mushroom spawn. Compost can be store-bought or homemade; just make sure there is little to no undecomposed materials. Make sure it is nice and saturated before using it.
- It thrives in warm to hot weather, so consider planting this well after the threat of last frost has passed and soil temperatures are at least above 40F. Ideal temperatures are above 70F. Greenhouses are excellent for this.
- It can be planted alongside plants that love rich soils and warm weather. Tomatoes are an obvious candidate. You can either inoculate the almond agaricus when installing a new bed or “top-dress” the soil with a layer of compost and mulch on existing beds.
- You want about a 1:10 ratio of spawn to compost. A bag of spawn around 5lbs and can cover just about a 4x4ft area.
The Procedure
- Apply a layer of compost directly into the bed at least 4” in depth.
- Break up your Almond Mushroom spawn into egg-sized pieces. Contrary to other mushroom inoculations, you don’t want to break up the spawn into small pieces.
- Bury these small pieces of spawn 1” deep about 3-4” apart into the compost.
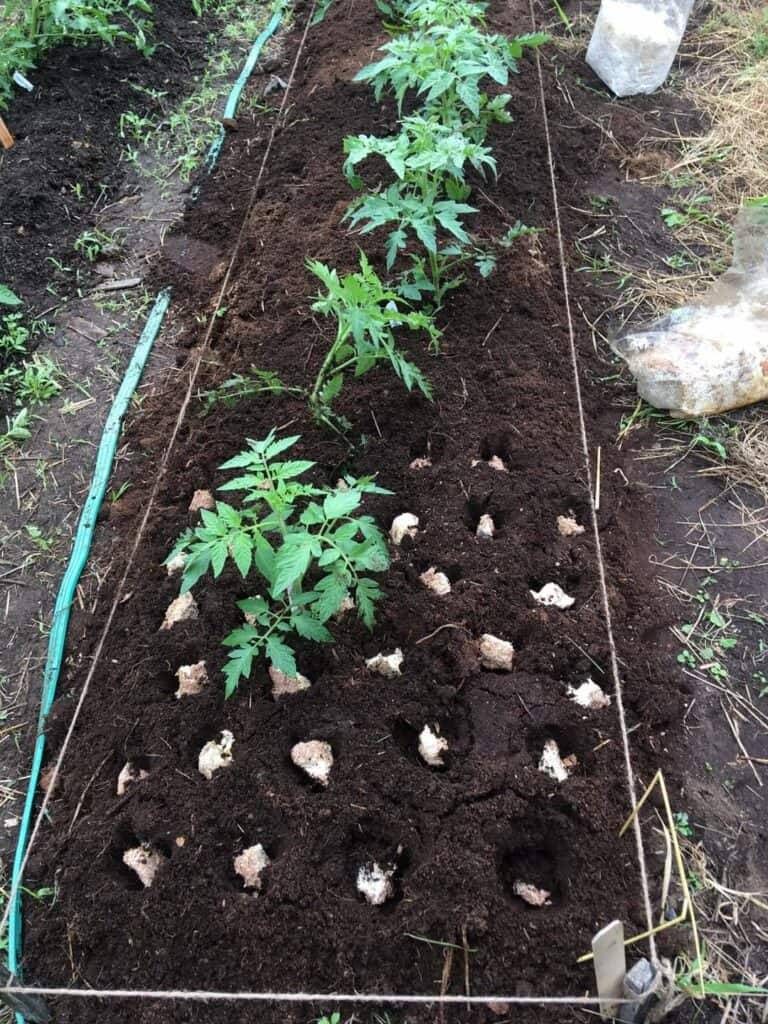
- Apply a thick layer of mulch several 2-4” deep to ensure moisture is retained in the compost.
- Keep moist and wait 4-5 weeks until the first flush! If they don’t fruit at first, they may just be waiting for the right environmental conditions.
- Harvest younger specimens before or right after the cap opens up for the best flavor and texture.
- These mushrooms do not usually overwinter well in places with cold winter seasons. Several inches of mulch may help protect the mycelium during the winter.
If you’re more curious about growing this mushroom, I highly recommend reading this article from Field and Forest Products. They provided the pictures for this section of the article and have great content on the subject.
Final Thoughts
While we have some of the most likely to succeed methods of integrating mushrooms into a permaculture design, it by no means stops here. This is a field ripe for exploration and investigation, that merits thought and experimentation. Looking to nature and your local ecosystem can be a great place to find guidance in this endeavor. Also, it’s worth mentioning that China and other countries in east Asia lead the frontiers in mushroom cultivation and have already developed many novel techniques largely unknown in other parts of the world. Also, there are countless historic texts, such as this mushroom growing book from 1915, that hold plenty of wisdom on low-tech methods for mushroom cultivation. Best of luck!
Sources:
Bruhn, J. N., Abright, N., & Mihail, J. D. (2010). Forest farming of wine-cap Stropharia mushrooms. Agroforestry systems, 79(2), 267-275.
Guzmán-Guzmán, P., Porras-Troncoso, M. D., Olmedo-Monfil, V., & Herrera-Estrella, A. (2019). Trichoderma species: versatile plant symbionts. Phytopathology, 109(1), 6-16. PDF
Luo, H., Li, X., Li, G., Pan, Y., & Zhang, K. (2006). Acanthocytes of Stropharia rugosoannulata function as a nematode-attacking device. Applied and Environmental Microbiology, 72(4), 2982-2987
Wisitrassameewong, K., Karunarathna, S. C., Thongklang, N., Zhao, R., Callac, P., Moukha, S., … & Hyde, K. D. (2012). Agaricus subrufescens: a review. Saudi journal of biological sciences, 19(2), 131-146
About the Author
Timothee is a 28-year-old Naturalist, Agricultural Specialist, and Author. He believes that environmental writing provides the information necessary for the cultural transformation needed to stabilize the climate.