
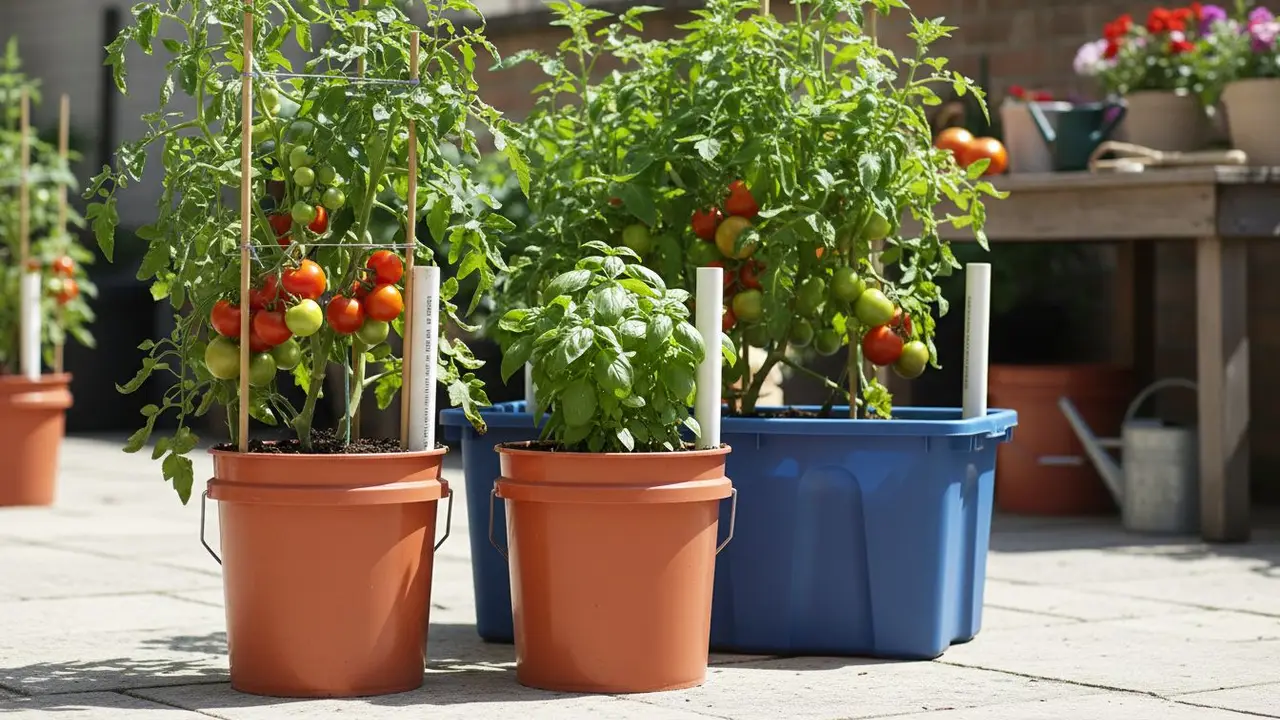
The single hardest part of container gardening is keeping up with the watering. Pots dry out fast, and one forgotten day during a summer heatwave can undo a whole season's work. Self-watering containers are the fix, and they changed container growing for me completely. The turning point came when I went away for a week in July and returned to find my self-watering tomatoes lush and heavy with fruit while the ordinary pots beside them had crisped to straw. A self-watering container holds a reservoir of water in its base that the soil steadily draws from, so your plants sip exactly what they need and you refill every few days instead of every single day. This guide explains how they actually work, why they are worth it, how to build your own for a few dollars, and how to use them well.
What Is a Self-Watering Container?
Despite the name, a self-watering container does not water itself; you still fill it, just far less often. A more accurate term is a sub-irrigated planter, and the design is simple once you see it. A water reservoir sits in the bottom of the container, separated from the soil above by a platform or false bottom. A wicking mechanism, either a column of potting mix or a fabric wick, dips down into that reservoir and draws water upward into the root zone by capillary action, the same way a paper towel soaks up a spill. The plant's roots then take up moisture from below as they need it. You top up the reservoir through a fill tube, and an overflow hole set at the reservoir's maximum level lets excess water escape so the soil never becomes waterlogged. As Michigan State University Extension explains in its overview of self-watering containers for the garden, this bottom-up delivery gives plants steady, even moisture with far less effort from you.
Why Use Self-Watering Containers?
The benefits go well beyond simple convenience, though the convenience alone is considerable.
- Consistent moisture, healthier plants. Even, steady moisture is exactly what most vegetables want, and it prevents the wild wet-dry swings that cause so many problems. My tomatoes stopped suffering from blossom end rot, a disorder driven by erratic watering, the year I moved them into self-watering containers.
- Watering days apart, not daily. A good reservoir carries a plant for several days to a week, which is forgiving of a busy schedule, a heatwave, or a trip away from home.
- Water efficiency. Because the reservoir is enclosed and the water is delivered straight to the roots, very little is lost to evaporation or runoff, making these containers more water-thrifty than top-watering.
- Dry foliage. Watering from below keeps the leaves dry, which helps reduce the fungal diseases, like powdery mildew and various leaf spots, that thrive on wet foliage.
Self-watering containers shine with the thirstiest, moisture-loving crops: tomatoes, cucumbers, basil, lettuce, celery, and spinach all love the steady supply. The one group to keep out of them is plants that prefer to dry out, like Mediterranean herbs, cacti, and succulents, which will rot in the constant moisture.
How to Build Your Own Self-Watering Container
You can buy ready-made self-watering planters, but building your own from a couple of five-gallon buckets or a storage tote costs a few dollars and takes half an hour. Michigan State University Extension even has a guide to building your own self-watering container. Every design, homemade or bought, has the same five parts:
- A reservoir in the bottom to hold the water.
- A platform or false bottom that holds the soil above the water so the mix does not simply turn to mud.
- A wicking chamber, usually a perforated cup or a column of potting mix that reaches down into the reservoir and pulls water up.
- A fill tube, a length of pipe running from the top down to the reservoir, through which you add water.
- An overflow hole drilled at the top of the reservoir, so you cannot overfill and drown the roots.
The classic two-bucket method nests one bucket inside another. You drill drainage holes in the bottom of the inner bucket, fit a small perforated cup of potting mix through the center to act as the wick, prop the inner bucket up on a spacer so a reservoir gap remains below it, run a fill tube down one side, and drill an overflow hole in the outer bucket at the height of the spacer. Fill the whole thing with potting mix, and you have a self-watering planter. A storage tote fitted with a perforated platform works the same way and gives you room for a big tomato plant. It is a genuinely satisfying afternoon project, and my first one cost less than a takeout lunch.
How to Use and Maintain a Self-Watering Container
These containers are nearly foolproof, but a few points make the difference between success and a soggy failure.
Use a wicking potting mix. This is the one non-negotiable rule. A self-watering container depends entirely on the soil's ability to wick water upward, so you must use a light, peat- or coir-based potting mix. Garden soil will not wick, compacts into an airless block, and dooms the whole system, so never use it here.
Water from the top the first time. When you first plant, water thoroughly from above to settle the mix and get the wicking started. After that, add water only through the fill tube, and let the reservoir do the work.
Feed at planting. Because you are no longer top-watering, you are not washing fertilizer down through the pot, so mix a slow-release organic fertilizer into the potting mix when you plant. Container plants are hungry, and a well-fed self-watering container is a remarkably productive one.
Watch for salt and refill on schedule. Because water constantly moves up and evaporates from the surface, mineral salts can slowly build up in the top layer of soil; every so often, water heavily from the top to flush them down and out. Refill the reservoir whenever it runs dry, which you will learn to judge by weight or with a simple float indicator. And in cold climates, empty the reservoirs before winter, since water left inside will freeze, expand, and crack the container.
Reservoir size determines how long you can go between fills. A five-gallon-bucket build might carry a large tomato for two or three days in the peak of summer and a week or more in mild weather, while a big tote with a deep reservoir stretches much longer. Early in the season, check every few days until you learn each container's rhythm, and you will soon know at a glance how often each one needs topping up.
Common Mistakes to Avoid
Self-watering containers are hard to get wrong, but a few errors account for nearly every failure.
- Using garden soil. The most common and most fatal mistake. Native soil will not wick and packs down into airless mud, breaking the whole system. I killed an early attempt in exactly this way before I understood that the mix has to be light enough to pull water upward.
- Growing the wrong plants. Succulents, cacti, and Mediterranean herbs want to dry out and will rot in the constant moisture, so save these containers for genuinely thirsty crops.
- Skipping the overflow hole. Without it, a heavy rain fills the reservoir past capacity and drowns the roots.
- Forgetting to feed. The reservoir supplies water, not nutrients, so a container that started strong and then stalled is very often simply hungry.
Self-Watering Containers Among the Watering Methods
A self-watering container is one excellent tool in a larger kit for keeping a garden hydrated with less work. For many pots or garden beds on a timer, drip irrigation is the efficient choice; for in-ground beds, buried clay pot ollas do a similar sub-surface job; and a thick mulch conserves whatever water you apply. My own low-maintenance setup pairs self-watering containers for the thirsty crops on the patio with drip lines for everything else, and I top up the reservoirs from a rain barrel for good measure.
For anyone growing in pots, especially on a hot balcony or in a busy urban garden, self-watering containers are the upgrade I recommend most. They take the daily anxiety out of container growing and reward you with steadier, healthier, more productive plants, and they turn a week away from home from a death sentence for your pots into a non-event. Build one from a pair of buckets this weekend, plant it with a tomato or a basil, and see for yourself how much easier, and how much more forgiving, growing your own can be. For more on growing food in any space, our gardening library has a guide for every step.
Sources
- Michigan State University Extension — Self-watering containers for the garden
- Michigan State University Extension — Build your own self-watering container
- Utah State University Extension — Self-Watering Containers
- University of Illinois Extension — Container Gardening: Watering
About the Author
Lucas is a writer and researcher focused on sustainable agriculture and permaculture practices.