Guide to Pitcher Irrigation: A water smart approach
When we started with our food forest, from scratch, one of our major challenges was watering plants that were far from zone zero. As we were on a low budget and in a remote region with limited electricity, drip was way too expensive to set up and maintain the cheapest and easy to set up passive irrigation solution was pitcher irrigation.
We followed the local practice, bought pitchers from the nearest potters, buried them near our plants, and mulched heavily. We were refilling them once or twice every week and that was pretty much it. The pots stayed intact for 5 to 7 yrs which was enough time for the fruit trees to establish post which they broke down and were integrated with soil.
The process was an interesting one, we slowly started understanding the pros and cons of pitcher irrigation and its importance to remote farmers and gardeners. Thus, here’s a guide to the process, the different variations tried and tested, the outcomes, and the potential.
What is Pitcher Irrigation?
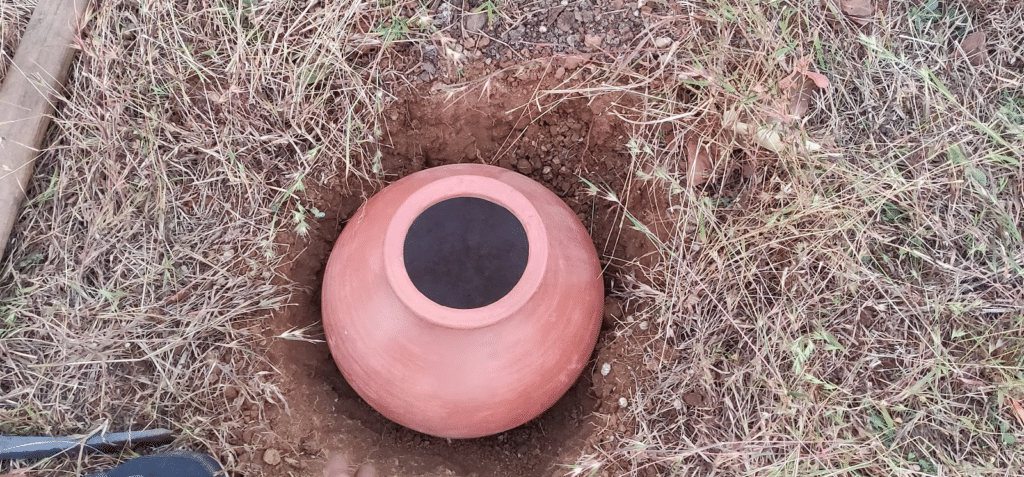
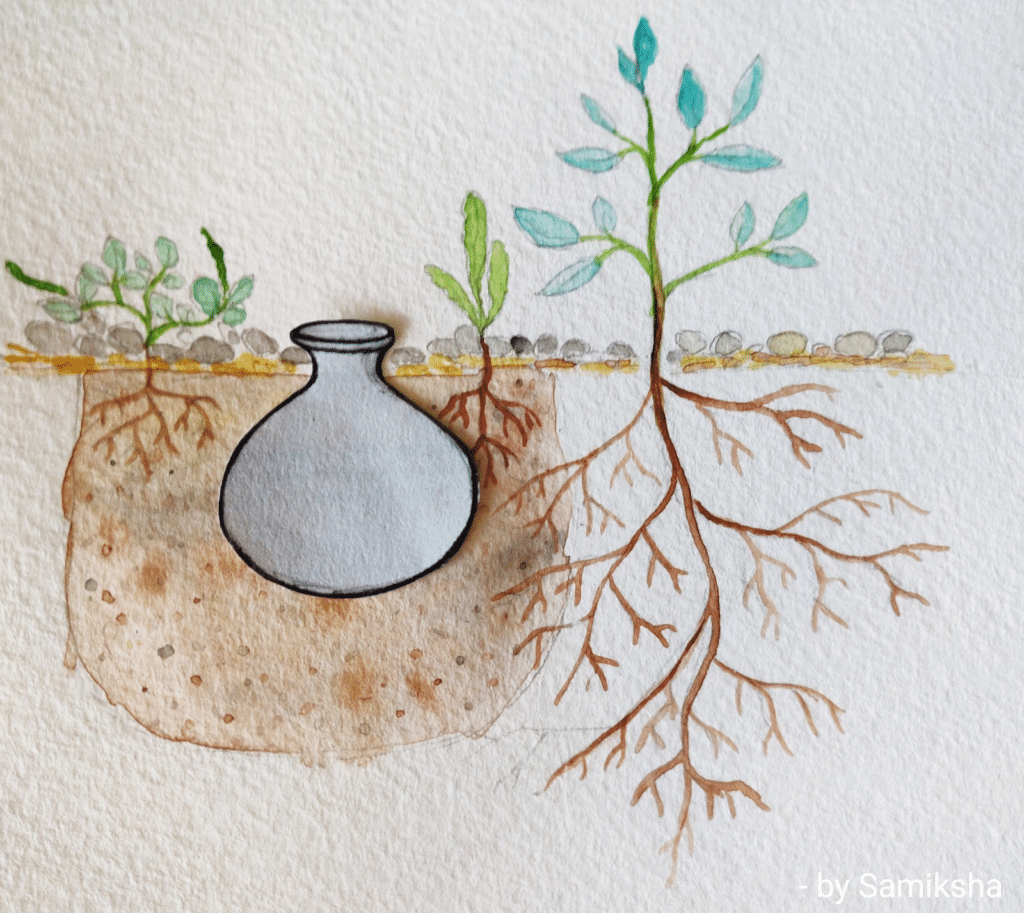
It’s an irrigation method where the unglazed pitchers are buried in soil, filled with water, and covered with lids. The pitchers release water through their pores into the soil underground which irrigates near the roots of plants, slowly and efficiently.
 |  |
It is an affordable and water-saving watering system, suitable for small-scale farming however can be implemented on large scale as well. The traditional method is labor intensive as the pots are filled manually, however, it is studied and is now being blended with automated refilling techniques to reduce labor.
History
It is an ancient technique practiced in various dry and arid parts of the world, especially in Africa, Pakistan, India, Iran, parts of Mexico, and more. It has been mentioned in one of the first Chinese agricultural texts as old as 2000 years and thus the practice is believed to be older than that.
The pitchers go by different traditional names, the common one in the global gardening community is olla, in our local language Marathi we call it madka and math, its called matka in Hindi.
How does it work?
It works on the principle of capillary action and water retention with an aim of rootzone irrigation to reduce any sort of water wastage, especially surface evaporation.
The water oozes out slowly through the highly porous walls of the unglazed pot due to capillary action, which is the ability of water to flow through small spaces due to the attraction between water molecules and the walls of the pores. The water then seeps as a result of uptake by the plants and is replenished due to the capillary action of the pot.
The rate of water seepage depends on soil type and plants.
How are the pots made?
Traditionally the pots are made by creating a mix of clay and sand, baked at high temperatures to create desired porosity. The porosity differs as the ratio differs and it’s changed to suit the soil and plant type as well with the basic being 4 part clay to 1 part sand. The pots differ in shape, color and size due to the local materials and soils used however the impact is similar.
Why Pitcher Irrigation?
- Lesser wastage of water as compared to drip and surface irrigation, and no surface water evaporation leading to 60 to 70% more water saving.
- Stimulates deeper root growth as the pitcher is buried underground.
- Cost-effective setup as sourcing locally made pitchers and installing them manually costs less
- Longer life as compared to surface irrigation systems as the pitchers are highly porous baked terracotta that doesn’t crack easily when the water travels through its surface and since they are not directly exposed to sun, they do not go through sudden temperature change leading to cracking.
- It’s a local solution as the resources and skills used are local and buying pitchers locally leads to supporting local artisans and thus supports local economies.
 |  |
- No plastic pollution and zero waste solution as there are no artificial materials involved, and the pots break down slowly (6 to 8 yrs) and create pores and pockets in soil once disintegrated which act as homes for soil life.
- It’s extremely useful in arid and drought-affected regions where water is limited and surface irrigation is unsustainable.
- Helps suppress weeds-related labor as the topmost surfaces stay dry.
- Reduces water stress and sudden shock to the plants as it releases water slowly and gives a good buffer time in-between refills where the soil around the pitcher remains moist.
- Less water wastage and water bills as it reduces risks of overwatering and underwatering as water is not directly poured into the soil and is only taken up by plants as per the trans evaporation.
- Deep percolation losses are negligible since water is released from smaller areas around the root zones where the pitcher is set up.
- Can be implemented for both existing plantations or while planting new annuals or perennials.
- Can be implemented for urban gardens or vegetables grown in small containers as well.
Step By Step Process Guide
Materials Needed:
- Unglazed Pitcher, narrow neck recommended as it helps reduce the exposure of pitcher and water to the sun above ground reducing loss due to evaporation. Always use unglazed pots as glazed pitchers do not allow the moment of water.
- Lid or a cover stone to keep the pot covered.
- Local soil digging tools, whatever gives you better results.
- Compost
- Mulching materials, any brown matter and stones to secure the mulch.
- Thread to be used as a wick (optional)
- Seeds or plants of choice.
Step 1: Selecting Pitchers
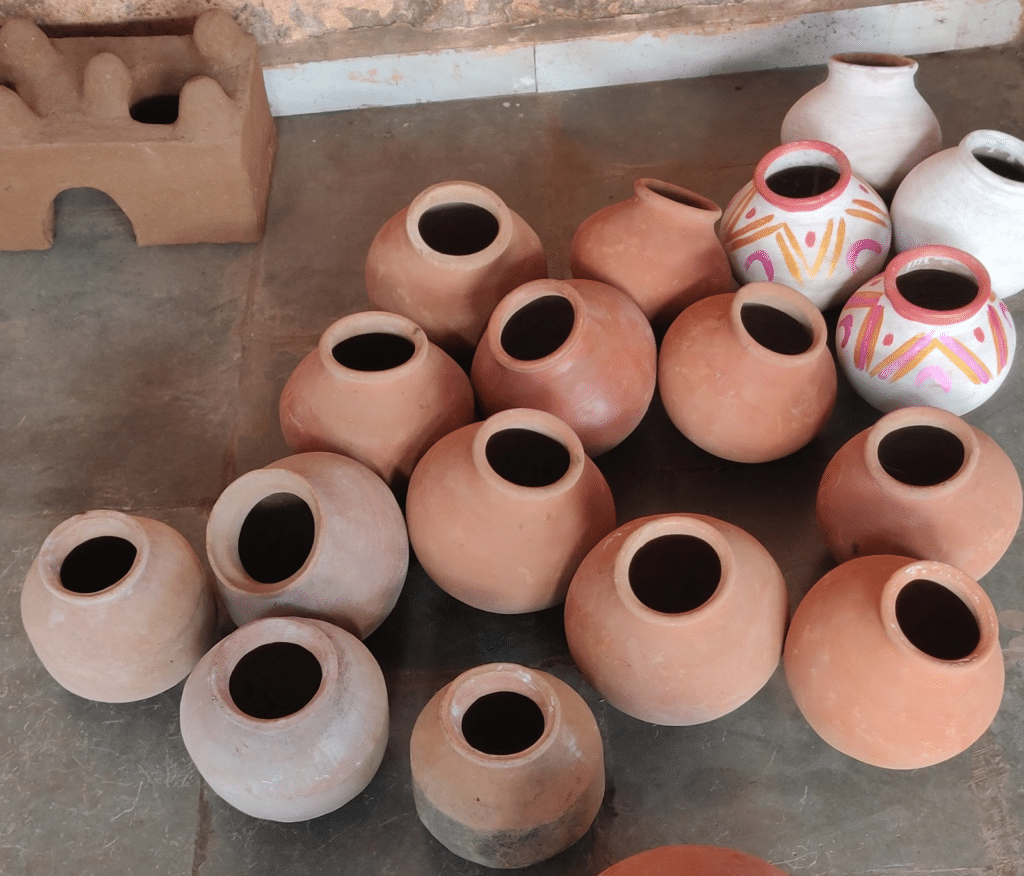
Based on the root zone and age of plants, the size of the pitcher needs to be selected accordingly.
For mature trees, a 15 to 20-ltr pitcher can be used. For annuals, 10 to 15 ltr should be enough. The size of the pitcher also depends on your soil type and your bandwidth to fill the pitchers, go for bigger pitchers if you wish to have a longer refill frequency.
Also, sandy or sandy loam soils will soak in water faster and clay-rich soils can lead to clogging of pores sooner. This can be managed by mixing compost and other organic matter that help improve the texture and porosity of soils.
There is no ground rule and selecting the exact size comes with experimenting and observing only.
Tip: Even though traditional pitchers are made in a particular shape, one can even ask the local potters to make elongated cylindrical pitchers which will go deeper than wider.
Step 2: Digging Pits
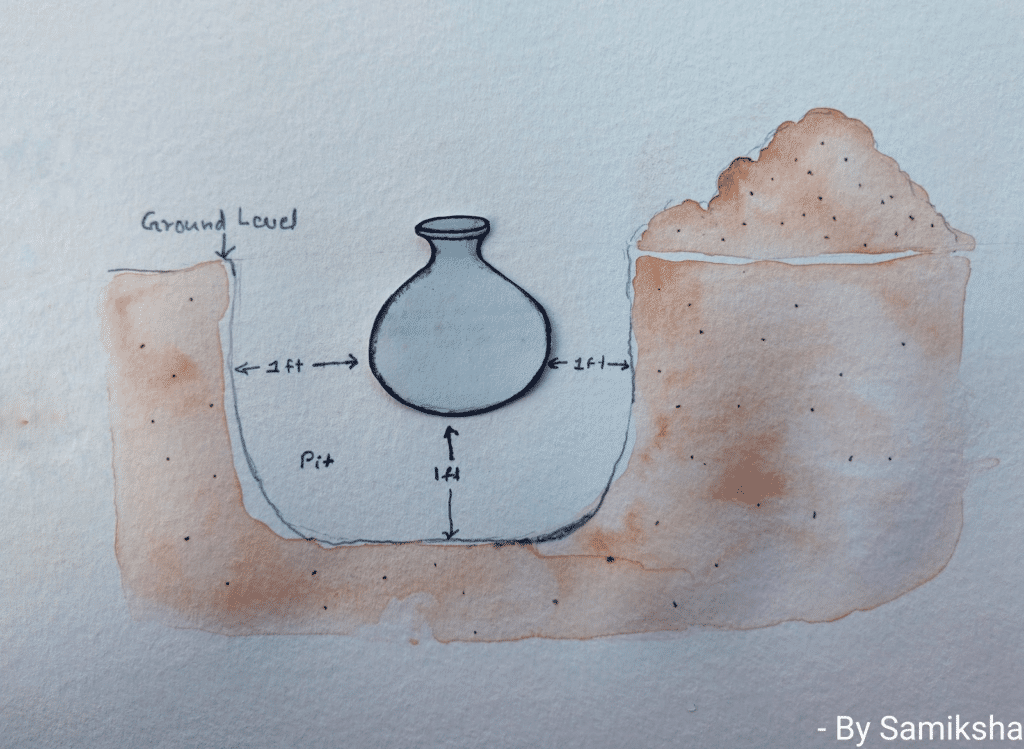
The dimensions of the pit can be such that there’s a minimum of 1ft of areas around and below the pot, this is done to ensure enough space to fill in soil around the pot such that there’s direct contact between the surface of the pot and living soil that absorbs and retains moisture like a sponge as compared to existing soils which might have too many or too little spaces in-between the particles.
Tips:
- Pile the dug soil carefully on one side for use later.
- Place the pitcher in the direction where you wish to promote root growth.
For perennial trees, make the pit deeper so that you can backfill the pit with compost and soil. The organic matter rich will stay retain moisture better and thus you will have a deeper zone for the roots to access.
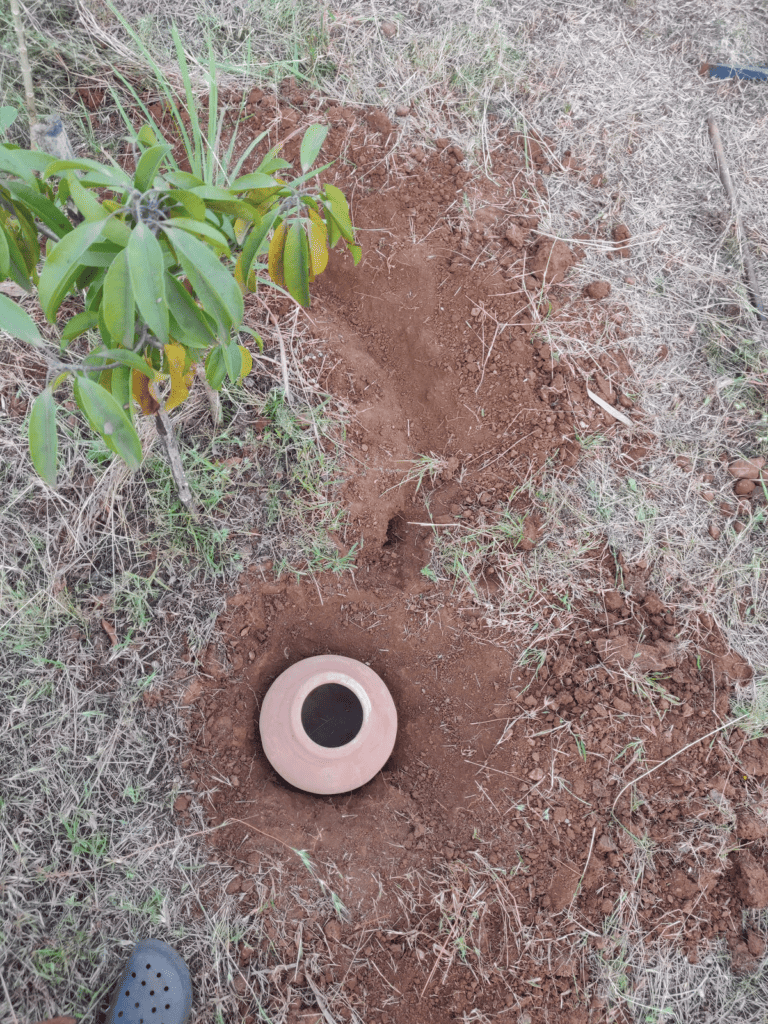
In the case of existing plants, dig a pit near the root zone of the existing plant but not too close to the plant base as we don’t want the roots to accumulate and spread instead.
In the case of annuals, you can avoid digging deeper as the roots will mostly stay in the first few feet of soil.
Optional: You can place or connect the pit to existing watering trench or guild as demonstrated above for growing ground covers or plants that can sustain with limited moisture, these trenches get filled when you refill the pitchers.
Step 3: Backfilling
Crumble the dug soil if clumps exist to get an even and soft texture. Mix it with compost and organic matter which is optional however it helps retain moisture better.
Remove the stones as well and pile them up separately, they can be used to secure the mulch in place later.
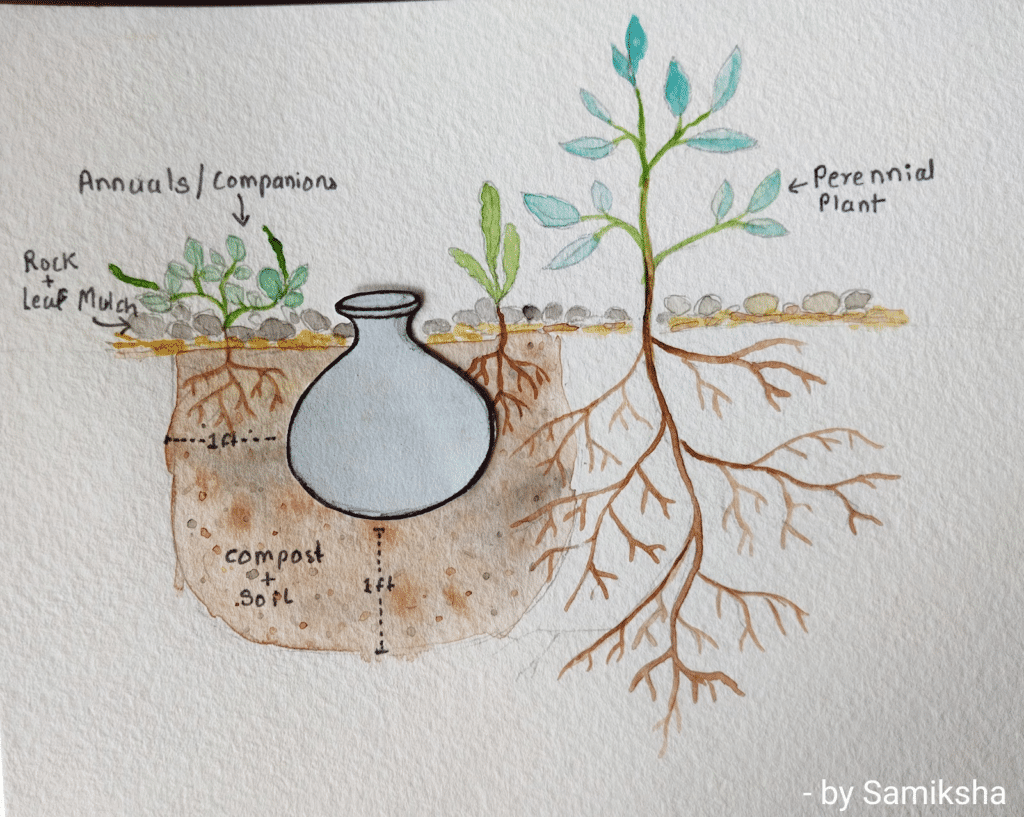
Start backfilling the pit, and fill the base such that once you place the pot, the mouth of the pot always stays above ground level. This helps increase the efficiency of the pitchers by avoiding clogging of the pores due to soil entering in while refilling or other environmental conditions.
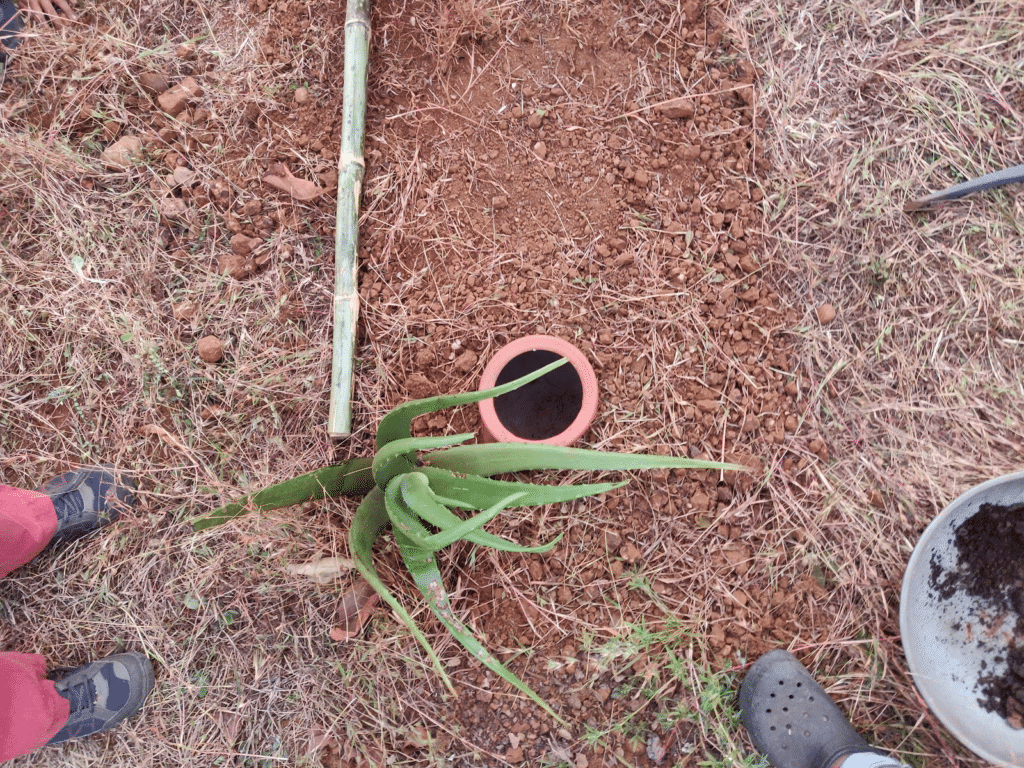
Backfill and press the soil well, not too much such that it gets compacted however apply enough pressure so that the pot is secured.
Step 4: Mulching & Watering
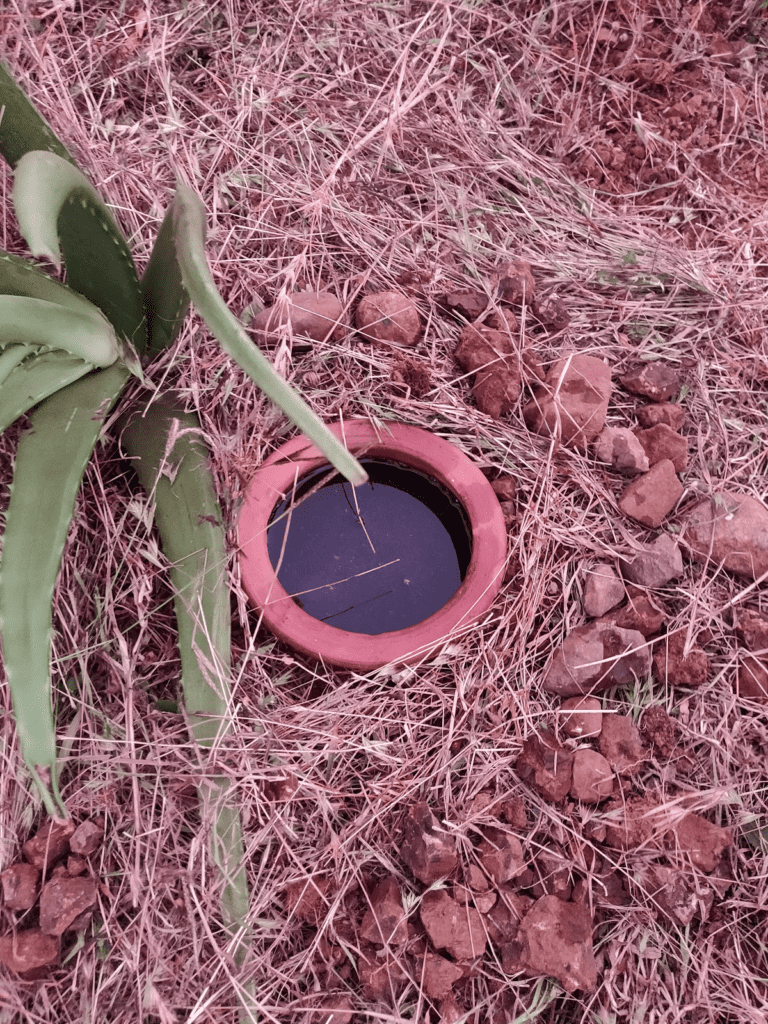
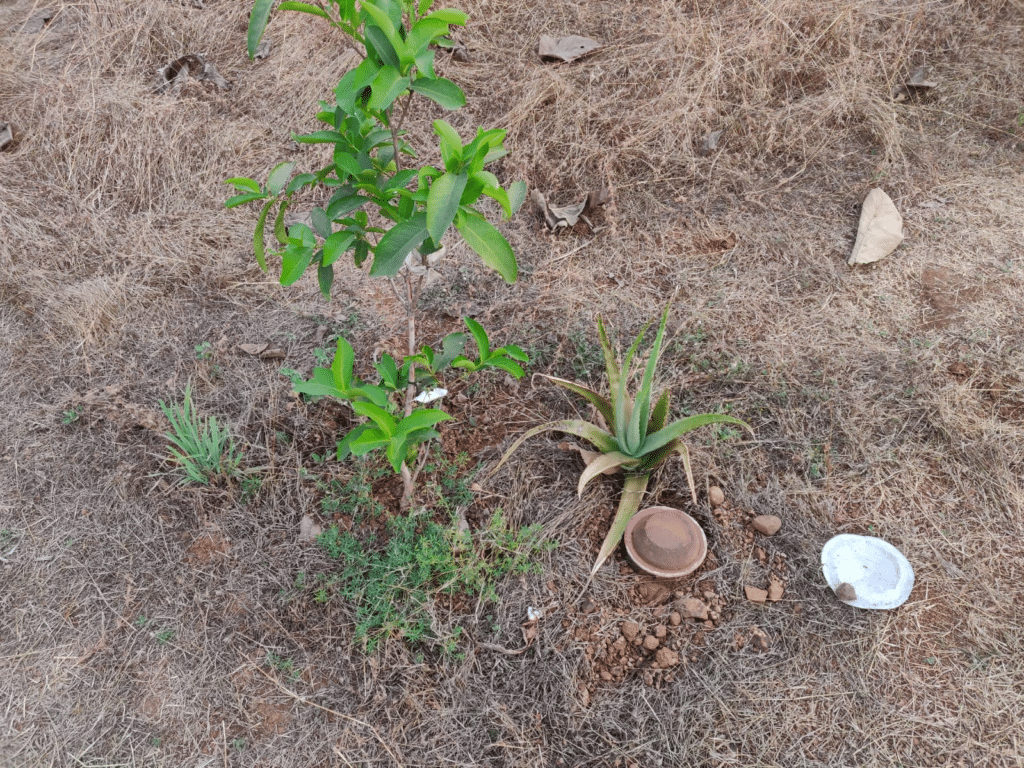
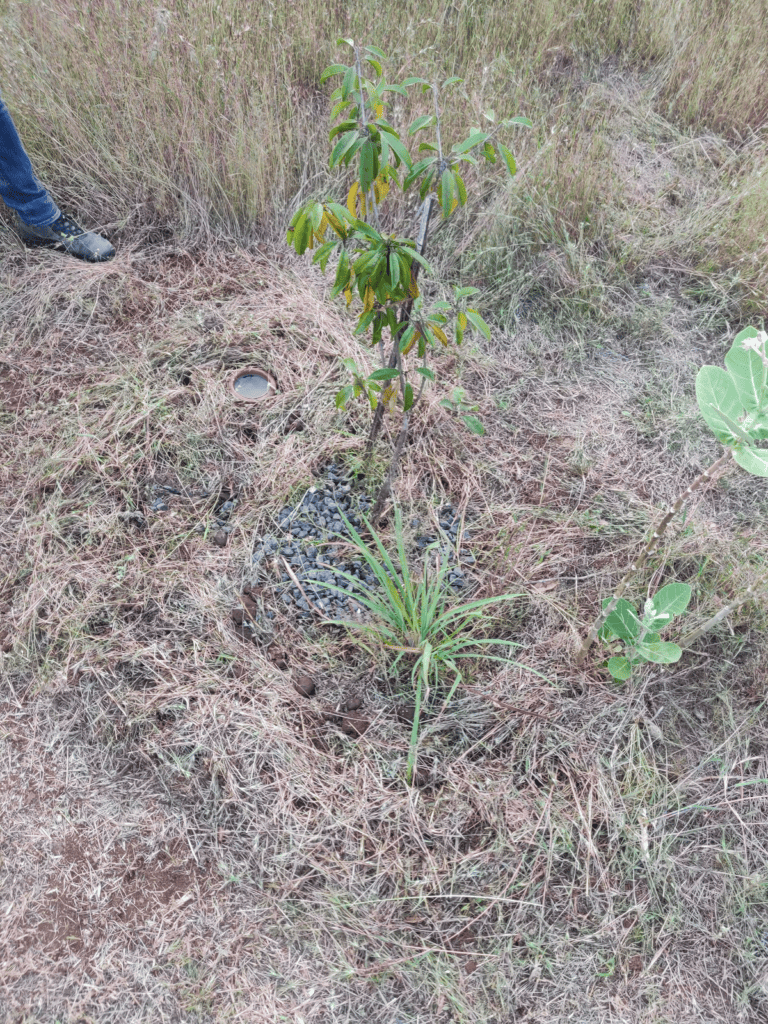
Mulch heavily on top and around the pitcher with dry organic matter like leaves, twigs, cardboard, wood chips, and more and place the stones collected earlier on top of the mulch to secure it.
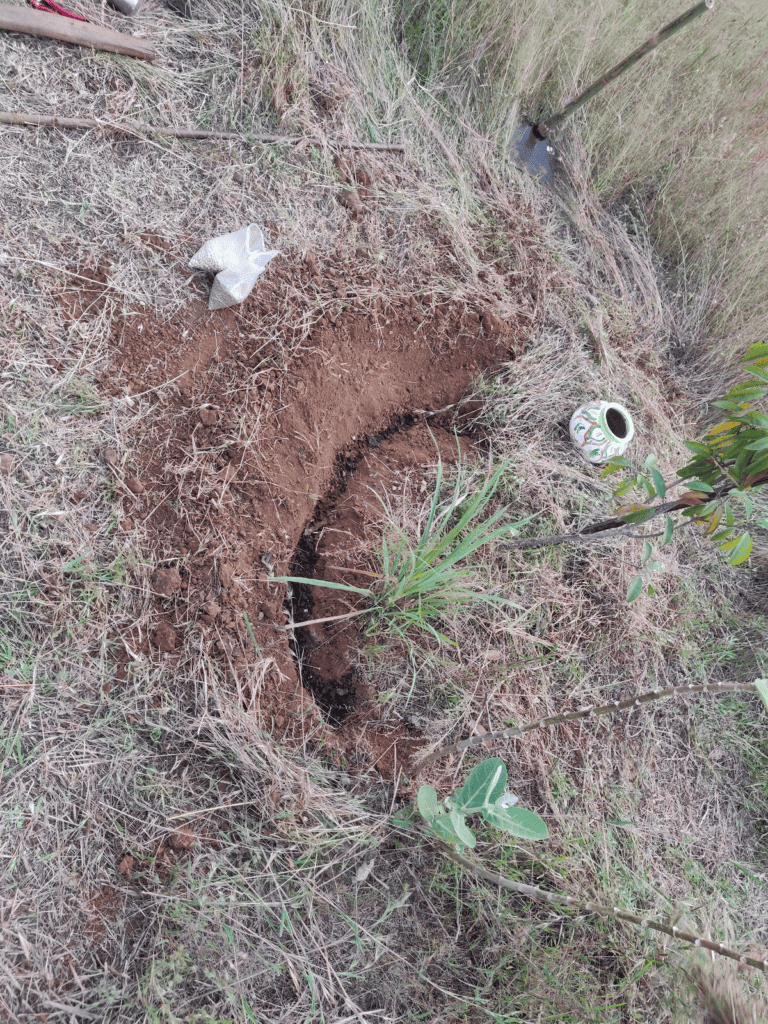 | 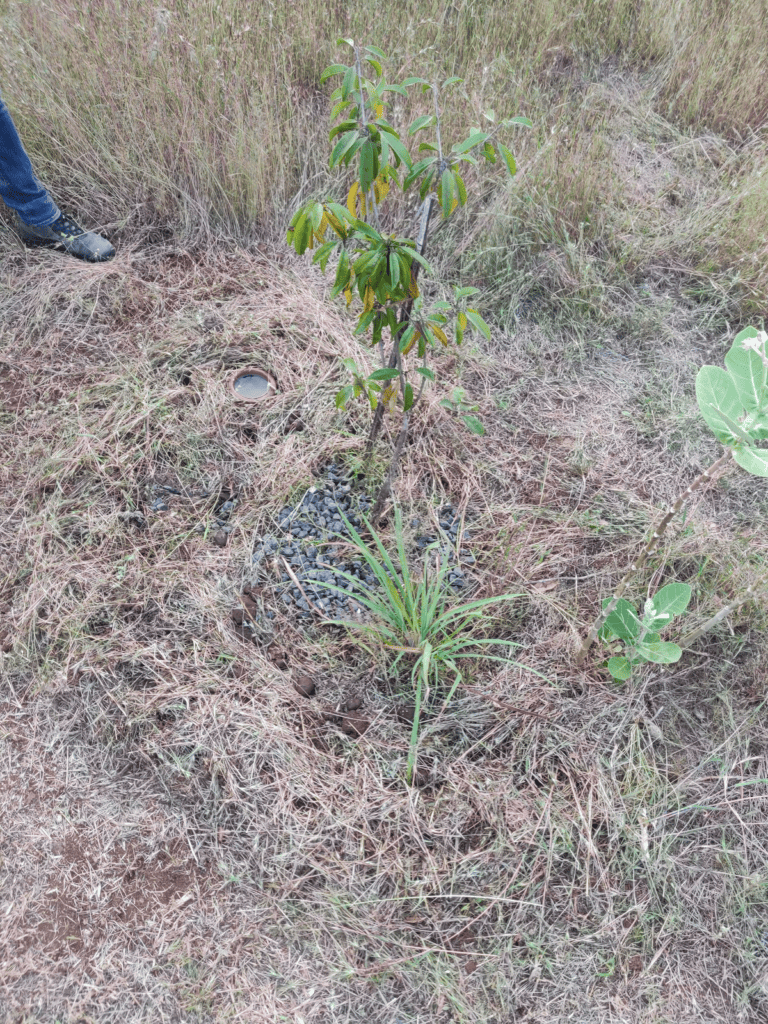 |
You can put compost and mulch the optional trench and secure them as well. The compost will slowly seep into the soil around and also support the companions.
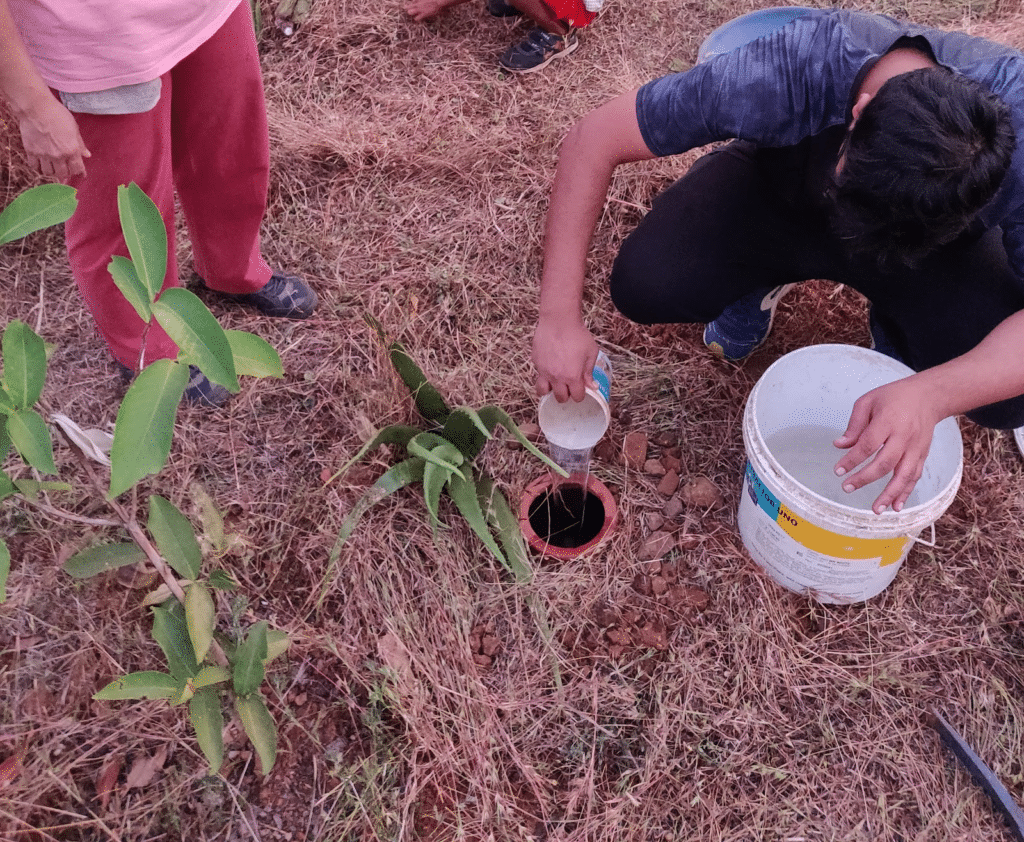
Tip: When filling the pitcher for the first time, fill it entirely up to the top and water the area around it as well. This helps with starting the process and the area becomes saturated with moisture. Now as the plants around start using moisture from the soil around the pitcher, the water starts slowly seeping through the pores into the soil and the cycle begins.
Step 5: Planting
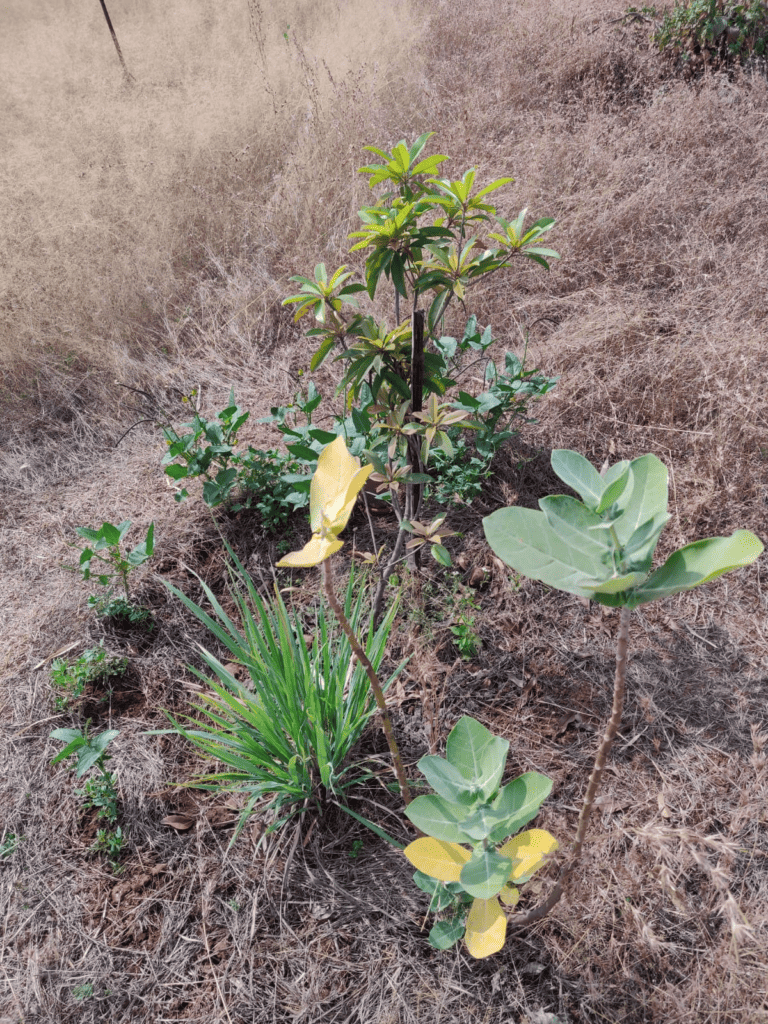
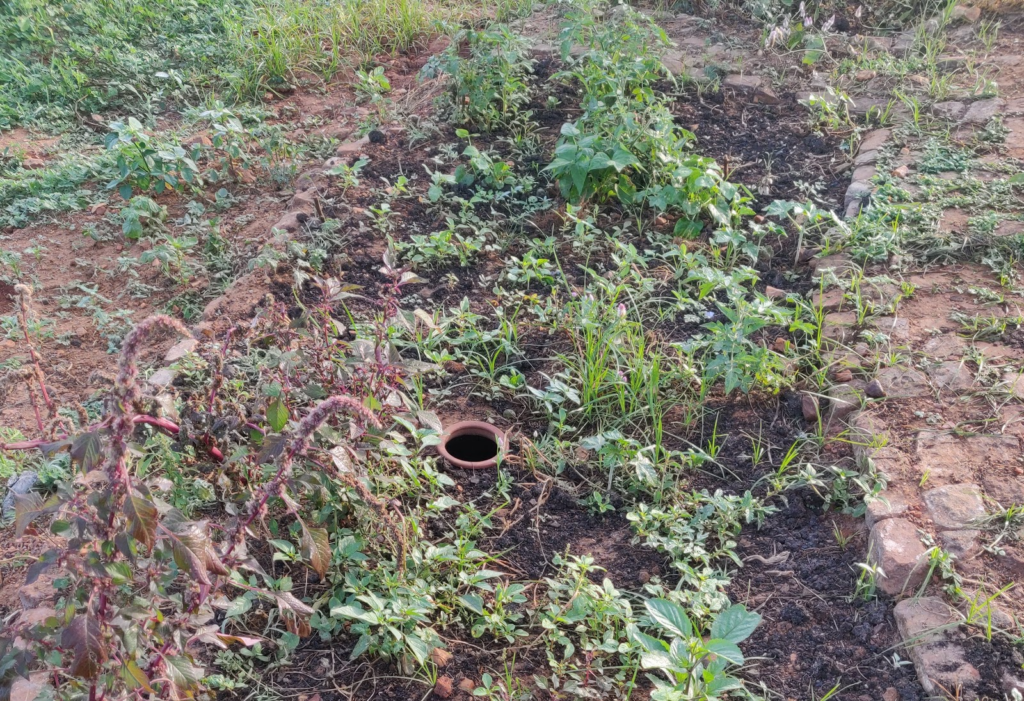
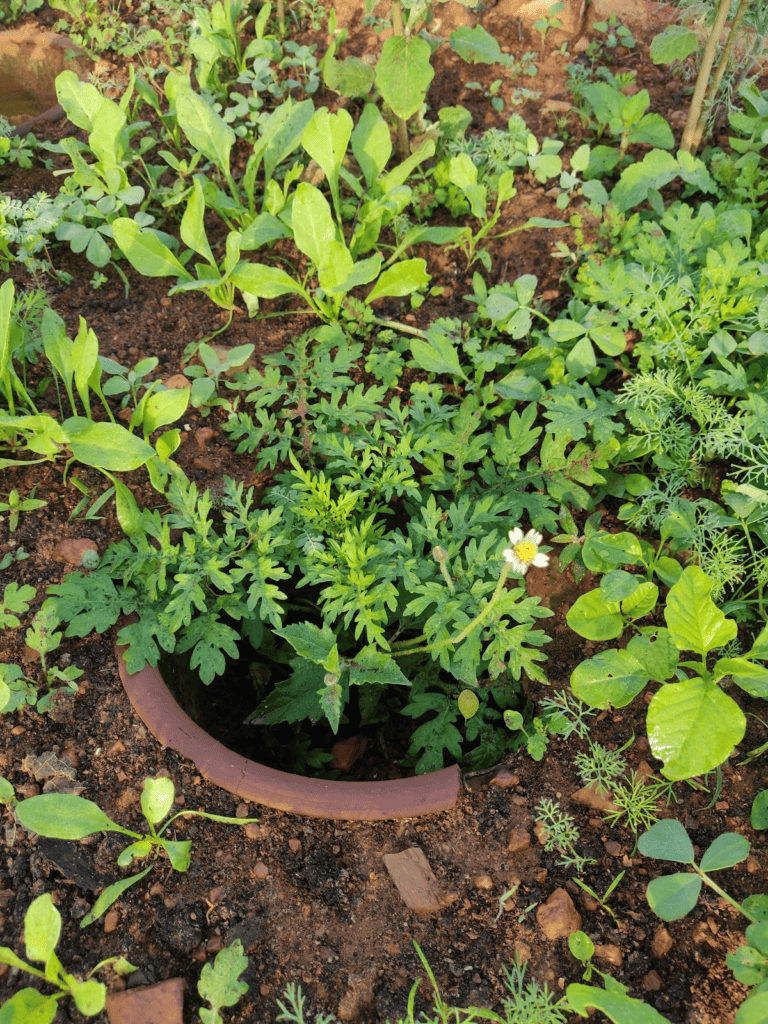
You can plant annuals and companion plants like beans and other cover crops immediately around the pitcher in the freshly dug compost-rich soil.
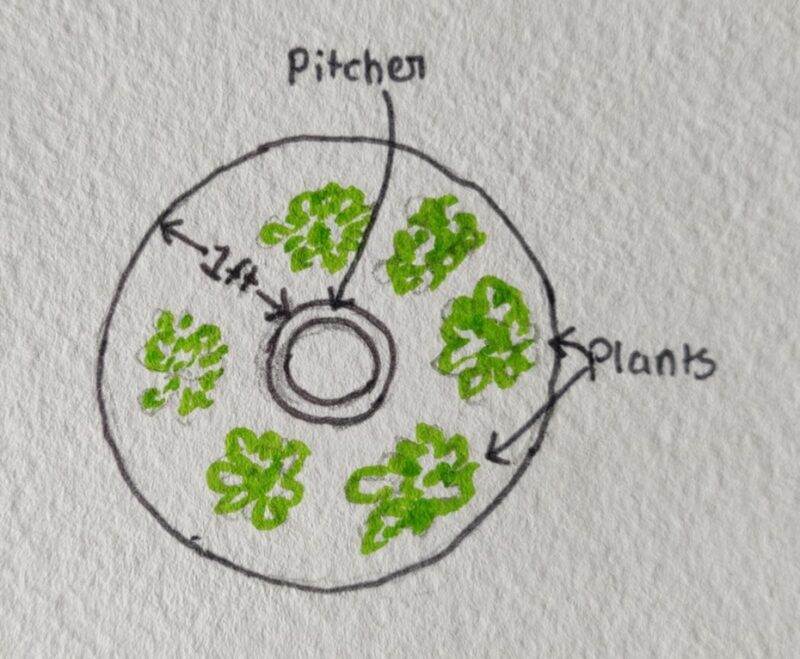
In the case of using pitchers in vegetable beds, plant vegetables that require constant moisture right around the pitchers in the 1 to 1.5 ft. area which will stay moist and drought-tolerant varieties in the outer circumference.
 |  |
Step 6: Observing and Interacting
Post-first irrigation, take time to observe how long it is taking for the pitchers to dry up.
When the pitcher is filled, the surrounding soil pores are moist and stay in the same state as long as the pot contains half or less than half levels of water and are refilled before they dry up entirely. Thus, observation in the initial stage is important as to how much time it is taking for the pots to dry up to 20 to 15% of their capacity, and plan your refilling schedule accordingly.
Traditionally the refilling is done by carrying water from the source in pots or buckets, now hose pipes are used as well.
Important: Avoid letting the pots dry up completely as this affects the cycle and refill as soon as they reach 15 to 10% capacity.
Maintenance and Care:
- Always keep the mouth of the pitchers covered with lids to avoid them from turning into a breeding ground for mosquitos.
- Remove the pitchers from the ground during the frost state in colder climate zones as the terracotta might crack.
Alternative Variations:
Adding a wick
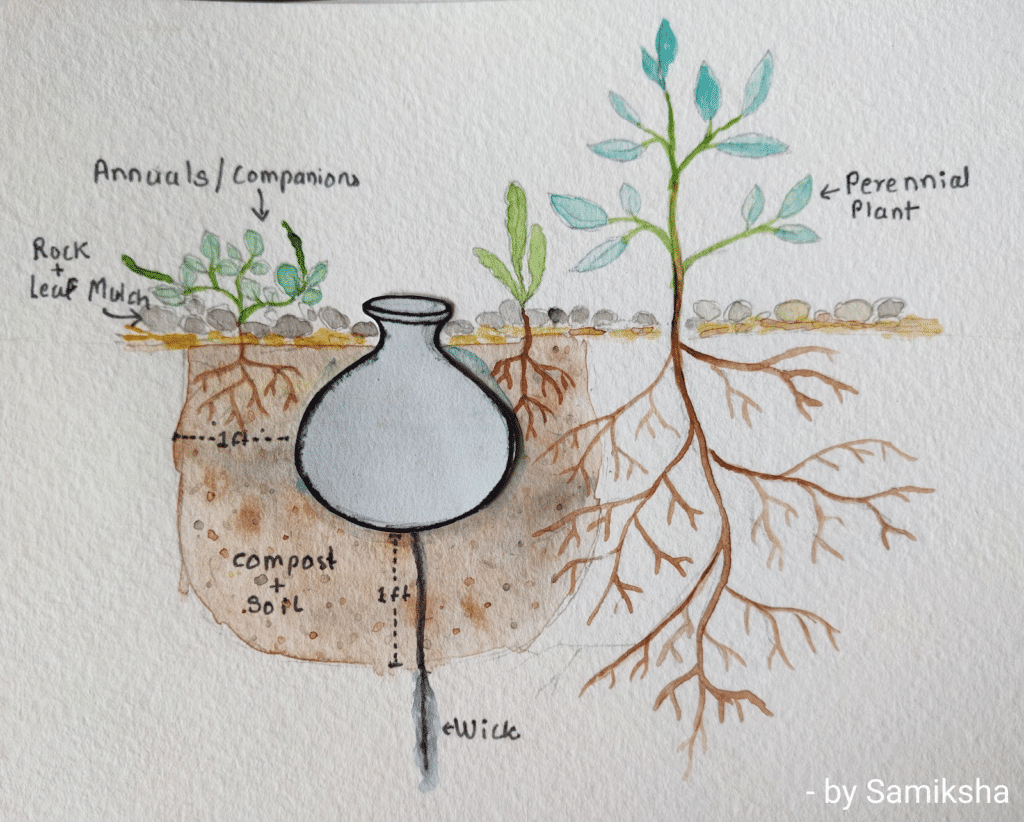
A wick is added to the pot by making a hole along the bottom and securing it tightly by putting a knot inside the pot so that there’s no major leakage and to avoid plant roots entering the pot.
The wick can either be let deep into the ground by digging a narrower trench, this is done for deep root watering.
In the second scenario a trench is made around the plant and the wick is passed through it ad buried, this helps supply moisture around the plant in all directions. I have sahred links to 2 videos at the end of the article in the reference section for this method.
DIY Pitchers Tip
In case of the unavailability of traditional pitchers, you can use unglazed terracotta planting pots as pitchers as well. You can either seal the bottom drainage holes with gorilla glue or you can put a wick through them and seal them as well. The evaporation will be higher due to the wider mouth and it would need frequent filling as compared to terracotta pitchers with narrow necks.
Some Limitations
Buying pitchers is affordable in localities where local potters use local materials to make them. Sourcing pitchers from expensive or long-distance sources makes it expensive and unsustainable.
Limited life as pots get clogged or break post 5 to 6 yrs and the porosity reduces with usage.
Conclusion
Overall, pitcher irrigation is a simple and effective method ensuring moisture retention and targeted rootzone irrigation. Even though the science behind pitcher irrigation is not been fully explored and studied, it has been used successfully for ages and remains a practical, affordable and sustainable technique.
And with the increasing degradation of agricultural land, it becomes important to experiment and shift to energy-efficient regenerative techniques and pitcher irrigation has the potential to be a part of this solution, it needs to be implemented, experimented and improvised upon.
I hope this article and insights inspired you to experiment with pitchers in your gardens 🙂
References
- Khurram, Ahmed (2020). How to install Clay Pot Pitcher Irrigation Technique, Permaculture. Retrieved from https://youtu.be/VNPv3P40rN0
- Patta, Nahin (2016). Permaculture DIY: Using clay pot pitcher for fruit tree planting. Retrieved from https://youtu.be/xVEdQsQNzk8
- Shekar, Raj (2009). Pitcher irrigation – A method that uses round earthen containers for growing saplings. Retrieved from https://www.indiawaterportal.org/articles/pitcher-irrigation-method-uses-round-earthen-containers-growing-saplings
- Teegala, Praveen (2015). Permaculture – Pot Irrigation. Retrieved from https://youtu.be/YxwqvdUSQII
- Wikipedia (2022). Fan Shengzhi shu. Retrieved from https://en.wikipedia.org/wiki/Fan_Shengzhi_shu


