An iconic beach plant, coconut palms provide a bounty of resources. They are a must-have plant in a tropical permaculture garden. From trunk to nut, you can utilize every part of the coconut palm on your farm. This versatile palm can feed, clothe, and shelter you, so why wouldn’t you want to grow it?
Unfortunately, growing coconuts can be challenging despite their ability to thrive in harsh coastal conditions. But don’t worry. We’ll explore how to grow and care for coconut palms so you, too, can harvest a bounty of these beautiful nuts. We’ll also cover how to harvest and utilize this valuable permaculture plant.
So hold on to your hats as we delve into all the benefits of this familiar yet exotic palm.
The Amazing Coconut Palm
We tend to associate coconut palms, Cocos nucifera, with dreams of tropical beaches. And there is a reason for that. Coconut palms are one of the few plants that thrive in sandy soil. Not only that, this incredible palm can actually absorb salt water and convert it to sweet drinkable water. The ocean easily transports these floating seeds, helping to spread them along the coastline.
But the ocean isn’t the only way coconut palms migrate. Coconuts were a staple for early explorers and travelers by sea. They were often found on boats because they provided a great source of fresh water when sailors were far from land. These early sailors and explorers helped spread coconuts as they left fertile husks behind on beaches.
Luckily for tropical permaculturists, they can flourish in places away from the beach as well. While they don’t need to grow on the shoreline, they do need the tropical heat and humidity to thrive, so the only places you find coconuts outdoors in the US are in Florida and Hawaii. If you don’t live in a tropical zone, you can try and grow a coconut palm in a pot indoors, but it likely will never produce any coconuts.
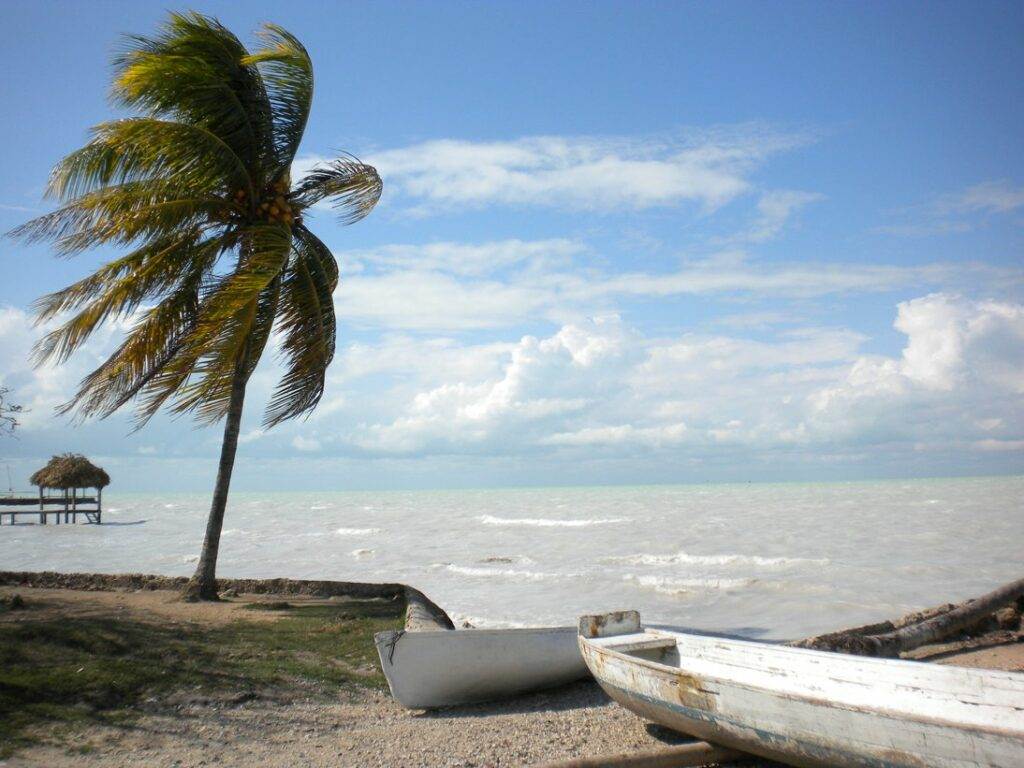
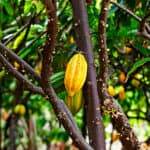
Coconut trees are long-lived and can grow up to 80 – 100 feet tall. However, there are dwarf varieties that reach less majestic heights. Whether tall or dwarf, they are easily recognized by the thin trunk without any branches and long, pinnate leaves at the top. While some coconuts grow straight, you often see them leaning at what appear to be precarious angles. However, rarely will you ever see a fallen coconut tree. Their flexible trunks and dense root structure give them a unique ability to withstand wind.
Coconuts take a long time to mature, so expect to wait five to ten years before you can harvest. But once your coconuts begin to fruit, expect each coconut tree to produce around fifty to 200 coconuts a year. That number may seem like a lot, but as we’ll explain, coconuts are super useful. If you want to ensure you have an ample supply of coconuts for all your needs, you will want to plant a fair number of coconut palms.
Let’s Plant Some Coconuts
Coconut palms are propagated by coconuts. That’s right, that delicious nut full of water and meat will grow into a new coconut palm. So if you want to grow coconut palms, you can’t eat all the delicious coconuts. You need to save some for sprouting. It takes quite a bit of time from when the first coconut starts to grow on the palm and when it is ready to plant. So be patient.
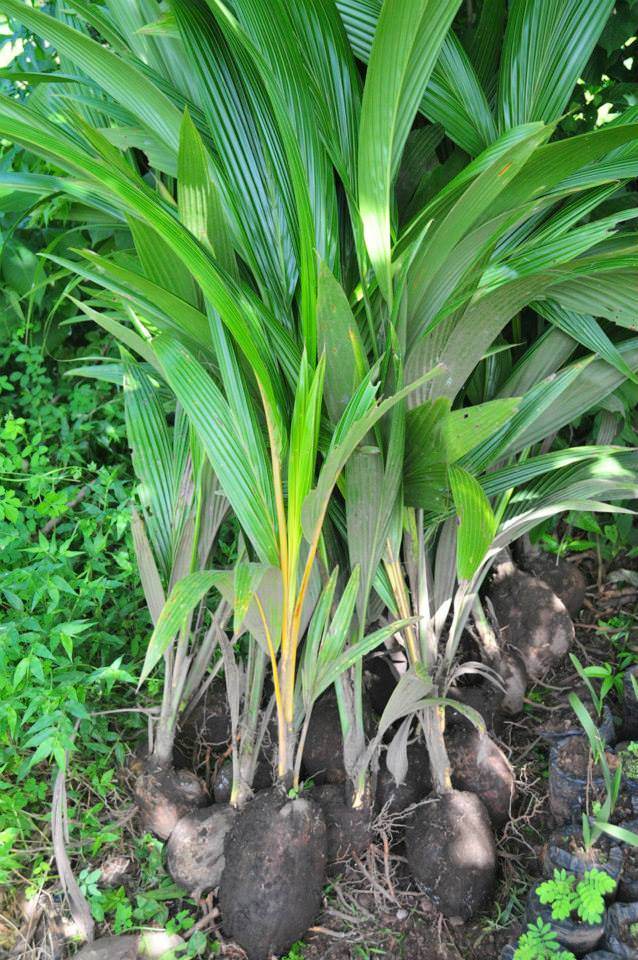
Eventually, after the outer coating has become brown and shriveled, a small green shoot will sprout from your coconut. I usually let this occur naturally under my coconut trees and plant already sprouted coconuts. However, if you aren’t able to find an already sprouted coconut, you can jump-start the process.
Look for a coconut that is brown and shriveled on the outside. Then give it a shake. You want to hear water sloshing around inside the shell. Once you have selected your coconut, you want to soak it, husk and all, for two to three days. After soaking, it is ready to plant. You want to place the coconut on its side. Only cover about a third of your coconut with soil and leave the rest exposed to the air.
While coconuts require a humid environment, they don’t really like to be waterlogged, so select a location with well-draining soil, more sand than clay– remember, coconuts can grow in beach sand. Water your coconut regularly. It may not seem like anything is happening for a long, long time but don’t give up. The earliest you can expect to see signs of germination is in three months, but it can take up to six months for your coconut to germinate in less than ideal conditions.
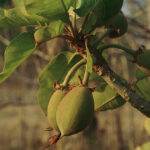
Eventually, you will see roots and a green spear emerge from the husk where it had previously been attached to the tree. Then a leaf will appear. Initially, the tree will produce individual leaves, but as the plant grows, it will develop the distinctive frond-like leaves and trunk we associate with this iconic tree.
Keeping Your Coconut Palm Healthy
Coconut palms may thrive in climates that are hostile to other trees, but they are not without complications. I have lost many a coconut palm over the years. It takes a long time for coconuts to germinate, so it is truly heartbreaking to see them die, sometimes after years of careful tending. So let’s talk about some of the key challenges you face growing coconuts.
Water
The biggest hurdle we struggle with on our property is water. I live on the edge of the dry and humid tropics, where we have a six-month dry season when it does not rain. Coconut palms require a lot of water to survive the dry season here. A coconut palm can consume between 4 – 30 gallons of water a day, depending on its age and variety. While I wouldn’t generally consider a non-drought tolerant plant to be a great choice in a permaculture garden, coconuts are so useful I’m willing to overlook their excessive water consumption.
One way I offset their water consumption is to water my coconuts with any leftover salty brines I have in my kitchen. Normally, I shy away from adding salt to my garden as salt generally inhibits plant growth. I equally don’t like to pour it down my drain. But the coconuts can process it just fine. While coconuts don’t require salty water to thrive, many people say giving your coconut trees salt will help them grow faster and produce sweeter water.
Mineral Deficiencies
In addition to suffering from drought, coconut palms can be afflicted with mineral deficiencies. Some of the minerals your coconut tree could be deficient in are nitrogen, potassium, magnesium, and boron. You can recognize the various vitamin deficiencies by examining the leaves of your coconut palm. Luckily, vitamin deficiencies can be treated by adequately amending your soil.
Disease
Coconut palms also can be stricken with disease. Lethal Yellowing, Bud Rot, and Thielaviopsis trunk rot are common diseases affecting coconut palms. Lethal Yellowing is caused by a microscopic phytoplasma, while the other two are fungal diseases. In almost all cases, if your coconut palm contracts one of these diseases, it is fatal.
Pests
Besides deficiencies and diseases, coconuts can suffer from pests as well. While there are
insects that attack your coconuts, oddly enough, the most problematic pest we suffer from with our coconuts is squirrels. That’s right, squirrels- the cute tree-climbing mammals that like to eat nuts. While you may not think of squirrels as tropical animals, trust me, they’re here.
While squirrels don’t harm your trees, they will happily consume all your coconuts while they are still hanging on the tree. So when you go to harvest, all you find are empty husks. I have yet to find a solution to the squirrels besides time. My goal is to eventually grow enough coconuts (and other fruits) that there is enough for both me and all the wild creatures that love them too. In the meantime, it’s super frustrating to go to harvest a coconut only to find they are all empty, especially given how long they take to grow and how difficult they are to harvest.
So, let’s talk about harvesting coconuts.
You Don’t Have To Be a Monkey to Pick Coconuts
In the weird places my research takes me, I came across this crazy fact— in Thailand, coconut farmers use monkeys to harvest their coconuts. They do this because a male monkey can pick 1,000 coconuts a day while a male human can only pick around 80 coconuts. Since we’re permaculture practitioners and not large-scale Asian coconut plantain owners, I think 80 coconuts a day should be plenty. So, you don’t have to be a monkey to pick coconuts.
But loving to climb certainly helps if you plan on harvesting lots of coconuts. As we mentioned, coconut trees can reach heights of up to 100 feet. Traditionally people harvest coconuts by shimmying up the trunk. Once there, you can gather all the coconuts you want. Use a sharp knife– or a machete is even better– to cut the coconuts from the tree. Using a ladder is a good approach if you don’t want to shimmy up the trunk.

Often you will see people growing multiple coconuts of varying ages very close together. The idea behind this is that when the oldest tree becomes too high to harvest easily, you chop it down. Then you have another younger tree planted close by, ready to harvest.
Another solution, if you don’t want to climb like a monkey, is to stick to planting dwarf varieties. These varieties don’t reach the soaring heights that other coconut trees do.
Now, it takes about a year for a coconut to fully mature on the tree, but depending on what you plan to do with it, you may want to harvest it sooner. However, if you haven’t been watching your tree, it’s hard to say which are the young coconuts and which are the older coconuts. If you look closely, you will find that more immature coconuts tend to be more brightly colored.
The coconuts themselves aren’t the only thing you can harvest from the coconut palm. As we mentioned before, the whole plant is valuable. You can collect the leaves, too. Always start from below to remove the oldest leaves first. Cut the leaf close to the trunk using a sharp knife or machete.
To harvest the coconut trunk, you need to kill the tree. I wouldn’t advocate growing coconuts with the intent to harvest just trunks. However, many people choose to cut down their coconut trees when they get too tall to reach the top easily. I mean, really, who wants to climb 100 feet for a coconut? In that case, it’s best to use every part of the tree, and you should absolutely plan to harvest and utilize this part of the palm.
So Many Ways to Use Coconuts
It truly amazes me all the multiple uses the coconut palm has. If you have a tropical permaculture farm, they are well worth the work it takes to keep them. You can use all parts of this palm, from the nut to the leaves to the trunk. So let’s look at some of those uses.
Culinary Uses
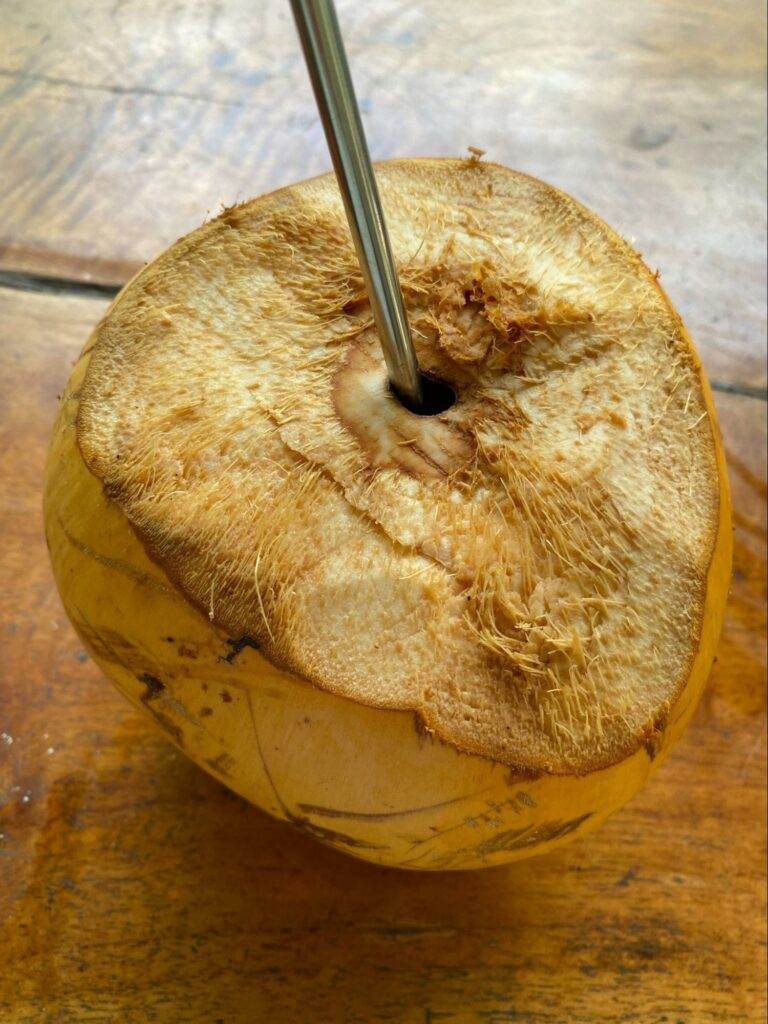
Coconut features in many cultures’ culinary traditions, and it’s no wonder why. Not only are coconuts delicious, but they are super healthy for you. The easiest way to consume coconut is to crack open a young coconut and drink the refreshing coconut water inside. While I said, this is “the easiest way,” opening a coconut is only easy once you learn the knack for it.
While young coconuts are full of water, the profile inside the nut changes as they age. Over time coconuts will have less water and more meat. However, age isn’t the only factor affecting what’s inside your coconut. There are two primary varieties of coconuts, Nui kafa and Nui vai. If you want more water than meat, you should look for the Nui vai coconuts. The Nui vai are rounder, whereas Nui kafa are triangular and oblong and contain more water.
But don’t throw away your coconut after drinking the water. There’s more you can do with it. After you finish all the water, crack that baby open for the sweet coconut meat inside. Depending on the age and variety, you will find anything from a thin sliver to a thick chunk of pure white flesh inside that hard shell. Now, you can eat that coconut meat straight from the shell if you want, or you can process it in tons of different ways.
You can use coconut meat to make coconut milk and cream. There are a variety of different processes out there, but here’s how we make it. First, you collect the meat from a number of coconuts. Next, put them in a powerful blender, like a Vitamix, and add boiling water. (Make sure your blender can handle hot liquids, I broke the pitcher for my Ninja by processing too many hot things in it.) Blend the coconut meat and hot water until it is pulpy.
The next step is to press out the liquid. We poured everything from the blender into a piece of cheesecloth (real cheesecloth– not the gauzy stuff they sell at the grocery store). You probably want to wear heatproof gloves during this process because it is HOT. Now you need to press out all the liquid from the pulp.
We started by squeezing by hand, but I said it was HOT and super messy that way. In the end, we built a simple press by placing a hinge between two boards. We placed the cheesecloth bundle between the two boards with a bowl beneath to catch the coconut milk. I recommend doing this outdoors as it is very messy.
We process each batch of meat twice in the blender to ensure we suck out every little drop of coconut milk there is. So repeat the process. Once you finish, you have your own homemade coconut milk. You can use it to cook with, add it to smoothies, or just drink it.
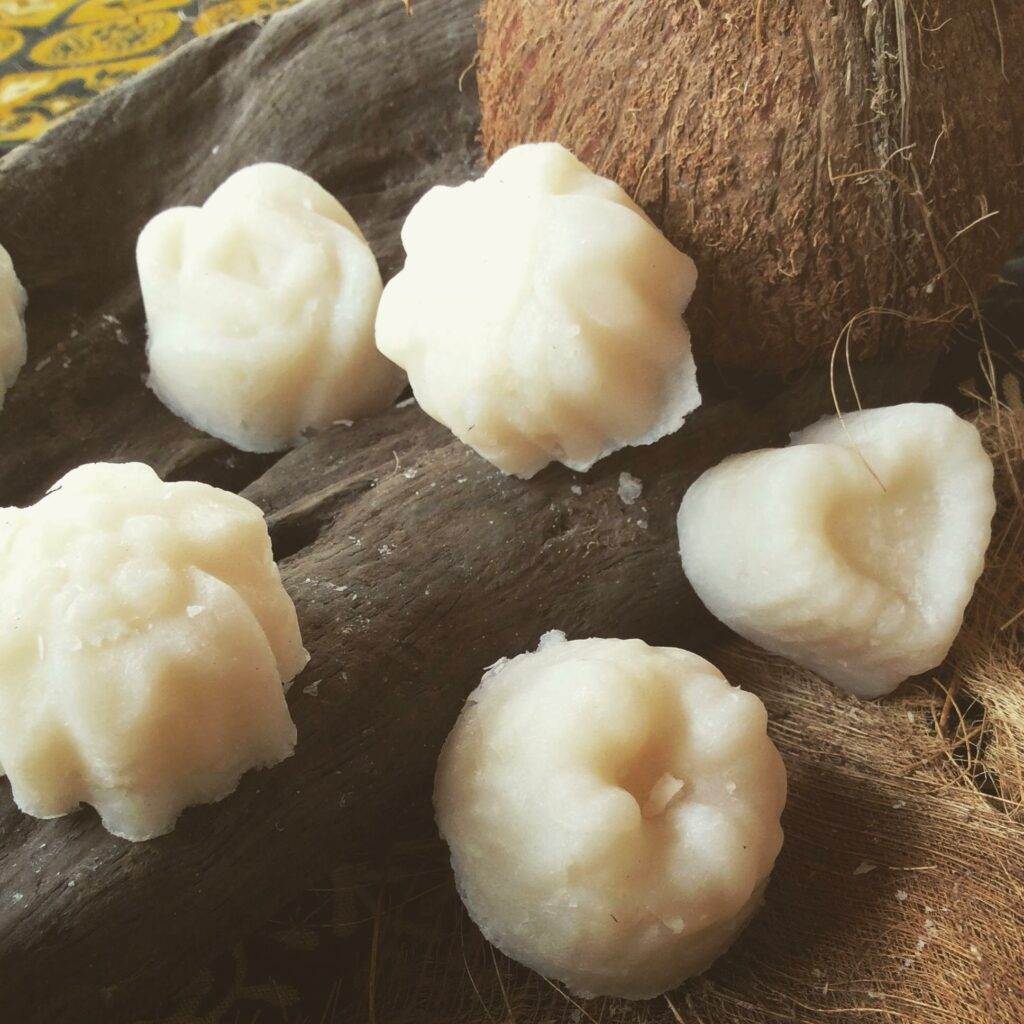
You’ll find that you have lots of finely ground-up coconut leftover. I take this and throw it in my solar dehydrator. Once dry, you can store it in jars. Then you can grind it up finer if you like and use it like coconut flour. Or my favorite thing to do is to use it to bread things. We make these breadfruit balls that are then rolled in this shredded coconut bits and then fried. Absolutely delicious!
Coconut Oil
Another way you can process your coconuts is to make coconut oil. Coconut oil is not only great to cook with, but it also is fantastic in soap and other cosmetic products. It’s possible to produce your own coconut oil at home. We’ve done it. There are two common methods, and we’ve tried both.
One method involves working with coconut milk, while the other works with copra, which is just a fancy name for dried coconut meat. While both methods present challenges, they are not impossible. However, they are way more complicated than the youtube videos lead you to believe.
We started with the coconut milk method. This method involves cooking your coconut milk down for hours on the stove. Eventually, the water will cook off, and the oils will separate from the solids, giving beautiful coconut oil. The people on youtube will tell you it’s a quick process– I’m here to tell you it’s not. However, I would say the satisfaction of having made my own coconut oil in this manner was well worth it.
In the end, though, we decided it was too much work (and consumed energy) to cook down the coconut milk for oil. So we bought a small countertop oil press to try instead. This press allowed us to make our oil from copra rather than from coconut milk, eliminating many hours of processing.
Again, youtube videos tell you simply place the dried coconut meat into the press, and viola, there’s your coconut oil. While that’s true in theory, like many things, it’s more complicated in practice. With this method, the biggest challenge we faced was drying out the copra before it grew mold.
Our farm is 100 percent solar-powered, so we rely on a solar dehydrator we built rather than using an electric one. The solar dehydrator wasn’t powerful enough to dry out large chunks of coconut meat before they would mold. Ultimately, we found we needed to shred the meat with a tool we affectionately refer to as “the coconut wheel of death.” And even with the shredded meat, we got the best results by slowly drying our coconut in our oven rather than the dehydrator.

Once we got passed the drying issue, using the machine to press the oil was pretty straightforward. You just drop the copra into the hopper on top. The oil comes out from below, and the solids pass out the front looking like dry, crispy ringlets. Easy-peasy.
After all our coconut oil experiments, we did some math to decide if it was all worth it and asked was coconut oil was something we could look to produce. And here’s what we found.
- The quickest my husband could open, peel, and shred a coconut was five minutes.
- We averaged one ounce of oil per coconut.
- We need to process 128 coconuts to make 1 gallon of coconut oil
- At 5 minutes a coconut, it takes over 10 hours just to get the coconut meat
Ultimately, we decided that while we may produce coconut oil for our use, the amount of time and labor involved in small-scale production was simply not worth it. That being said, if you are growing your own coconuts, I highly recommend you try and make oil. It gives you a completely new appreciation for how complicated it is to get oil from a plant and why it is so expensive in the store.
Uses of Coconut Oil
The seemingly endless uses for coconut oil spurred our quest to process our own oil. If you think coconut oil should be kept only in the kitchen, think again. I keep coconut oil in my bedroom and bathroom too.
Not that coconut oil isn’t great for cooking. Coconut is an excellent cooking oil but is not perfect for everything because it carries a distinctive coconut flavor. Coconut oil is my go to oil for Asian-style stir-fries. But we use it for more than just that in my kitchen. The fact that it solidifies at a relatively high temperature as well (78 degrees Fahrenheit) makes it a workable butter substitute for plant-based pastry.
A new world opens up when you take coconut oil outside the culinary realm. I use it medicinally and cosmetically. It’s my preferred carrier oil for any herbal-infused oils, salves, and balms I make. I also use it as a base for homemade toothpaste.
If you don’t want to go through the trouble of mixing up toothpaste, you can use it straight up. It’s an ancient Indian practice called oil pulling. To do this, squish about a tablespoon of coconut oil around your mouth, like mouthwash. Ideally, you should swish for 15-20 minutes, but the experience can be rather unpleasant if you haven’t done it before. If you want to try it, I recommend starting with maybe 5 minutes and slowly increasing the time until you reach 15-20 minutes. The idea is that the anti-bacterial properties of coconut oil help kill the harmful bacteria in your mouth that cause bad breath, cavities, and other dental problems.
I also use coconut oil to make homemade soap. Coconut oil is one of the few oils that creates a well-balanced soap without adding other oils. While you can use coconut oil alone, some people find it drying, so it is often combined with other oils. While I liked my 100% coconut oil soap, I discovered that my bars lasted longer when I added other oils.
Shells and coir
When you start cracking lots of coconuts open, you suddenly find yourself drowning in the excess coconut shells. At first, all these empty coconuts can seem like a problem, but only until you apply permaculture’s zero-waste philosophy and waste suddenly becomes a resource. Both the hairy outer part of the coconut called coir, and the hard shells are extremely useful.
In order to get to the hard shell of the coconut, you need to remove all that pokey brown hair. While it’s frustrating to get rid of, it’s great to have on hand. Traditional coconut coir was made into fiber for ropes, mats, and brushes. While I’ve watched many inspirational videos on how to make rope from coir, I can’t say I have ever actually done it. The closest I ever got was mashing into a ball and using it to wash my dishes. Let me tell you– coconut coir makes a great sponge.
Coconut coir is also a great addition to your potting soil. You will find it marketed as a more sustainable option than peat moss in garden centers. Unfortunately, the bricks you see in the store will be heavily processed before you get them. However, the coir off your coconuts is not. Adding coir to your potting soil can help your potted plants retain moisture.
Not only can you use coir in gardening, but it also can be used in natural building. The key components in cob and adobe are clay, sand, and fiber. The fibers in the mix help make your building stronger. While coir isn’t the best fiber to use in structural cob as it is relatively short, it works well in finer finishes like plasters and earthen floors.
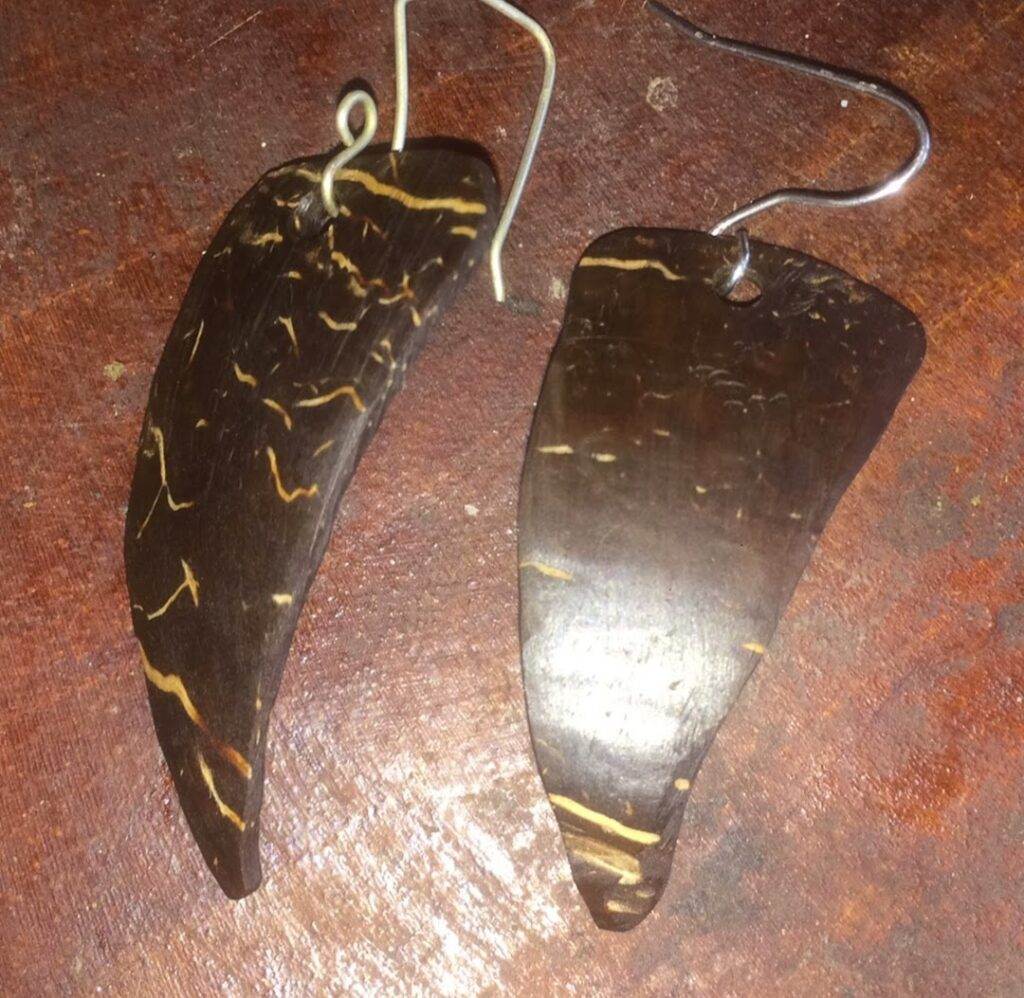
Now that we have multiple uses for the coir let’s talk about what we can do with those coconut shells. Once you’ve removed the water and meat from the inside and the coir from the outside, you are left with a highly serviceable, waterproof bowl. The shell can be left as is or polished to appear more attractive. But you can do more with shells than just make basic bowls out of them. Coconut shells can be carved and polished to create a wide variety of waterproof containers, utensils, and decorative objects, as well.
Now don’t worry if you aren’t a crafty person. While coconut shells are great for ornamentation, they have other practical uses. If you eat a lot of coconuts, you may soon find a mountain of coconut shells on your land. One great way to get rid of them is to make biochar. Biochar is a wonderful addition to help improve your soil and encourage plant growth.
Leaves
So far, we have been talking almost exclusively about how you can use the coconut itself, but the coconut palm provides us with more resources. The fronds are another abundant source of material for use around your farm. Fronds are readily obtained by simply cutting them off the tree. And they are large, easily stretching 4 – 6 feet, if not longer.
You can use these coconut fronds to build yourself a basic shelter. Many cultures use them as thatching material for roofs. Layered tightly together, the fronds can create a waterproof barrier to keep you dry from the rain. You need to replace coconut palm roofs every couple of years as they break down in the elements.
Where I live, it is common to sandwich a piece of heavy-duty plastic between the palm leave layers. This roofing method protects the bottom layer of the palms from any exposure to the elements. So, you need to replace the bottom palms less frequently. Placing fronds on top of the plastic protects increases the longevity of the plastic layer by shading it from the sun. The fronds also improve the aesthetic appearance of your roof. When the sun and rain start to break down that top layer of fronds, you just throw more fronds on top, but the rest of the roof structure remains intact, minimizing time and investment in your roof construction.
In addition to roofs, you can weave the leaves for many different uses. I have only begun to explore the basics of palm weaving. I have done simple weaving to create panels. With this technique, you work with the whole palm leave. Starting with the leaflet closest to where the leaf attaches to the tree, begin to weave over-under each successive leaflet. When you can longer incorporate that leaflet, move on to the next one. Now you weave under-over, performing the opposite action you used with the previous leaflet.
As you work, you may find the ends start to work loose. You will need to continually return to the previous sections to retighten your weaving in the beginning. But as you progress along the leaf, the earlier parts will begin to hold together tightly. I found that every couple of inches of weaving, I would go back and tighten what had worked loose.
You work one side of the leaf and then repeat the process on the other side. When both sides are finished, you will have a tightly woven palm panel. These work great to block the sun and the wind. You can stitch multiple panels together to create basic walls.
In addition to panels, you can weave coconut palm leaves into a variety of different shaped baskets and even palm hats. This is another instance where YouTube can lead you astray. If you watch experienced palm weavers, they can whip together a basket in just a few minutes. However, I can spend hours trying to recreate their work.
When I was trying to learn to weave coconut palm baskets, I worked with both a local teacher and online tutorials and found advantages to both methods. My teacher could reposition my hands and show me exactly where the flaws were. However, with the videos, I could watch and rewatch a particular technique a hundred times if I needed to in order to understand. My teacher was not quite so patient.

Weaving isn’t the only thing you can create with coconut leaves. When you trim your coconut frond, place them in your garden to help shade the ground from the sun and trap moisture. You can use coconut fronds to wrap food, eliminating plastic wrap. People also use them to make brooms, children’s toys, skewers, and many other useful objects. If you start to explore what you can do with the leaves, you will find them a valuable resource.
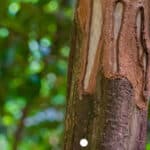
Trunk
Personally, I haven’t used coconut trunks yet, because I haven’t cut any of my trees. However, I always plan for the future and see people using them all around me. They make excellent construction materials. The straight round trunks make them ideal posts for fences and houses. They are also used in furniture making.
Coconut wood is strong and long-lasting. They produce interesting timber with a rich mahogany color. The limiting factor with using trunks in building is their diameter. While the base of a coconut palm may be as large as 30 inches, these towering trunks quickly taper off to a more modest average of 15 inches across.
Traditionally coconut trunks were used to construct not only houses but also boats.
Final Thoughts
With everything the coconut palm provides, it’s no wonder it’s called a miracle tree by many cultures around the world. It seems miraculous that a single tree can give so many essentials. When I first started growing coconuts, I thought just of the obvious uses. I dreamed of fresh coconut water daily from my own farm.
But the more I worked with coconuts, and the more mature my palms grew, the greater my appreciation grew. I could spend my life exploring the bounty the plant provides. From delicious coconut curries to beautiful handcrafted jewelry, there seems no end to the coconut projects I can explore. The only limiting factor at this point is finding the time.
While coconuts are not always the easiest plant to grow, in the end, the hard work getting them established undoubtedly pays off. Now that I have several coconuts established on my land, I’m glad I didn’t give up on this water-intensive tree. For me, growing a permaculture garden is a lesson in patience, and coconut palms are certainly a great teacher. But after the lessons are learned, I find the rewards and satisfaction I achieved priceless. And I hope if you grow coconuts, you do too.