
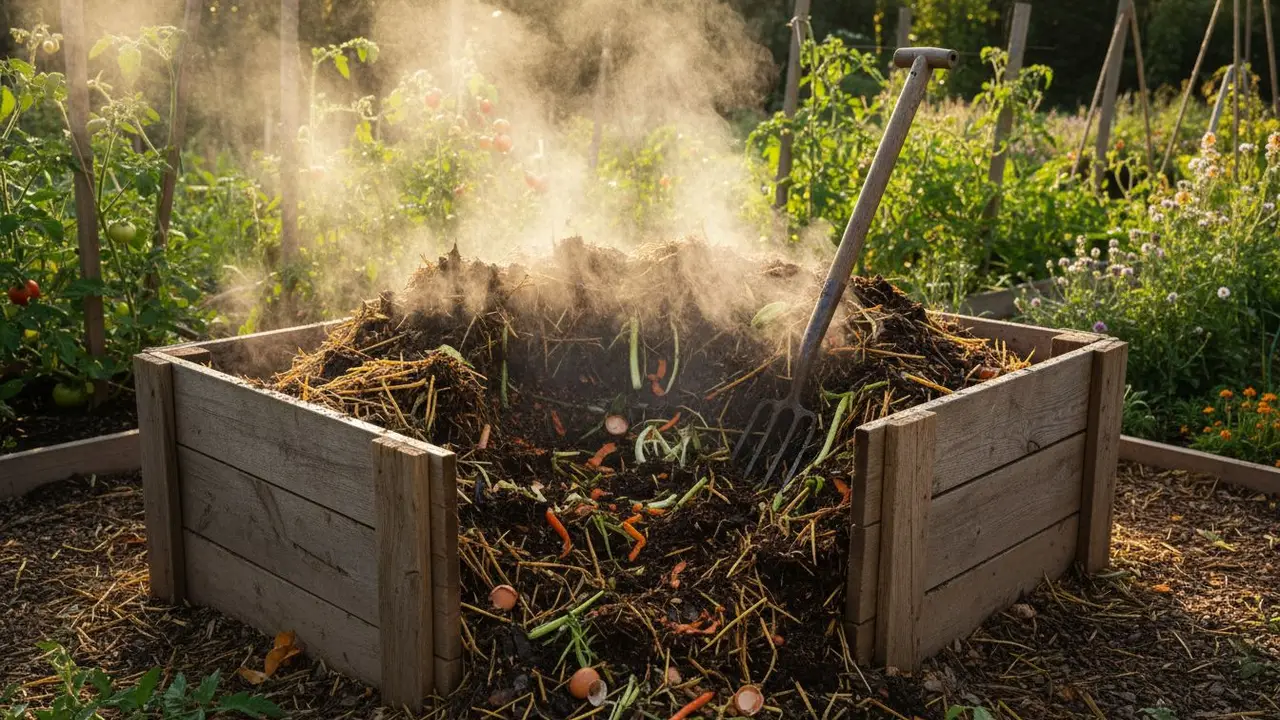
If you have ever wished your compost pile would just hurry up, hot composting is the answer. Where an ordinary heap takes the better part of a year to break down, a well-built hot pile can turn kitchen scraps and garden waste into finished, crumbly compost in as little as three to eight weeks, and it does something a slow pile cannot: it gets hot enough to kill weed seeds and plant diseases along the way. Hot composting is not complicated, but it is a bit more of a craft than simply piling up scraps and waiting. It rewards you for getting a few things right, the mix of ingredients, the size of the pile, the moisture, and the air, and once you understand those levers, you can make beautiful compost faster than you ever thought possible. This guide walks through exactly how.
Hot vs. Cold Composting: What's the Difference?
Every compost pile is doing the same fundamental thing, letting microbes break organic matter down into rich, dark humus, but the speed and the temperature separate the two approaches. Cold composting is the relaxed, passive method most people already use, and it is the one I cover in my complete guide to composting at home: you simply add scraps to a bin over time and let nature take its slow course over six months to a year, turning rarely if at all. It could not be easier, but it is slow, and because it never really heats up, it does not kill weed seeds or diseases.
Hot composting, by contrast, is the active, faster method. You build a large pile all at once from a balanced mix of ingredients, keep it moist and aerated, and the population of microbes explodes, generating so much metabolic heat that the pile climbs to between 130 and 160°F within days. That heat is the whole point: it drives astonishingly fast decomposition and sterilizes the compost as it works. The trade-off is that hot composting asks more of you, a bit of planning and some turning, but for a gardener who wants a lot of good compost quickly, it is well worth the effort. It sits alongside worm composting as one of the faster, more hands-on ways to make your own.
Why Bother Making It Hot?
The heat delivers three real advantages that a cold pile cannot match, and together they make the extra effort pay.
- Speed. This is the headline: finished compost in weeks rather than a year. If you garden on a schedule or simply want more compost than a slow bin can supply, hot composting is transformative.
- It kills weed seeds. A pile that holds above about 130 to 140°F kills most weed seeds, so you can compost weedy material without seeding your beds, a perfect companion to a chemical-free approach to controlling weeds. The first time I hot-composted a barrow of seeding weeds and later spread the finished compost without a single weed sprouting from it, I was sold for good.
- It kills diseases. The same heat destroys many plant pathogens and pests, letting you safely recycle diseased leaves and spent plants that you would never risk in a cold pile.
On top of all that, hot composting handles a wider range of materials and produces a uniform, fine, thoroughly broken-down product that is a joy to spread. It is the surest way to turn a season's garden and kitchen waste into a serious quantity of homemade fertility.
The Four Things a Hot Pile Needs
A hot pile is really just a machine for feeding microbes, and to work at full tilt it needs four things in balance. Get these right and the pile does the rest on its own.
- The right carbon-to-nitrogen ratio. This is the single most important factor. Microbes want roughly 25 to 30 parts carbon to 1 part nitrogen, which in practice means mixing carbon-rich "browns" with nitrogen-rich "greens." Too much brown and the pile sits cold; too much green and it turns to smelly sludge.
- Enough mass. A hot pile needs bulk to insulate itself and hold its heat. The magic minimum is about a cubic yard, three feet wide, deep, and tall; smaller than that and it struggles to heat up, while much larger can go short of air in the middle.
- Moisture. The pile should be as damp as a wrung-out sponge, moist but not dripping. Too dry and the microbes stall; too wet and they drown and the pile goes anaerobic and sour.
- Oxygen. The fast, hot, sweet-smelling decomposition you want is aerobic, so the microbes need air. This is why you turn the pile, to refill it with oxygen and keep the process from going stinky and slow.
Browns and Greens: Getting the Mix Right
Balancing carbon and nitrogen sounds technical, but it comes down to combining two familiar kinds of material. Browns are your carbon: dry, woody, or papery things like fallen leaves, straw, shredded cardboard and paper, wood chips, sawdust, and dried plant stalks. Greens are your nitrogen: fresh, moist, living material like grass clippings, vegetable and fruit scraps, coffee grounds, fresh garden trimmings, and manure from herbivores.
A rough starting point is to mix roughly equal volumes of browns and greens, or lean slightly toward browns, then adjust by how the pile behaves. Chopping or shredding everything smaller dramatically speeds things up by giving microbes more surface to work on. A few nitrogen-rich plants make superb natural "activators" that kick a sluggish pile into gear: a layer of comfrey or nettle leaves, both rich in nitrogen, will fire up a heap beautifully, as will fresh grass clippings or a shovel of manure. I keep a comfrey patch by my compost bays for exactly this reason, and tucking a few armloads of its leaves into a new pile reliably sends the temperature soaring. Keep out meat, dairy, oily food, pet waste, and diseased-then-cold material, and you cannot go far wrong.
Building and Turning the Pile
The defining feature of hot composting is that you build the whole pile in one go, rather than adding to it a little at a time, so gather your materials first until you have enough to make that full cubic yard at once. Then build it, either layering browns and greens like a lasagna or, better still, mixing them together, and moisten each layer as you go until the whole heap is evenly damp. Once it is built, the microbes take over and the pile should begin heating within a day or two, often reaching its peak by the third or fourth day.
Then comes the one real chore: turning. Turning the pile, lifting the outside to the middle and fluffing the whole thing to let air back in, is what keeps a hot pile hot and fast. Each time the pile heats up and then starts to cool, you turn it, which reintroduces oxygen and brings unfinished outer material into the hot core. The famous "Berkeley method" pushes this to its limit, turning every day or two to produce finished compost in around 18 days; a more relaxed schedule of turning every week or so still gives you compost in a couple of months. The more often you turn, the faster you finish, so let your ambition set the pace. I will admit the first pile I built barely warmed because I skimped on greens and never turned it; the very next one, properly balanced and turned every few days, was steaming on the second morning and finished inside a month.
Reading the Heat and Knowing When It's Done
The temperature of the pile is your dashboard, and a simple long-stemmed compost thermometer is the best few dollars you can spend, letting you read the core instead of guessing. Aim to keep the center in the ideal range of about 130 to 160°F. Below that and decomposition slows and weed seeds may survive; much above 160°F and you start killing off the beneficial microbes doing the work, in which case you turn the pile to cool and aerate it. In practice the rhythm is simple: the pile heats up, you let it ride at temperature for a few days, and when it begins to cool you turn it, which sends it hot again. Each cycle is a little cooler than the last as the easy food runs out.
When the pile no longer reheats after turning, it has finished its hot phase and should be left to cure for a few weeks. You know the compost is ready when it is dark, crumbly, and sweet-smelling like a forest floor, with none of the original ingredients recognizable and the pile shrunk to roughly half its original size. Cured compost is gentler on plants than raw, freshly finished material, so the short wait is worth it.
Troubleshooting a Hot Pile
Almost every problem with a hot pile traces back to one of the four needs being out of balance, and each has an easy fix.
- It won't heat up. The usual causes are too little nitrogen, too little moisture, or too small a pile. Add greens (grass, manure, an activator like comfrey), water it to a wrung-sponge dampness, or build it bigger, then turn to mix.
- It smells like ammonia. Too much nitrogen. Mix in more browns like shredded leaves, cardboard, or straw to soak up the excess and rebalance.
- It smells rotten or sour. The pile is too wet or airless and has gone anaerobic. Turn it to add air and mix in dry browns to absorb moisture.
- It's soggy. Too much water or too many wet greens. Add browns and turn; cover an open pile if heavy rain is the culprit.
- It dries out. Common in hot, windy weather. Water as you turn until it is evenly damp again, and consider covering it to hold moisture in.
Putting Your Compost to Work
Finished hot compost is garden gold, and how you use it is the same as any good compost. The best way of all is to spread it as a surface mulch in a no-dig garden, letting the soil life draw it down rather than digging it in. Use it as a rich mulch around plants, blend it into the mix when filling a raised bed, or work a few inches into new ground when you start a vegetable garden. It is one of the finest of all organic fertilizers, and a generous dose is exactly what heavy clay soil needs to open up and breathe. You can even steep a little of it into a compost tea for a fast liquid feed. However you use it, you are feeding the soil rather than the plant, building the living, fertile ground that makes everything else in the garden easier, and a quick soil test now and then will show you just how far your compost is moving the needle.
Faster Compost, Better Garden
Hot composting is one of the most satisfying skills a gardener can learn, taking you from a slow, passive heap to a fast, hardworking compost machine that turns waste into fertility in a matter of weeks while sterilizing weed seeds and disease as it goes. The recipe is simple to remember: a big enough pile, a balanced mix of browns and greens, moisture like a wrung-out sponge, and air from regular turning. Get those four right and the microbes do the rest, generating a heat that never stops feeling a little bit like magic when steam rises off the pile on a cold morning. My honest advice is to gather a cubic yard of material this weekend, build it all at once, and take its temperature on the third day. When the thermometer reads 140°F, you will be hooked. For more on building living, fertile soil, our gardening library and soil library have a guide for every step.
Sources
- Cornell Composting (Cornell Waste Management Institute) — The Science and Physics of Composting
- Oregon State University Extension — Do the rot thing: choosing and using a composting system
- Michigan State University Extension — Composting: A Smart Gardening Practice
- Clemson Cooperative Extension — Composting
- University of Illinois Extension — The Science of Composting
About the Author
Lucas is a writer and researcher focused on sustainable agriculture and permaculture practices.