Plant Overview
Tea Tree or Melaleuca alternifolia is a plant with many fascinating uses and properties, which makes it a must-have in any home. It is Perennial, meaning that there is no need to replant it every year. Instead, it will regrow every year after harvesting.
One must note this is different from your traditional tea plant. Being native to Australia’s Queensland and New South Wales regions, the plant has a rich history with the native Aborigine tribes of Australia. British explorer James Cook first coined the name Tea Tree during his exploration of Australia between 1770 and 1779 when he discovered the native tribes drinking tea made of leaves with a strong nutmeg smell.
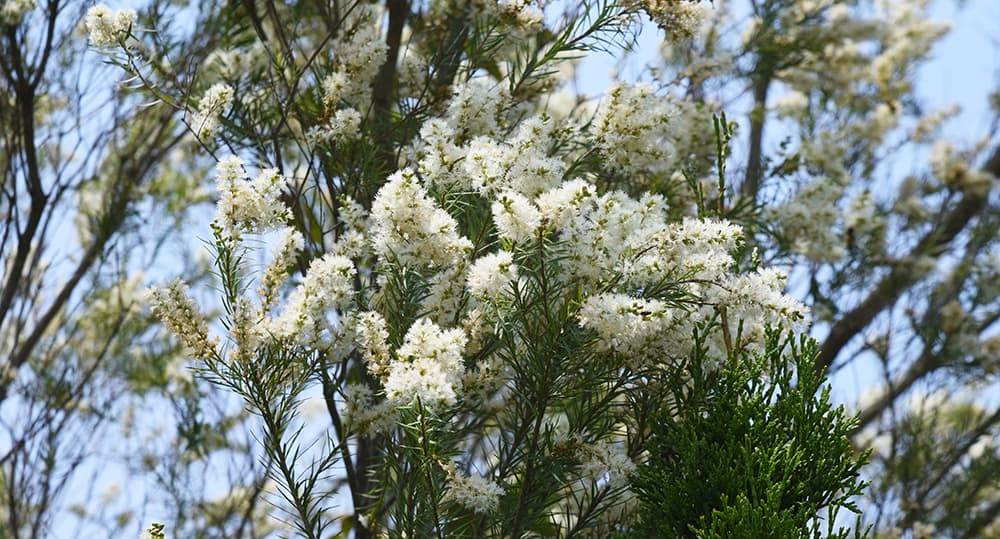
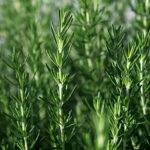
Although technically an evergreen shrub with small aromatic needle-like leaves, the tree does resemble a scruffy and dense pine sapling growing about 7ft to 10ft tall at fully mature. Soft woody stems that do harden and thicken. They also have an aggressive growing robust tap root system that allows them to anchor the plant, with active lateral roots growing aggressively to absorb as many nutrients as possible. It also gives additional support because the plant is native to coastal regions where wind and sandy soils are the norm. This plant, therefore, has adapted to have solid roots.
While predominantly a coastal plant, this shrub can withstand colder temperatures and resist light frosts. However, with the correct care and management, they can flourish, and they are. In South Africa, they are being grown further and further inland, which shows the versatility of this plant.
In the home garden, they make fantastic perimeter plants, not only due to their tall and bushy features, which can create a hedge-like effect, but also the oils in the leaves. The oils are the product these plants are farmed for are intense and aromatic with fantastic pest-repelling properties. Fortunately, bees who are friends to the garden and farm are attracted to the blooms of small red and white flowers.
While an excellent crop, using them for perimeters or planting them in dedicated beds or fields is advisable as they will serve as a perennial as you cut them down to short stumps in late summer and then regrow, then harvest again. The growing time depends on the climatic conditions and region and the care and management they receive.
Propagation & Planting
As you are creating a herbal product, growing this plant organically is strongly preferred, especially if you intend to market and sell the oil or by-products. No matter the methods you use to obtain your seedlings, ensure you have at least 25% extra than you need for your planting to replace any that fail to establish after planting.
Purchased Seedlings
Ensure you source seedlings from a reputable source with good quality parent stock. Growers can obtain seedlings from specialist nurseries like commercial nurseries and online, depending on where they are geographically. It is advisable to try and source seedlings with parents grown in conditions similar to yours, so background research is essential. Having plants that have genetics adapted to your climatic conditions will result in better establishment at planting into their permanent home.
Seeds
Seedlings can also be self-propagated and produced at home with seeds, which is not tricky as these seeds do not require scarification or any pretreatment like many other plants. Again these need to be sourced from a reputable source and usually can be found online. Like with seedlings, research the parent plants to get plants adapted to growing in similar conditions. Planting from seed is also a rewarding and self-enriching experience and a confidence booster, knowing you started from scratch.
Clones
Seedlings can also be grown by cloning adult plants. Cloning is done by using leaf stem cuttings 6 to 8 inches in length. Remove any growth on cutting, and trim the base of the cutting close to where it is supposed to join the stem of the plant. This will usually be the thicker end. Shave about 1/16 inches from the base and dip in the rooting hormone. Then place it in a good quality soilless potting mix like perlite. Wet until moist, not wet.
Then, cover it with a plastic bottle with the bottom cut off or a plastic bag, creating a greenhouse effect and humid environment by placing it in a warm and sunny area. Check the seedlings every two weeks for roots. Once rooting has taken place, you can remove the plastic. You can choose to wait until some leaves appear, or you can go and plant outside.
Bed & Soil Preparation
Tea Tree grows well in slightly acidic, well-drained fertile soils. With fast-growing roots like tea trees, the ground needs to be loose and not compacted. Planting in loose, well-drained soils allows them to spread quickly and establish easily with minimal effort. A good mix of compost rich in decomposed plant matter or strong compost tea will give you the acidity you require. Mix this soil well with a cultivator, a short-tined broad fork, or a garden fork.
Ensure, after composting, that the soil you are planting has a fair amount of nitrogen. A seedling needs nitrogen during establishment. Potassium and Phosphorus are also vital nutrients. Getting your soil tested at a testing center and adjusting will save you time and seedlings. Again research and homework are critical factors to success.
Planting
Determine how many rows you will be planting; single rows as a perimeter is relatively simple. Plant each seedling 20 inches apart. It is advisable to stake out the area grown to ensure that you are planting symmetrically and in the shape you desire.
It would be best if you began planting in spring as soon as the rains arrived and stopped halfway through summer. In warmer climates, you can plant all the way through until late summer, provided you have the rains to help you establish.
Should you be planting in a field or with more than 1 row, it would be advisable to ensure you plant in straight lines equally spaced apart for management purposes and aesthetically pleasing. Skew lines won’t look great, especially since you will see any deviations clearly, and because they will be there for years, you will notice them. It is best to put the effort in from the start.
It gives you a population of 20000-25000 plants per hectare or 8093-10117 plants per acre. In the rows, 20 inches (1.66ft) apart is perfect, but the spacing between the rows needs to be around 40 inches (3.3ft) is ideal. To achieve this:
- Use ropes that have a marking every 20 inches.
- Nail down an end of the string, pull out to the other side, and make sure it’s straight.
- Take another identical rope and lay down precisely 40 inches parallel to the first rope.
- Plant the seedlings 3-4 inches deep, so the roots are completely submerged in the soil.
- Cover loosely with the surrounding soil and move on.
- Keep in mind that your seedlings will have established and bound the soil around their roots in the seedling tray, so when you remove them, the soil will come with this, and that is called the plug, which will anchor the seedling in the loose soil of the planting hole.
Meaning there is no need to compact the soil around the base.
I have tried and tested many alternatives; however, this method with ropes has proved to be by far the most effective. Use a stick cut to 40 inches and adjust the lines so that you have neatly and evenly spaced lines, and then plant at each 40-inch marker in your ropes. Remember to stand back, eyeball your lanes/channels, and adjust before planting.
Another crucial bit of advice I’d like to give growers to enhance your seedlings’ survival is to plant in the rain. Rain is free irrigation and a pure gift and time saver. Choose a day with soft to mildly soaking rain, Not downpouring rain that washes soil away. A miserable day of no sun will suffice as well. Planting in the rain allows you to plant in nice moist soil, and your first watering occurs. It is only advisable to plant in very moist soil. Planting with no sun means that your soil will not dry and allow your seedlings to take advantage of the critical nutrients made available to their roots through the water.
Growth & Care
Post Planting & Seedling Establishment
Seedling establishment is arguably the essential phase after planting, and your seedlings need serious care and management until they have established. Neglect will lead to mass mortality and a serious cost to replant again. Remember, you planted in the rain, and this was the most fantastic hack for growing essential oils. It’s the best way to plant seedlings of any plant if planting by hand.
These seedlings went from their moist, warm, and well-drained seedling plot and transferred into the earth, where they needed to fend for themselves. They were given the most fantastic start with a wet planting into soil that didn’t get instantly dry, so they could absorb all those essential nutrients and wait for that first bit of sun to photosynthesize.
When those sunny days arrive, you must walk those rows daily and check soil moisture. You can feel the soil moisture by sticking your finger 3-4 inches near the base of a few of your seedlings. If you think the soil is drying out, you need to get water on quickly, or the tiny fibrous roots will die, and so will your plant.
There are many arguments about hot and cold compost. However, I believe hot compost is a better option as it reduces the chance of weeds being transferred to your fields, as the heat will kill them. Topping up compost around the base of the plants every 4-6 weeks and then further apart during winter when the plant doesn’t grow as vigorously.
Watering
After planting and using the finger test mentioned above, consistent watering is essential. Irrigation is crucial until your trees are at least 4 feet tall. For those lucky growers who receive frequent rain, they get a distinct reprieve from this laborious task.
In small planted areas, one can water with a watering can with a good head that can wet the soil so that it soaks in and doesn’t run off. Typically, a normal seedling needs around an inch of rain, equating to around 28 fluid ounces or 3 cups of water. Using a watering can, time how long it takes to get to 28 fluid ounces and pour for the same amount of time on each plant.
In larger fields where this kind of watering is not feasible, a soft-spraying overhead sprinkler system or a drip irrigation system is an effective way to efficiently water more significant areas. The most important thing is to keep your soil moist during the first growth cycle and ensure the plant will adequately establish.
Gapping
Gapping is an activity coined by the forestry industry where after planting, some seedlings die or are removed by various factors like animals or damaged during mechanical weeding. It is advisable to take excess seedlings every two weeks and again during a rainy day and replant in the gaps where the predecessors have died. Gapping will ensure you have no open spaces in your field or growing area, and gapping can continue even into the next few years when older plants die or are damaged, and these can be gapped when the sprouts first start to appear on the harvested stumps.
Weed Management
Weed management, like water management, can determine success or cripple your crop. Weeding, next to watering, is your most important management activity. Weeds are plants that are highly adapted, unwanted plants that invade your fields. They are more efficient plants growing faster and more vigorously than most crops. Furthermore, they compete for water and nutrients that your plants need and, in doing so, not only affect your seedlings’ growth but also overtake them forming a canopy and blocking out the sun that your plants need to photosynthesize.
In commercial farming, weed management is done with chemicals and herbicides. In organics, this is not an option. There are numerous ways to combat weeds, and the main one is to deal with them early when weeds are in the thread stage (tiny with a tiny fibrous root). Using mechanical methods like a scuffle/stirrup hoe disturbs the soil, the weeds will be uprooted and exposed to the sun and die. Plants with thicker roots can be pulled by hand and turned over roots facing up, which will kill them. Over time, ensuring weeds do not reach the flowering phase will slow their succession, residual seeds germinate, and fewer weeds will appear.
Cover cropping in the rows is also an option. However, I haven’t experimented with this yet, although a good cover crop planted once your plants are established could be an excellent option for weed and soil management. It is certainly an option for the regenerative agriculture community to try.
Mulching is another excellent weed management tool. Covering the soil creates an obstacle for the weeds to germinate and maintains soil moisture by reducing surface evaporation.
Harvesting
Harvesting can begin once your plants reach maturity between 7-10 ft tall. However, if they mature and become ready in the middle of the rainy season, you will have to wait until the rains subside and begin harvesting in early fall. The reason for this is to maximize your oil yield.
Plants produce more oil in a time of stress. Water stress is the best way, and you need to have your plants exposed to heat and no water for a minimum of 2 weeks to stress them out and produce a lot of oils. Harvesting can now commence.
Harvest process
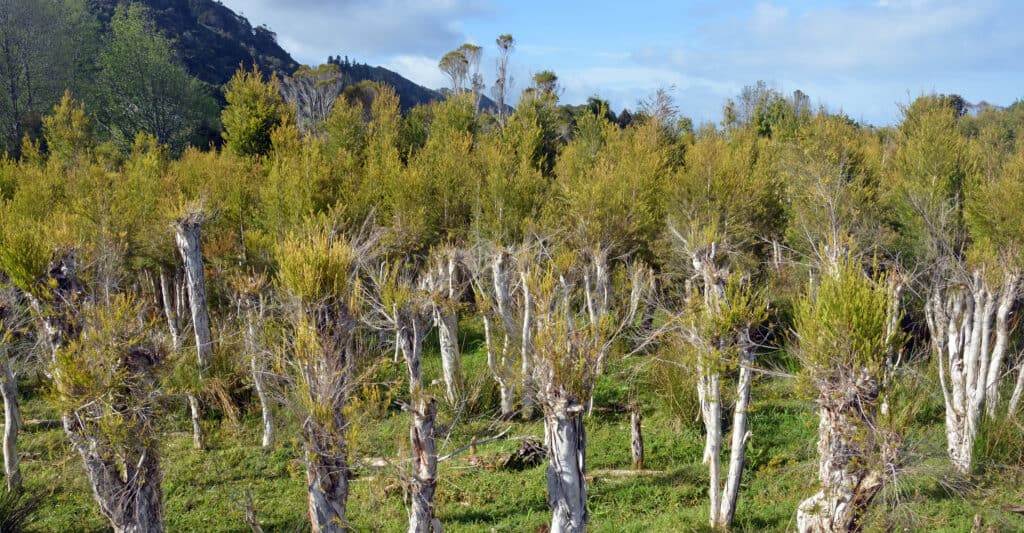
To harvest Tea Trees, they will need to be felled. In a small garden, the easiest way to do this is to use a hand saw or pruning saw and cut the tree down to around 3 inches above the ground. A brush cutter and circular saw blade are used in more extensive production areas to get the cutting done more efficiently. These trees are not very thick, at most 1.5 inches in diameter. There is only one stem in the growth period. When they regrow, they will do so in multiple shoots, so the next harvest season, your plant matter yield will be much more significant. The tree will shoot regardless of how short the stump is cut. It just has to be cut a few inches to spare saw blades damaged by hitting the hard earth and getting soil in the gearbox and bearings.
In a small production unit, you can feel the trees and strip the leaves and thin branches. You can put these through a light-duty garden shredder and then distill them. Distilling only the leaves is due to the oil only being held in the leaves, not the woody stem.
In commercial production with a large commercial distillery, the felled trees are then laid down in bunches or stacks. These stacks are loaded with heavy hydraulic machinery and hauled by road to a bulk distillery. In some producing areas, they use mobile distilleries, and the entire operation happens field side. These stacks are then chipped in industrial chippers and put into the distillery because removing only the leaves from thousands of trees is not cost-effective. In a hobby system, this is advisable. Shredding it breaks it into much smaller uniform-sized pieces, which results in a consistent extraction.
Post Harvest Care
Post-harvest care is an essential part of tea tree oil production. After harvesting post the rain season, the next step is to ensure the plant is well cared for and prepared to resprout. These small trees will shoot many new stems compared to the initial individually stemmed plant in the first growing season.
Due to the trees now being cut, the lanes are more accessible for applying compost and or organic fertilizer. Watering now is optional. Whether you do it manually with a wheelbarrow or use an automated or machine-driven compost applicator, it is vital to get the compost around the base of the plant. That compost will only release nutrients into the soil when it rains. Therefore, just being prepared and having your compost there ready for the rain to leach the nutrients into the soil to the roots will give you a good advantage.
Post compost, it is now the time to put your compost down. Now that the tree canopy has been removed, the sun will reach the earth in the lanes between the trees, and weeds will quickly establish if you get rain. Therefore it is advisable to get mulch on while there is no foliage to be an obstacle in the application. Make it nice and thick, and you will have soil moisture retention and weed protection. Steamed wood chips from distilling work fantastically as mulch. Old hay bales in the rows also do a superb job as a mulching material. This natural mulch will slowly decompose and add layers of organic material to the soil.
Distillation & Extraction
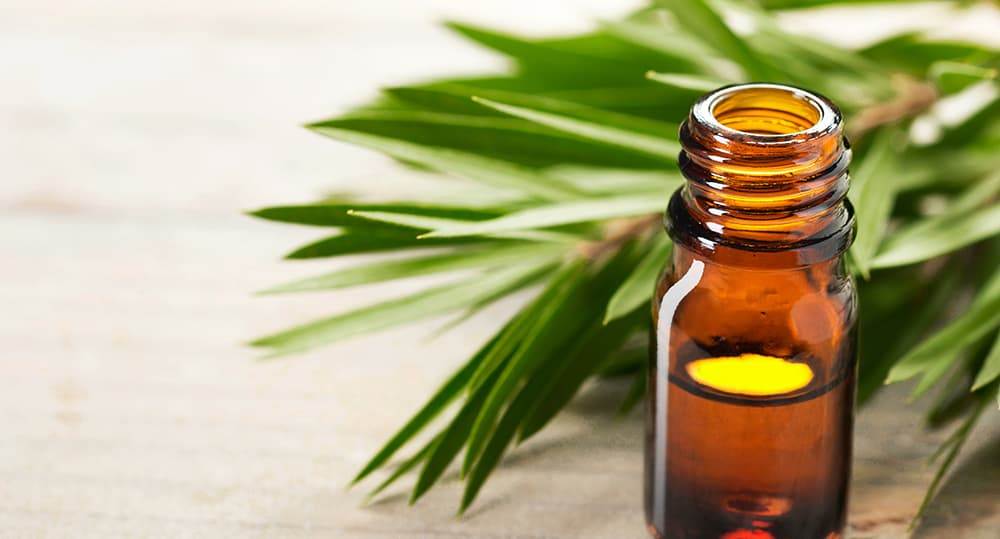
The time has come for you to reap your rewards. Tea Tree essential oil is almost in your jar, ready for sale or use.
As mentioned earlier, the oil is only found in the plant’s leaves. The best or most effective way to extract it is to use steam distillation. There are numerous designs for small hobby distilleries, and the price depends on how big you want to go.
In a traditional steam distillery of any size, the general way it works is, The shredded material is placed in an airtight sealed container with a cone-shaped lid and an outlet pipe. Under the bottom is an inlet pipe where steam is pushed from a boiler, the chips are steamed, and the oils in the plants then combine with the rising steam and escape through the outlet pipe.
The steam then enters a condenser, condenses back into liquid form, and the water flows into the bottom of a holding tank. The holding tank then fills up, but the oil floats to the top as water and oil don’t mix in liquid form. As it rises, there is a tap at the top. As the level increases, the highly concentrated and intense essential oil escapes into a separate container, comparable to skimming the cream off milk. The water by-product known as hydrosol is a fantastic product as well, as it is stained with the pungent smell of tea tree oil.
In an average situation, you can expect an oil yield of 17.8-22.30 Lbs/Acre. Naturally, more will be a fantastic accomplishment and a great ROI.
Utilization
There are many uses for this fantastic oil and the by-products of the distillation. The production scale will determine how many by-products you shall have to use or sell. Either way, the uses can be broken down by product.
Essential Oil
Tea Tree Oil is one of the most fascinating oils with so many uses, many of which are medicinal. Since beginning to farm these incredible plants, love and passion have emerged from experimenting with them. This oil is easily my favorite essential oil. However, it must be understood that in no circumstance should tea tree oil be ingested, which is strange as the plant was discovered by being stepped into hot water to make tea. However, the essential oil is highly concentrated, bitter, and pungent, so it would be challenging to ingest.
Going back to the uses of the essential oil, the most common are listed below.
- When mixed with carrier oils, carrier creams, body washes, or shampoos, Tea Tree oil treats dandruff, acne, athlete’s foot, and nail fungus, and other topical conditions like insect bites and poison ivy.
- E45 cream mixed with Aloe Vera gel extract and tea tree oil is an excellent treatment for any skin condition, especially sunburn. Some websites and content advise against using it for chronic skin conditions like eczema. However, I have used it successfully to treat eczema and numerous rashes, depending on which carrier oil or cream is used.
- It can be used effectively as an antiseptic, mixed with water to clean wounds, as an excellent alternative to traditional antiseptics.
- Mixed in hot water, it is a fantastic household cleaner for floors, bathrooms, and other surfaces. By doing this, you also rid your house of unpleasant smells.
- It is an excellent insect repellant; cleaning your house with this mix prevents flies, mosquitoes, ants, and termites. I also use it in dog shampoo to deter ticks and fleas.
Hydrosol
This magic ingredient used to be discarded, but now it is bottled and sold as a by-product and has fantastic uses.
- Hydrosol is commonly used as a household cleaner as an alternative to adding the oil back into the water; it can be used in spray bottles to clean surfaces and car interiors. It leaves a lovely smell afterward.
- The following use is highly ironic, and that is a deterrent for termites that destroy establishing roots of tea tree saplings. They are woody plants, especially at the root, and as there is no oil in the stem or roots, this is where the termites attack. I was spending a lot of money on organic garlic termite repellant when he learned that, although ironic, tea tree was a repellent for termites on tea tree roots. Watering around the bases of trees in affected areas with hydrosol fixed the problem. I use it in and around garden and house plants, which is especially effective against spider mites on big leafy houseplants.
Steamed wood chips
- These chips will pile up, especially if you grow your production and distill more frequently. These chips work fantastically as mulch for spreading back in your garden or tea trees.
- Another great use is mixing it in your bulk compost heap as a carbon source. Being small in size, the chips will break down fairly quickly.
Conclusion
The Tea tree is a fascinating plant, and the oil gives the grower a great return on investment. The essential oil price needs to be structured, so the prices are difficult to know. However, in South Africa, tea tree oil retails at around R1400 (South African Rand) per Liter, equating to $81.20 per Liter or $307.38 per Gallon.
If you decide to invest in a slightly bigger production or more extensive distillery, it would be advisable to grow more essential crops and also offer to distill for other interested growers. Market directly to entrepreneurs who make soaps, candles, bath salts, and perfumes or to herbalists and aroma therapists. And, of course, use it in your own home. I believe you will never turn back, and now essential oils have replaced many products in his family home and enjoy them for many years to come.
